 Skip to content
How Do You Fit a Backless Dress Without Gaping or Slipping?
Your trusted Women’s Apparel Development & Manufacturing Partner from China
- Jerry
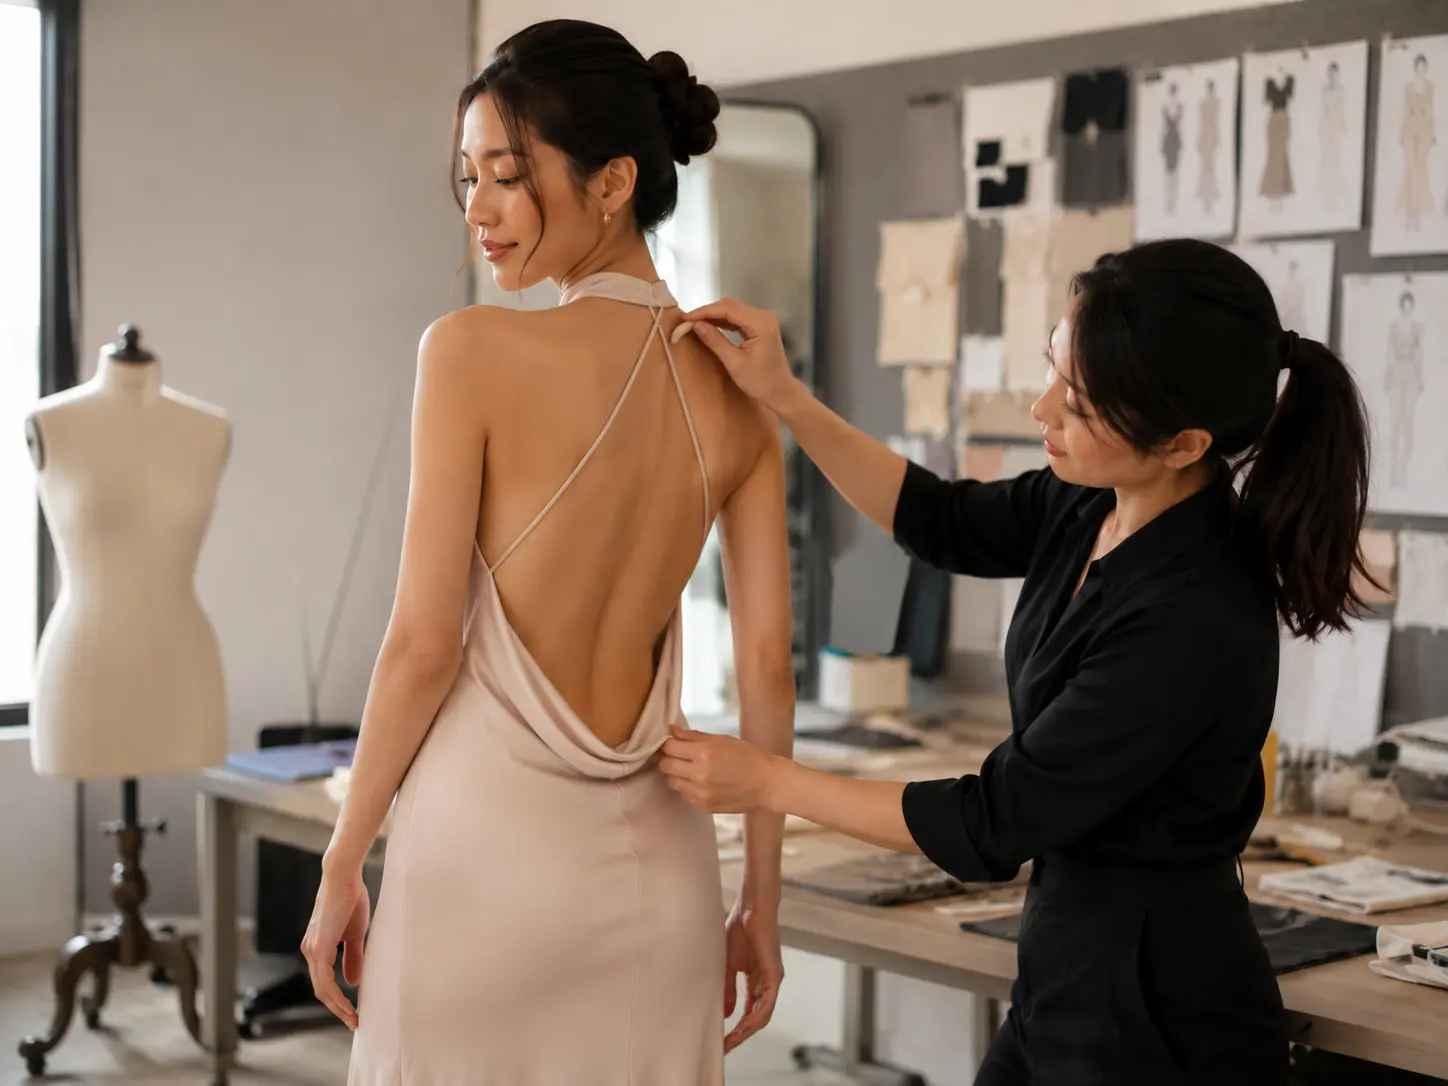
A backless dress can look effortless in a campaign image, yet it is one of the least forgiving silhouettes to fit. Once most of the back bodice is removed, the garment loses a major anchoring area. The remaining neckline, straps, side seams, bust structure and waist must work together to support the dress. If one element is slightly wrong, the wearer may experience lower-back gaping, exposed side bust, sliding straps, neckline movement or a bodice that slowly drops during wear.
A backless dress fits correctly when the bust and waist anchor the garment, the open-back edge lies flat, the straps stay balanced, and the neckline remains secure during movement. Correct fit depends on accurate torso measurements, fabric recovery, pattern contouring, internal support and wear testing – not simply choosing a smaller size.
That distinction matters because making the garment tighter can hide one gap while creating another problem, such as bust compression, side-seam pulling or painful neck tension. A good fit distributes force across several support points rather than concentrating it in one strap or seam. Picture a sample that looks perfect while the model stands still. At the campaign shoot, she turns, reaches forward and sits down – and the entire back edge lifts away. The failure did not begin in the studio. It began earlier, when static appearance was mistaken for functional fit.

What Should a Backless Dress Fit Like?
A well-fitted backless dress should stay close to the bust, waist and open-back edge without pinching or restricting movement. The neckline should remain secure, the straps should stay balanced, and the dress should not shift when the wearer walks, sits, bends or raises her arms. Good fit comes from balanced support, not simply making the garment tighter.
Bust Security
The bust should sit naturally inside the intended shape of the bodice. There should be no empty space above the bust, no flattening through the center front and no breast tissue being pushed toward the armhole. In a close-fitting style, the outer fabric should follow the body smoothly without strong horizontal strain lines or diagonal drag lines running toward the side seam.
One of the most common fitting mistakes is treating every bust problem as a circumference problem. A dress can be loose at the neckline while still being too shallow through the cup. It can also feel tight across the bust while leaving a gap near the armhole. These problems usually come from incorrect bust-point placement, insufficient cup depth, weak underbust shaping, an unsuitable side-seam angle or a cup that does not match the intended body shape.
Check the bust from the front, side and three-quarter view. A front view may look acceptable while the side view reveals that the cup sits too high or the lower bust lacks support. The sample should also be tested with the support method planned for the finished product, whether that means built-in cups, adhesive support or no separate bra. A secure bust should feel held by the whole bodice. If tightening the straps is the only way to keep everything in place, the structure below the straps is doing too little.
Back Edge
The exposed back edge should follow the body cleanly from one attachment point to the other. It should not flare away, collapse into ripples or pull so tightly that it creates a deep line across the skin. A small amount of functional ease may be needed for sitting and turning, but visible air between the edge and the body usually signals excess length, excess width, stretched fabric or a curve that does not match the wearer.
The edge finish has a major effect on the final result. A curved opening may stretch during cutting, sewing and pressing, particularly where the line approaches the bias grain. Stay stitching, narrow stabilizing tape, clear elastic, underlining or a stable facing may be needed to preserve the intended length. The edge should be checked before and after its final finish because a pattern can fit correctly during an early fitting and still lose shape once lining, binding or topstitching is applied.
Fit Area | Correct Result | Warning Sign |
Bust | Smooth contour with stable planned coverage | Empty cup, flattening, overflow or side exposure |
Underbust | Close enough to anchor the lower bodice | Bodice drops, rolls or moves upward |
Back opening | Edge follows the body without visible air | Gaping, rippling, twisting or digging |
Straps | Balanced, secure and comfortable | Sliding, twisting, neck pressure or shoulder marks |
Waist | Holds the garment at the intended level | Waistline lifts, rotates or collapses |
Side seam | Hangs vertically and stays aligned | Pulls forward or backward during wear |
Strap Balance
Straps should stabilize the dress, not carry its entire weight. When straps are doing too much work, they dig into the neck or shoulders, distort the armhole and pull the waist upward. A halter can appear secure because it can be tied tightly, but excessive tension may become uncomfortable within minutes. Thin shoulder straps may hold the neckline in place while standing yet slip or twist when the wearer turns.
Check both strap length and strap direction. A rear attachment positioned too close to the center can pull the upper bodice inward and allow the side edge to flare. An attachment placed too far outward may increase the chance of slipping. Adjustable straps are useful, but the full adjustment range should be tested. Hardware should not sit directly on a shoulder blade, the neck or another pressure point, and attachment points should be reinforced so delicate fabric does not distort under repeated tension.
Movement Fit
A backless dress is not fully fitted until it performs during movement. Standing still can hide problems that appear when the wearer sits, reaches, bends or turns. A practical fitting should include walking, sitting, leaning forward, raising both arms, turning the torso and taking several longer steps. For a party or occasion style, light dancing or repeated turning is also useful.
Whenever possible, the wearer should remain in the sample for 15 to 30 minutes. Some fabrics relax under body heat and garment weight. A neckline that looks stable during the first two minutes may begin to drop later. Watch whether the back edge lifts, the bust shifts inside the cup, the straps loosen or the side seam rotates. Comfort matters as much as appearance: a dress that stays in place only because it is painfully tight is not correctly fitted.

Which Measurements Control the Fit?
Backless-dress fit depends on bust, underbust, waist and hip measurements, but vertical and positional measurements are equally important. High bust, bust-point spacing, shoulder-to-waist length, side-seam length, strap length and back-opening depth control how the garment balances. Accurate measurements reduce gaping, cup misalignment and unstable straps.
Bust Measurements
The full-bust circumference is only one part of the fitting picture. Two wearers can share the same full-bust measurement while having very different cup depth, upper-chest width, bust height and bust spacing. That is why a sample can technically meet its bust circumference yet still look wrong on the body.
The high-bust measurement helps control the upper bodice and neckline width. The underbust measurement determines how closely the lower bodice can anchor the garment. Bust-point distance affects cup and seam placement, while shoulder-to-bust-point length determines whether the shaping sits at the correct height. Side-bust depth is useful for low armholes because it shows whether the garment provides the planned amount of coverage.
Measurements should be taken over the support method intended for the dress. A conventional bra, adhesive tape and a no-bra fitting can produce noticeably different bust positions. For styles with built-in cups, cup placement should be treated as a measured construction feature. The cup base, apex and side edge must align with the intended body rather than simply fitting inside the lining.
Vertical Measurements
Vertical measurements become more important as the back opening becomes lower. Removing the back panel reduces the garment’s ability to hide differences in torso length and posture. Shoulder-to-waist length controls overall bodice depth. Front waist length affects the bust and waist-seam position. Underarm-to-waist length helps control side coverage, while shoulder-to-back-opening depth defines how low the design actually sits.
A difference of 1 to 2 cm can be visible in a low-back style because it changes strap tension, side coverage and the angle of the opening. The exact back depth should therefore appear in the technical specification rather than being left as a visual comment such as “make it lower.” It is also useful to record the lowest back point in relation to the natural waist, zipper top and any internal waist stay.
Measurement | Main Purpose | Typical Fit Risk |
High bust | Controls upper-bodice and neckline width | Neckline gaping or chest restriction |
Full bust | Provides overall bust capacity | Flattening, overflow or excess volume |
Underbust | Anchors the lower bodice | Sliding, rolling or weak support |
Bust-point distance | Positions cups, darts and seams | Cups sit too wide or too narrow |
Shoulder to bust point | Controls vertical bust position | Shaping sits too high or too low |
Shoulder to waist | Controls total bodice length | Back gaping or waist lifting |
Underarm to waist | Controls side-body length | Side edge cuts in or stands away |
Back-opening depth | Defines exposure and support loss | Instability or unintended coverage |
Finished strap length | Controls neckline and upper-edge position | Slipping, distortion or pressure |
Torso Shape
Measurements describe size, but posture and body shape determine how those measurements are distributed. A pronounced lower-back curve, rounded shoulders, prominent shoulder blades, an erect posture, a long torso or a short torso can all change how an open edge sits.
For example, a wearer with a deeper lumbar curve may show a center-back gap even when the waist circumference is correct. Taking equal amounts from both side seams may tighten the dress without removing the local excess. The better correction may involve reshaping the back curve, adjusting a contoured waist seam or redistributing dart value. A long torso can create downward pull because the bodice is too short, while a short torso can produce excess length around the lower back.
Pattern corrections should follow the location and direction of the problem. Removing fabric from the wrong area often hides one symptom while creating another. Before changing the pattern, check whether the shoulder, bust point, waist and side seam are in their intended positions. A garment that has been pulled into place incorrectly can generate misleading fitting comments.
Fit Block and Grading
A reliable backless dress begins with a base fit block suited to the target customer. The block should reflect the intended posture, cup assumption, shoulder width, torso proportion and fit preference. Once the base size is approved, grading should preserve the design and planned coverage rather than simply enlarging every edge by the same amount.
Bust capacity, side coverage, strap length and back-opening width may require different grade rules. Larger sizes often need more cup depth and stronger support, not only more circumference. The back opening may need controlled adjustment so the visual proportion remains consistent without reducing security. Smaller sizes may require shorter straps and narrower cup spacing.
At minimum, brands should review the base size plus one smaller and one larger size. Wider ranges may require additional fittings at key break points. A weak base fit cannot be rescued by grading; it will simply be repeated across the size range with the same underlying imbalance.

How Do You Fix Gaping or Slipping?
To fix gaping or slipping, first determine whether the problem comes from excess width, excess length, poor contouring, stretched edges or insufficient support. Lower-back gaps often need pattern reshaping or waist anchoring. Side-bust gaps may require cup, dart or seam corrections. Strap shortening should only follow a full balance check.
Lower-Back Gaping
Lower-back gaping is often blamed on a dress being “too big,” but the location of the gap matters more than the size label. If the excess appears mainly at the center back, the opening may be too straight for the wearer’s curve. If the whole edge stands away evenly, the back may have too much width, too much vertical length or insufficient edge tension. If the gap appears only when sitting, the garment may lack effective waist anchoring.
Pin the excess where it naturally appears instead of pulling the entire edge toward the side seam. Measure the pinned amount and check whether the correction changes the waist position, side seam or front neckline. The correction then needs to be transferred to the pattern. Common solutions include reshaping the open-back curve, removing local width through a seam or dart, shortening the back bodice, adding a contoured waist seam, installing a waist stay or stabilizing the edge before sewing.
Fashion tape may hold a small edge against the skin for one event, but it does not correct excess pattern length, unstable fabric or poor garment balance. When a product repeatedly depends on tape to appear secure, the design or construction deserves another review.
Side Gaping
Side-bust gaping is common in halter, low-armhole and deep-neck dresses. It can result from too much upper-bodice width, insufficient cup depth, incorrect bust-point placement or an edge stretched during construction. The direction of the wrinkle usually provides a clue. Fabric pulling from the bust toward the armhole often suggests insufficient volume, while an armhole that simply stands away without strain may contain genuine excess width.
The correction may involve taking in the armhole, deepening the cup, moving the bust point, adjusting a princess seam or changing the strap attachment. Adding a dart can improve contour, but it must be positioned carefully so it does not weaken the intended design. In clean styles without visible darts, shaping can often be transferred into an underbust seam, princess seam or side panel.
For product development, side coverage should be recorded as a measurable point rather than a vague instruction such as “cover more.” The team can measure from the bust apex, side seam or underarm reference point, depending on the pattern. This makes revisions and size grading far more repeatable.
Observed Problem | Likely Cause | Practical Correction |
Center-back gap | Opening curve too straight or local excess length | Reshape the curve or remove localized excess |
Full back edge stands away | Excess width, weak tension or stretched edge | Reduce width and stabilize the edge |
Gap appears when sitting | Poor waist anchoring or vertical imbalance | Add a waist stay or revise bodice balance |
Side-bust opening | Excess upper width or incorrect seam shape | Adjust armhole, side seam or princess seam |
Bust pulls toward armhole | Insufficient cup depth or front volume | Add volume through dart or shaped seam |
Neckline drops | Weak underbust and waist support | Strengthen lower anchoring before tightening straps |
Strap slips | Incorrect length, angle or attachment point | Shorten carefully or reposition attachment |
Back edge ripples | Bias stretching during handling or sewing | Stabilize before assembly and control pressing |
Strap Corrections
Shortening the straps is one of the fastest alterations, but it is often overused. A shorter strap can raise the neckline, yet it may also pull the waist upward, tighten the armhole and increase pressure on the neck or shoulder. Before changing strap length, place the waist in its correct position and support the bust manually. If the neckline becomes stable without excessive strap tension, the bodice needs stronger anchoring rather than shorter straps.
Strap direction should also be reviewed. Moving an attachment point by a small amount can change how force travels through the garment. Rear attachments placed too centrally may allow side gaping. Attachments placed too far outward may slip. For halter styles, the tie should secure the upper edge rather than suspend the full weight of the dress. Thin straps should be reinforced at attachment points because repeated tension can distort delicate fabric or pull stitching through the edge.
Temporary or Permanent Fix
Temporary solutions are appropriate when the garment already fits reasonably well and only needs light security. Double-sided fashion tape, adhesive cups or breast tape may help for a specific event, provided the wearer is comfortable with the product and the fabric is not damaged by the adhesive.
Professional alteration is more suitable when the back gap measures several centimeters, cups sit above or below the bust, straps need relocating, side seams twist, or the neckline changes during movement. Complex fabrics and structures – including satin, sequins, layered mesh, bias-cut panels, boning and internal corsetry – also benefit from experienced alteration. These changes affect pattern balance and finishing, not just seam width.
For brands, recurring customer dependence on tape or tailoring should be treated as a product-development signal. Styling products can provide extra reassurance, but they should not compensate for a back edge that consistently gaps or a bodice that cannot support its own weight.

Which Support Structure Works Best?
The best support structure depends on back depth, bust range, fabric weight and expected movement. Built-in cups can shape the bust, while boning, underbust seams, power mesh, elastic stabilizers and waist stays distribute the garment’s weight. The lower the back and the heavier the dress, the more important internal support becomes.
Built-In Cups
Built-in cups provide shape and coverage, but they do not automatically create support. A foam cup loosely attached to the lining may improve appearance while allowing the entire bodice to move. For better performance, the cup should connect to the surrounding structure. The lower cup should align with the underbust, the apex should match the target bust point and the side panel should limit outward movement.
Cup thickness should suit the outer fabric. A thick molded cup may show through light satin or fitted jersey. A very thin cup may collapse under a heavy or embellished bodice. The cup edge should remain smooth from the outside, and the lining should keep the cup in the intended position during movement, pressing and packing.
Using one cup shape across a broad size range can create problems. Larger sizes may need greater depth, stronger side support or a different cup specification. Increasing only the cup width can place the apex too far apart. When the target range is broad, the brand should decide whether separate cup components, different support levels or additional fit checks are needed.
Boning and Waist Stays
Boning helps a bodice maintain vertical shape and resist collapse. It is useful in corset-inspired dresses, structured party styles and designs with limited shoulder coverage. Common positions include side seams, princess seams and internal panel seams. Boning should end before sensitive pressure points and be securely covered. Poorly placed boning can poke the wearer, show through the fabric or force the bodice into an unnatural line.
A waist stay is often more effective than making the outer dress tighter. It is a narrow internal tape or elastic structure fitted around the waist. By carrying part of the garment weight, it reduces downward pull on the bust and straps. Waist stays are particularly useful in dresses with a very low back, a full skirt, heavy embellishment, a structured bustier, a deep neckline or minimal shoulder support.
The stay must still allow normal breathing and sitting. Its finished length, attachment points and closure should be specified clearly. Because the component is hidden, it can provide significant support without changing the visible design, but only when it is positioned accurately and tested in the final sample.
Hidden Support
Hidden support can be built into the garment or added by the wearer. Garment-integrated methods include power-mesh panels, underbust elastic, clear elastic at the open edge, silicone gripper tape, internal cups, side boning, stable lining and waist stays. These methods provide more consistent performance because they are part of the construction.
Wearer-applied options include adhesive bras, breast tape, nipple covers and low-back shapewear. Each solves a different problem. A dress intended for breast tape needs enough clean skin area for secure application. A low-back bra requires sufficient side and front coverage to conceal the band. Nipple covers provide modesty but not meaningful lift. Product information should therefore distinguish between built-in cups, light shaping and structured support instead of treating them as interchangeable claims.
The support expectation should be defined early: light coverage, moderate shaping or substantial lift. Once the goal is clear, the pattern, materials and components can be selected around it. Trying to add strong support after the visible design has already been fixed usually leads to bulky construction or compromised fit.
Weight Distribution
Many fitting failures are actually weight-distribution failures. A heavy skirt or embellished bodice pulls downward while a thin neck strap tries to resist the entire force. Support should be shared across the bust contour, underbust, waist and straps. The lower three areas should carry meaningful load before the straps are tightened.
Testing must be done on the fully finished sample. A partial prototype without lining, cups, hardware, stones or sequins may feel stable, but the completed garment can behave differently once weight is added. The wearer should not feel increasing neck or shoulder pressure after several minutes. If comfort decreases quickly, the structure is relying too heavily on the straps.
For commercial production, every support component should appear in the bill of materials and workmanship specification. Placement, length, stiffness, attachment method and tolerance all matter. Adding support late can change both fit and cost, so it is better treated as part of the design rather than a final correction.

How Do Fabrics Affect the Fit?
Fabric controls whether a backless dress holds its shape, stretches around the opening, supports the bust or grows during wear. Stretch, recovery, weight, drape, opacity and seam stability must match the pattern. A design that works in stable crepe may behave very differently in soft satin, mesh or weak-recovery jersey.
Edge Stability
Backless openings create long exposed edges, often with sections close to the bias grain. These areas can stretch during cutting, handling, sewing and pressing. Satin may show rippling immediately. Mesh may stretch unevenly. Jersey can gradually lengthen under garment weight. Velvet may shift while being stitched, and sequined fabric may be too heavy for a lightly supported bodice.
The exposed edge should be stabilized early. Stay stitching, narrow tape, clear elastic, underlining or a controlled facing can prevent growth. Waiting until the edge has already stretched makes correction more difficult and can leave visible ripples even after pressing. Cut components should also be handled consistently during sampling and bulk production because differences in resting time, stacking and pressing can change the finished edge length.
A useful development check is to measure the opening before assembly, after sewing and after pressing. Any unexpected growth should be investigated before the sample is approved. The team should also confirm that the stabilization method does not create stiffness, shine, visible ridges or discomfort against the skin.
Stretch and Recovery
Stretch describes how far a material extends. Recovery describes how closely it returns to its original size. Recovery is especially important in backless and fitted dresses because weak recovery allows the neckline, bust and open edge to loosen during wear.
A simple development test can begin with a marked 10 cm section. Stretch it repeatedly to the expected wearing limit, release it and measure again. If it returns to 10.5 cm, the remaining 0.5 cm shows measurable growth. This does not replace laboratory testing, but it quickly reveals whether a fabric is likely to relax during fitting. The test should be repeated in the horizontal, vertical and bias directions and on the lining, power mesh and elastic components as well as the outer fabric.
Negative ease must be used carefully. A slightly smaller garment can create a close fit, but too much reduction may pull the open edge away from the body, strain seams or make the dress difficult to put on. The shell and lining should also behave compatibly. A rigid lining inside a highly elastic shell can create bubbling or restricted movement, while an overly soft lining may fail to support the outer shape.
Lining and Reinforcement
Lining affects opacity, comfort, seam appearance and support. The correct lining depends on the role it must perform. A stable woven lining can control shape in satin or crepe. Stretch lining works better in close-fitting jersey. Power mesh can provide targeted compression, while underlining can help a delicate outer fabric hold cups, boning and seam structure.
The lining pattern does not always need to copy the shell exactly. It may require reduced ease, different seam placement, separate cup support or an internal waist structure. Opacity should be checked while the garment is worn, not only while the fabric lies flat. A material may appear opaque on the cutting table but become transparent across the bust or hips. Strong lighting and flash photography are useful tests for party and occasion dresses.
Reinforcement should remain visually discreet. Heavy interfacing can create stiffness, visible edges or a board-like appearance if it is selected without considering the shell’s drape. The aim is to support the garment where needed while preserving the intended softness, movement and surface finish.
Silhouette Match
Fabric should be selected for the intended silhouette rather than chosen only by color or surface appeal. Soft satin creates fluid drape but may need underlining around the bust. Stretch jersey can produce a smooth bodycon line, but only when recovery is strong enough. Mesh can create an illusion-back effect while adding coverage, although its shade, stretch and seam visibility must be controlled.
Before approving a fabric, ask whether it can hold the neckline, support cups or boning, maintain the open-back curve, recover after movement, hide internal construction and remain stable during production. A substitute fabric may look similar in a swatch yet behave differently in a finished dress. Any meaningful material change should trigger another review of stretch, drape, opacity, edge stability and pattern balance.
Commercial repeatability matters as much as the first sample. A beautiful material that is difficult to cut or sew may increase puckering, rework or rejection rates. Fabric decisions should therefore balance appearance, support, wear performance and production control rather than focusing on one attribute alone.

How Do Brands Approve the Fit?
Brands should approve fit through a structured sample process that combines measurements, visual review, movement testing and construction checks. The base size must be confirmed before grading, and high-risk styles should receive a pre-production or first-piece review. Approval should be based on measurable comments, not only photographs or general impressions.
Fit Sample Review
The sample should first be measured flat against the approved specification. It should then be fitted on the intended body or approved fit model using the planned support method. The fitter should align the waist, side seams and shoulder points before judging the garment because a dress placed incorrectly on the body can create false comments.
Review the garment from the front, side, back and three-quarter views. Check bust-point alignment, side coverage, strap tension, waist position and the open-back edge. Comments should be measurable. “Back is loose” is not sufficient. A more useful comment is: “Remove 1 cm at each back-waist seam, blending to zero 8 cm above the waist.” Photographs should show the pinned correction, but the written comment must explain exactly how the pattern or construction should change.
The updated measurement chart, pattern comments and sample photographs should agree with one another. When only one record is changed, later teams may follow conflicting instructions. Keeping the technical record consistent is especially important when sampling and production occur in different departments or factories.
Movement Testing
Movement testing should reflect the intended wearing occasion. A club dress, vacation dress and formal event dress may face different activity levels, but each should maintain its planned coverage. The fitting should include walking at a normal and faster pace, sitting upright, leaning forward, raising both arms, turning the torso, taking longer steps and repeating a light dancing motion.
Video can be more useful than still photography because it reveals brief neckline drops, strap shifts and side exposure. Whenever possible, the model should wear the sample for 15 to 30 minutes so fabric growth and pressure points have time to appear. Every revision should be retested. A correction at the back may change the front neckline or side seam, so the dress must be treated as one balanced structure rather than several isolated areas.
Grading Review
The approved base size becomes the foundation for all other sizes. Grading must preserve both design proportion and coverage. Bust volume, underbust circumference, strap length, side coverage, back-opening width and boning length may require separate rules. The opening should not become unintentionally wider or lower as size increases.
A practical size review includes at least the base size, one smaller size and one larger size. Additional fit samples may be needed when the range crosses major bust or body-shape changes. Larger sizes may require deeper cups or stronger support rather than simple proportional enlargement. Smaller sizes may need reduced strap length and narrower cup spacing.
All grade decisions should be recorded in the technical package so repeat orders use the same logic. When a later order changes fabric or support components, the brand should consider whether the approved grading still behaves as expected.
Production Approval
A pre-production sample or first-piece review checks whether the approved fit can be repeated with bulk fabric, production equipment and line methods. Sampling proves that one garment can be made correctly. Production approval tests whether the method remains stable when materials, operators and quantities change.
Approval Stage | Main Checks | Useful Control |
Initial prototype | Overall concept, proportion and major balance | Visual review plus basic garment measurements |
Fit sample | Bust, waist, back edge, straps and movement | Pinned corrections with measurable comments |
Revised sample | Accuracy of requested changes | Updated specification and side-by-side comparison |
Size-set sample | Grading, coverage and support across sizes | Review smaller, base and larger key sizes |
Pre-production sample | Bulk fabric, trims and final construction | Full measurement and movement test |
First production piece | Line execution, edge control and workmanship | Compare directly with approved reference |
Final inspection | Consistency, measurements and visible defects | Inspection plan plus retained standard sample |
High-risk areas often need closer control than broad garment circumferences. Strap length, cup position, back-edge length, waist-stay tension and exposed opening symmetry can change coverage even when the overall bust and waist measurements remain within tolerance. The exact tolerances must come from the product specification, but the principle is simple: the smaller and more structurally sensitive the feature, the more carefully it should be controlled.
Final inspection should include back-edge length and symmetry, strap length and attachment strength, cup and boning position, waist-stay tension, side-bust coverage, side-seam balance, lining roll-out, zipper performance, seam puckering, fabric transparency, measurement consistency and continuity across sizes. Flat inspection alone is not enough for a shape-sensitive backless dress. Selected garments should be reviewed on a form or body so fit-related defects can be identified before shipment.
Develop Backless Dresses With Duolan Apparel
A successful backless dress does more than photograph well. It gives the wearer enough confidence to walk, sit, turn and enjoy the occasion without repeatedly checking the neckline or pulling the garment back into position. Achieving that result requires cooperation between design, pattern, fabric, sample, technical and production teams.
Duolan Apparel is a Guangdong-based fashion dress manufacturer focused on fashion dresses, occasion dresses, party dresses, fitted silhouettes and collection development. Its backless-dress development capabilities include fabric and trim sourcing, pattern development, fit correction, sample revision, grading review, pre-production verification and coordinated manufacturing for brand programs.
For an efficient backless-dress development review, prepare the following information:
- Tech pack, design sketch, reference image or original sample
- Target market, base size and planned size range
- Body or garment measurement chart and fit preference
- Intended fabric, desired hand feel and stretch requirement
- Back-opening depth and planned side-bust coverage
- Required support level, cups, boning, lining or waist-stay details
- Target order quantity, launch date and delivery window
- Required testing, labels, packaging and inspection standards
Send your backless-dress concept, tech pack or reference garment to Duolan Apparel. The development team can review likely fit risks, recommend suitable materials and support structures, and plan a practical route from the first sample to repeatable production.
Share:
Our Services
Categories
Table of Contents
Here, developing fashion collections is more than manufacturing garments — it’s a collaborative process focused on transforming ideas into well-executed, market-ready products. From fabric sourcing and sample development to scalable production and delivery coordination, every stage is built to support quality, consistency, and efficient collection launches across global markets.

