 Skip to content
How Are Cut-Out Party Dresses Manufactured?
Your trusted Women’s Apparel Development & Manufacturing Partner from China
- Jerry

A cut-out party dress can look beautifully simple in a campaign image: a close-fitting silhouette, a clean waist opening, and a narrow strap linking the front and back. Inside a factory, that missing section of fabric changes almost everything. It interrupts the support that would normally hold the bust, waist, shoulder, or back in place. Tension moves into narrower panels, exposed curves become vulnerable to stretching, and small pattern or sewing differences become immediately visible against the body.
Cut-out party dresses are manufactured by engineering the opening into the complete pattern, matching the design with a fabric that has suitable stretch or structure, stabilizing every exposed edge, testing fit and coverage through movement, grading the opening separately where necessary, and reproducing the approved sample through controlled cutting, pilot production, inline inspection, and final quality checks.
The strongest result rarely comes from tracing a hole from a reference image. It comes from understanding what every remaining panel must do after fabric has been removed. One section may support the bust, another may anchor the waist, while a narrow side connector must resist stretching without digging into the wearer. Imagine a sample that looks perfect on a mannequin but shifts several centimeters when the model raises one arm during a campaign shoot. Nothing has torn, yet the product has failed in real use. Professional manufacturing begins by preventing that moment.

What Makes Cut-Out Party Dresses Complex?
Cut-out party dresses are complex because every opening removes part of the structure that normally supports the bust, waist, back, or shoulder. The remaining panels must control tension, coverage, and movement without gaping or twisting. A design can look balanced on a sketch yet fail on the body if the opening position, fabric behavior, pattern shape, or internal support is not engineered correctly.
Structural Load
A conventional fitted dress distributes tension through continuous fabric panels. Once a section is removed, that load is redirected into the fabric surrounding the opening. A narrow bridge at the waist may suddenly carry tension from both the bust and hip. A large back opening can transfer more responsibility to the neckline, shoulder straps, side seams, or closure. An underbust cut-out can weaken the connection between the upper and lower bodice unless the cups, lining, and waist panel are engineered as one system.
The first technical question is therefore not simply, “How large should the opening be?” It is, “Which parts of the dress will hold the garment in position after this fabric is removed?” That question becomes critical in bodycon, halter, corset-inspired, and asymmetric designs. A change of only 5-10 mm at a strap, bust seam, or waist point may decide whether an edge lies flat or lifts away from the body.
A skilled pattern maker traces the path of tension through the whole garment. Bust support, waist anchoring, side-seam balance, grain direction, closure position, lining, and fabric stretch all influence the visible opening. Simply making the opening smaller rarely solves the underlying issue. It may hide the symptom while moving the pulling or twisting into another seam.
High-Risk Openings
Not every cut-out carries the same manufacturing risk. Small shoulder keyholes and controlled neckline openings are usually easier to manage than large side-waist, underbust, or asymmetric torso openings. Risk rises when the cut-out crosses a shaped body area, interrupts a major seam, depends on a narrow connector, or combines with hardware, ruching, mesh, boning, or a highly elastic fabric.
Cut-Out Position | Typical Risk | Common Failure | Primary Control |
Shoulder or neckline | Low-Medium | Edge distortion | Stable facing, lining, or binding |
Upper back | Medium | Shoulder slippage | Neckline and strap balance |
Side waist | High | Gaping and side-seam rotation | Waist anchoring and edge tension |
Underbust | High | Poor coverage or bust lift | Cup shape and lower-bust support |
Center front | Medium-High | Opening spread | Front-panel shaping and reinforcement |
Large asymmetric torso | Very high | Twisting and unequal tension | Full-pattern balance and movement fitting |
Hardware-connected panels | High | Stress at attachment point | Reinforcement and pull-strength checks |
Sharp internal corners add another layer of risk. They require accurate stitching, reinforcement, clipping, turning, and pressing. If a corner is clipped too deeply, the seam may weaken or split. If it is not clipped close enough, the shape will appear blunt or puckered. Large curved openings can also grow between cutting and sewing, particularly when part of the edge lies near the bias direction.
Movement and Coverage
A cut-out dress should never be approved from a static front-view photograph alone. It is worn while walking, sitting, dancing, turning, reaching, and raising the arms. Each movement changes the distance and angle between body landmarks, creating tension that is invisible on a mannequin.
A side-waist opening may rise when the arm is lifted. An underbust edge may move away from the body when the wearer sits. A back cut-out may pull the neckline backward when shoulder balance is incorrect. In a stretch dress, repeated movement can gradually enlarge an opening if the fabric has weak recovery or the edge is not stabilized.
- Check the dress while standing naturally from the front, side, and back.
- Raise both arms above shoulder height and reach forward.
- Sit upright, lean slightly forward, and stand again.
- Walk with a normal stride and then take a longer step.
- Rotate the torso in both directions.
- Recheck the opening after 10-15 minutes of wear.
Coverage also has to be assessed under realistic lighting. Pale stretch fabrics may become more transparent when worn. Satin can reveal the outline of a facing, cup, or seam under strong photography lights. Mesh may look controlled in the fitting room but show more skin under flash. A club dress, birthday dress, wedding guest dress, and formal occasion dress may use related cut-out ideas, yet each requires a different balance of exposure, support, and market suitability.
Production Readiness
A visually attractive design is not automatically production-ready. Before sampling begins, the development team needs a workable seam route, dressing method, closure system, lining solution, edge finish, and grading plan. The operator must be able to reach the seam, turn lined openings cleanly, attach straps or hardware at the correct stage, and press the shape without stretching it.
Production readiness also means that the approved result can be repeated by a line team rather than produced only by one unusually skilled sample maker. A technician may spend hours hand-shaping a single opening, but that method is rarely reliable for hundreds or thousands of units. The process needs measurable points, clear templates, agreed reinforcement, and a repeatable sewing sequence.
- The opening shape and placement can be measured from stable reference points.
- The surrounding panels maintain contact with the body during movement.
- The edge construction is practical for the selected fabric and lining.
- The wearer can put on and remove the dress without overstretching narrow areas.
- The grading plan preserves coverage and visual proportion across sizes.
- The finished shape can be checked with measurements, templates, and an approved sample.
Which Fabrics Work Best?
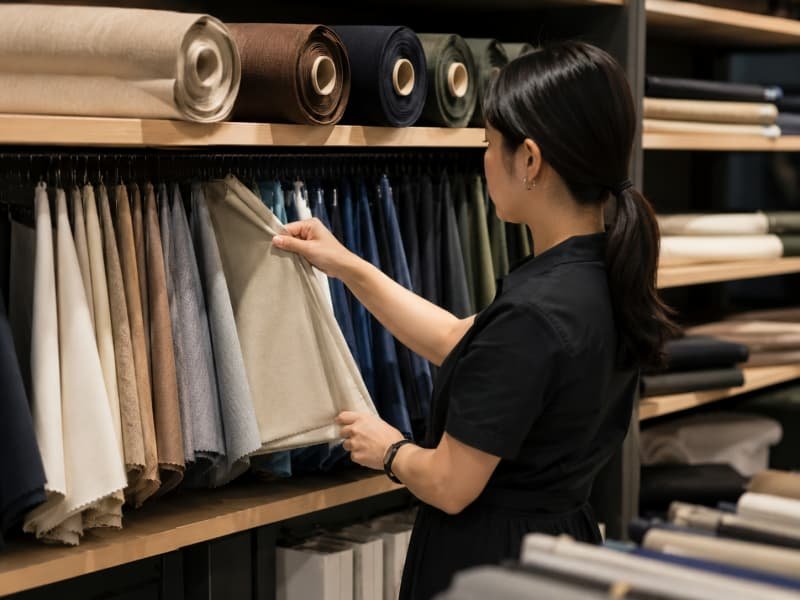
The best fabric for a cut-out party dress is the one whose stretch, recovery, drape, weight, opacity, and surface behavior support the intended silhouette. Compact jersey may suit a bodycon style, while woven satin may need darts, lining, and internal support. Fabric should be selected for the complete construction system, not for appearance alone.
Fabric Performance
The same pattern can behave very differently in compact stretch jersey, soft viscose knit, stretch crepe, woven satin, velvet, or sequin fabric. The selection process should begin with the final garment behavior rather than a swatch viewed flat on a table. A fabric may have the right color and shine but still fail to hold the opening, recover after movement, conceal internal construction, or remain comfortable against the skin.
Five properties deserve close attention: stretch, recovery, drape, stability, and opacity. Stretch describes how far the fabric extends. Recovery describes how closely it returns to its original dimension. Drape determines whether the fabric hangs softly or supports a defined shape. Stability affects cutting, sewing, and edge growth. Opacity must be judged at the actual level of stretch, because many light or pale fabrics become noticeably more transparent on the body.
Direction matters as much as percentage. A fabric may have strong crosswise stretch but very limited lengthwise stretch. If the design relies on diagonal movement around a waist or underbust opening, the real behavior can differ from a simple supplier specification. Weight alone is also misleading: a heavier knit with poor recovery may distort more than a lighter, denser knit.
Common Fabric Options
Fabric | Working Characteristics | Best Use | Main Risk |
Compact stretch jersey | Moderate-high stretch with firm recovery | Bodycon and side cut-outs | Edge growth if unstabilized |
Stretch crepe | Controlled drape with moderate recovery | Fitted occasion dresses | Bias distortion |
Woven satin | Low stretch, smooth reflective surface | Structured party dresses | Puckering and seam show-through |
Stretch satin | Polished surface with improved mobility | Close-fitting evening styles | Uneven stretch and shine marks |
Power mesh | High stretch with support | Internal panels and sheer inserts | Directional inconsistency |
Soft mesh | Light, transparent, flexible | Decorative inserts | Limited support |
Velvet | Rich surface with moderate body | Cold-season party dresses | Nap mismatch and pressure marks |
Sequin fabric | High visual impact with added weight | Statement party styles | Bulk, abrasion, and edge instability |
Double knit | Stable stretch and clean recovery | Geometric cut-outs | Thickness at lined edges |
These are general working characteristics rather than universal specifications. Yarn type, knit density, finishing, coating, supplier consistency, and dyeing can change performance. The production fabric should always be tested, especially when the style depends on strong recovery or a very precise exposed curve.
Stretch and Recovery
A fabric that stretches easily but recovers poorly can produce a sample that looks correct for the first few minutes and then becomes visibly larger around the opening. Recovery is particularly important at the waist, side torso, underbust, neckline, and narrow connecting panels.
A practical development test starts with a marked 100 mm section. The fabric is stretched to a defined length, held briefly, released, and measured immediately and again after several minutes. If the section reaches 130 mm, it has achieved 30% extension. The more important question is whether it returns close to 100 mm and whether the surface remains smooth.
- Measure stretch in both the crosswise and lengthwise directions.
- Record immediate recovery and recovery after 5-10 minutes.
- Check for surface whitening, yarn separation, or permanent distortion.
- Observe curling or rolling at the raw edge.
- Test how steam, pressing, washing, or cleaning affects the result.
- Compare the outer fabric alone and together with the proposed lining or elastic.
A lower-recovery fabric may still be usable if the pattern contains more ease or the opening is controlled by clear elastic, stay tape, facing, or stable lining. Those controls must be approved in the sample because they change tension and sometimes reduce the visible opening. Replacing the fabric after fit approval should trigger a new technical review, even when the new material has a similar composition label.
Lining and Reinforcement
Lining is part of the structure, not simply a way to hide seam allowances. In a cut-out dress, it may control stretch, support the bust, improve opacity, protect the skin, and help the edge remain flat. Full lining works well for delicate satin, pale colors, or complex internal construction. Partial lining may support only the bodice or cut-out area. Power mesh can add controlled elasticity without the stiffness of a woven lining.
The outer and lining fabrics must move together. A rigid lining behind a highly elastic outer fabric can create horizontal pulling and a hard edge. A lining that is too soft may fail to stabilize the opening. Different shrinkage rates can create twisting after steam, cleaning, or wear.
- Clear elastic for stretch edges and bodycon styles.
- Lightweight woven tape for curved woven openings.
- Fine fusible interfacing for facings or structured areas.
- Power mesh for controlled internal support.
- Boning for corset-inspired bodices and underbust stability.
- Non-stretch reinforcement at rings, hooks, straps, and hardware points.
Reinforcement should be as light as possible while still solving the risk. Heavy fusible material can create a visible ridge or stiff hand. Elastic applied too tightly gathers the opening and increases pressure on the body; applied too loosely, it adds little control. Before bulk production, the brand should approve the lining composition, color, weight, opacity, stretch direction, attachment method, and any reinforcement used around the cut-out.

How Is a Cut-Out Pattern Engineered?
A cut-out pattern is engineered by locating the opening from fixed body and garment reference points, shaping the surrounding panels to balance tension, defining the seam and support construction, and applying grading rules that preserve coverage. The opening must be designed as part of the garment’s complete fit system rather than added as a decorative hole after the base pattern is finished.
Technical Information
A fashion sketch communicates the idea, but it does not provide enough information to engineer the garment. The pattern maker needs front, back, and side technical views, along with measurements that establish exactly where the opening begins, ends, and changes direction. Asymmetric styles require independent information for both sides.
- Finished opening width and height.
- Distance from the opening to the waist seam, side seam, center front, or center back.
- Position relative to the bust point, underbust, high hip, and underarm.
- Finished width of straps, bridges, and narrow connecting panels.
- Main fabric, lining, interfacing, elastic, and reinforcement specifications.
- Edge construction, seam allowance, stitch type, and pressing requirements.
- Zipper, hook, ring, buckle, or other closure and hardware positions.
- Base size, intended size range, and final garment measurement chart.
The technical package should identify which dimensions are visually critical. A 5 mm difference at a hem may be difficult to notice, while the same difference between mirrored waist openings can be obvious. Early samples may remain flexible while the team develops the shape, but the approved pre-production file should lock the final measurements, pattern version, materials, and workmanship.
Measuring the Opening
Cut-out measurements should be linked to stable reference points rather than floating visual locations. Measuring only the widest point is not enough because two openings can share the same width and height yet have different curves, angles, or positions on the body.
Measurement Point | What It Controls | Common Project Tolerance* |
Opening width | Horizontal exposure and balance | ±3-5 mm |
Opening height | Vertical exposure | ±3-5 mm |
Distance from waist seam | Torso placement | ±3-5 mm |
Distance from side seam | Front-to-back balance | ±3-5 mm |
Narrow connector width | Strength and visual proportion | ±2-3 mm |
Strap finished length | Bodice and neckline position | ±3-5 mm |
Left-right difference | Visible symmetry | Usually within 3 mm |
Finished edge length | Gaping and tension | Style-specific |
*These are common working references for visually sensitive areas, not universal standards. Final tolerances should be agreed according to the fabric, construction, size range, brand requirement, and inspection method.
A cardboard, acrylic, or digital template can verify the complete shape more reliably than width and height alone. Templates are especially helpful for geometric or mirrored openings. The edge can also be measured before and after stabilization, sewing, and pressing. If it grows repeatedly during production, the process needs correction rather than temporary reshaping with steam.
Tension Balance
The pattern must keep the exposed edge in controlled contact with the body. This may involve dart manipulation, contoured panels, negative ease, internal power mesh, changes to the side seam, or added support at the bust and waist. For a side-waist opening, the upper edge may depend on bust and underarm balance while the lower edge is anchored by the waist and high hip.
A common mistake is to reduce the visible opening without correcting the excess panel length around it. The opening becomes smaller, but the edge still lifts because the underlying tension has not changed. The technical team should review bust point position, underbust length, waist suppression, side-seam angle, back-waist length, grain direction, and the stretch direction of both outer fabric and lining.
Negative ease should be applied carefully. Too much can widen the opening, rotate the side seam, pull the skirt upward, or create pressure at a narrow connector. Too little can cause gaping. Bias edges also need attention because they may lengthen during handling or wear. In some designs, changing the orientation of a panel or moving a seam provides a more reliable solution than adding heavier reinforcement.
Size Grading
The complete garment and the cut-out should not always be graded at the same rate. If every opening dimension grows proportionally with bust, waist, and hip measurements, larger sizes may expose far more skin. If the opening remains unchanged, it may appear too small or move away from the correct body landmarks.
- Grade the overall garment circumference according to the approved size chart.
- Set separate rules for opening width and height.
- Shift the opening position when body landmarks move between sizes.
- Review strap, connector, cup, and support-panel grading independently.
- Check the base size plus representative smaller and larger sizes.
- Compare exposure, edge contact, visual proportion, comfort, and ease of dressing.
A waist may increase by the brand’s standard grade while the cut-out width grows more slowly. The upper point may shift to maintain its relationship with the bust, and the lower point may move to remain aligned with the natural waist. Extended-size development may require more than mechanical grading, particularly when the style includes cups, boning, underbust shaping, or a large open back. The goal is not to make every size mathematically identical; it is to preserve the same design intention and level of security.

How Are Cut-Out Edges Constructed?
Cut-out edges are constructed with clean-finished lining, facing, binding, elastic stabilization, or inserted mesh, depending on the fabric and design. The finish must lie flat, conceal raw seam allowances, resist stretching, and remain comfortable against the skin. Accurate stitching, clipping, understitching, reinforcement, and controlled pressing are essential because even small irregularities are highly visible around exposed skin.
Edge Finishes
Clean-finished lining is widely used for refined woven party dresses. The outer fabric and lining are sewn right sides together, clipped where needed, turned, and pressed so the seam is hidden. This produces a smooth appearance, but the assembly sequence must allow the garment to be turned without trapping inaccessible areas.
Facing can create a similar visual result with less lining. It works well when the cut-out needs support but the entire dress does not require a second layer. The facing must be anchored with understitching, seam tacking, or another controlled method so it does not roll to the outside. Binding creates a visible border and can suit jersey, mesh, or sporty partywear, but the finished width and feeding tension must remain consistent around curves.
Clear elastic is common in stretch bodycon styles. It may be applied with slight controlled tension and then enclosed or turned. The correct ratio must be tested on the production fabric. Too much tension creates gathering and pressure; too little allows the edge to gape. Mesh insertion is another useful method when the design needs the visual effect of exposure with added support or coverage. The mesh color, transparency, stretch direction, and seam finish should all be approved during sampling.
Stabilizing Curves
Curved edges can grow before they are sewn, particularly in satin, crepe, and soft knits. Stabilization should begin soon after cutting. Woven curves may be staystitched. Stretch openings may receive clear elastic or lightweight tape. Panels should be kept flat and handled as little as possible before assembly.
- Check the cut edge against the master pattern before sewing.
- Apply tape, elastic, or interfacing at the approved position and tension.
- Reinforce internal corners before clipping.
- Clip close enough for a clean turn without cutting the seam.
- Use understitching to keep lining or facing away from the visible edge.
- Control steam, pressure, and handling during pressing.
- Verify the final shape with a template after pressing.
Pressing is part of the construction, not merely a finishing step. Excess steam can stretch a curve. High pressure can glaze satin, flatten velvet, or create a ridge where interfacing ends. The production team should lock pressing temperature, pressure, time, and tool choice during pre-production. A shape that only looks correct immediately after heavy pressing is unlikely to remain stable during wear.
Straps and Closures
Straps, rings, hooks, and zippers often carry more load than their small size suggests. A narrow halter strap may support the upper bodice. A ring connecting two panels may receive repeated pulling every time the wearer puts on the dress, moves, or sits.
Straps should be checked for finished width, finished length, stretch, recovery, seam position, left-right consistency, and attachment strength. Turned fabric tubes can twist when the seam is not kept in a stable position. Stretch straps may lengthen unless they are reinforced or cut in the correct direction. Adjustable hardware can improve fit, but the slider and ring must match the strap width and garment weight.
Closure placement needs equal care. A side zipper may interfere with a side-waist opening, while a center-back zipper can pull on an open-back design. Some dresses require a combination of zipper, hook, concealed snap, or adjustable strap so the wearer can enter the garment without overstretching narrow components. Dressing practicality should be tested during fitting; a dress that is extremely difficult to put on is more likely to be damaged before its first wear.
Decorative Details
Sequins, rhinestones, embroidery, ruching, and metal accessories can strengthen the partywear effect, but they also add weight, stiffness, abrasion, and local tension. Decorative work should be planned with the edge construction rather than added after the pattern and sewing method are complete.
Sequins may need to be cleared from seam allowances before sewing and restored by hand where necessary. Dense sequins can break needles, increase seam bulk, and irritate the skin. Rhinestones should remain far enough from seam lines to avoid needle contact and heat damage. Adhesive systems must be tested for the fabric, intended care method, and pressing temperature.
Embroidery near an opening may need backing, but that backing should not scratch the skin or become visible. Heavy embroidery can pull the edge downward. Ruching ratios should be specified because a small difference in gathered length can change the opening shape. Rings, chains, and buckles should have smooth edges, stable plating, and reinforced attachment points. Decoration is successful only when it preserves the approved fit, comfort, and repeatability.

How Is Fit Approved Across Sizes?
Fit is approved through prototype, fit, revised, size-set, and pre-production samples that check opening position, edge contact, coverage, movement, and the relationship to the bust, waist, and hip. The base size establishes the design, but representative smaller and larger sizes must also be tested because cut-out proportion, support, and exposure do not always grade at the same rate.
Sample Stages
The first prototype tests whether the design, pattern, and construction concept are workable. It may reveal that the opening sits too close to the bust, the side bridge is too narrow, the fabric cannot hold the shape, or the chosen closure makes the dress difficult to put on. The fit sample applies the first pattern corrections and should evaluate the whole garment, because side-seam position, bust balance, waist level, and skirt tension all influence the cut-out.
Sample Stage | Primary Purpose | Key Cut-Out Checks |
First prototype | Test concept and construction | Opening shape, assembly method, initial balance |
Fit sample | Correct relationship to the body | Gaping, coverage, tension, bust and waist position |
Revised sample | Confirm major corrections | Edge contact, symmetry, movement, support |
Size set | Validate grading | Proportion and coverage across representative sizes |
Pre-production sample | Lock the bulk standard | Final fabric, trims, measurements, workmanship, pressing |
Not every project requires the same number of rounds, but the decision to skip a stage should be based on verified risk rather than schedule pressure alone. A change to fabric, lining, elastic tension, edge finish, cup structure, or closure can justify another physical sample because the interaction cannot always be judged from a pattern file.
Movement Testing
A fit session should reproduce real use. The wearer should raise both arms, reach forward, sit and stand repeatedly, walk with normal and extended strides, rotate the torso, bend slightly, and wear the dress for 10-15 minutes. After movement, the opening should return close to its intended position, the lining should remain concealed, and narrow connectors should not twist or dig into the skin.
Short videos can reveal problems that still photographs miss. A flash of lining, momentary exposure, or sudden edge lift may occur for only a second, but it can appear in event photography or customer-generated social content. The team should also check whether the side seam stays vertical, the neckline remains balanced, and the skirt returns to its correct level after sitting.
Fit comments should be measurable. “The opening looks wrong” is difficult to execute. “Move the upper point 5 mm toward the side seam, reduce the front edge by 8 mm, and add stabilization to the lower curve” gives the pattern and sample teams a clear task. Specific comments reduce repeated interpretation and shorten the route to approval.
Coverage and Comfort
Coverage should be checked from the front, side, back, and slightly elevated angles. The team should confirm whether bras, cups, underwear, facing edges, or lining remain hidden during movement. Opacity should be assessed under normal room lighting, strong fitting-room light, phone flash, photography lighting, and daylight when relevant.
Stretch fabrics often become more transparent over the bust, hip, and seat. Pale colors generally need more attention. Satin may show the outline of cups, boning, seam allowances, or facing even when the fabric is not technically transparent. Mesh color and density can also change significantly against different skin tones or under camera flash.
Comfort is equally important. Clear elastic can stabilize an opening but feel sharp when the seam is poorly covered. Sequins and stones may irritate exposed skin. Boning can press or poke when its length, end treatment, or channel placement is incorrect. A revealing party dress should still feel secure enough that the wearer is not constantly adjusting it; that sense of control is part of the product’s perceived quality.
Size-Set Approval
The size set confirms whether the same design language survives across the intended range. Mechanical grading alone may create excessive exposure in larger sizes or shrink the cut-out into an unrecognizable detail in smaller sizes. The review should compare opening width and height, position relative to bust and waist, edge contact, strap tension, underarm comfort, sitting coverage, and ease of dressing.
Where the design includes built-in cups, corset panels, underbust shaping, or an open back, cup volume and support may require separate development. Increasing the outer circumference does not automatically create the correct bust shape. Torso length and body proportion may also change the apparent opening position between sizes.
Any corrections made directly on a sample must be transferred back into the production pattern and measurement chart. Otherwise, the bulk team may unknowingly use an earlier version. The pre-production sample should finally lock the fabric, lining, elastic, reinforcement, edge shape, straps, hardware, measurements, labels, and pressing appearance. It becomes the physical authority for production together with the approved technical file.

How Is Bulk Quality Controlled?
Bulk quality is controlled by approving production materials, verifying pattern and cutting accuracy, running a first-piece or pilot review, monitoring critical sewing operations, and inspecting finished garments against the pre-production sample. Cut-out styles require extra checks for symmetry, edge growth, lining exposure, strap length, hardware placement, and opening dimensions because these defects are highly visible and difficult to repair later.
Cutting Control
Fabric inspection should take place before cutting. The production team should review shade variation, width, defects, shrinkage, stretch, recovery, surface direction, and any print, sequin, or nap requirement. Stretch knits may need relaxation before spreading. If they are cut while under tension, the panels can contract after release and change the opening dimensions.
Marker planning should protect grain direction, stretch direction, and mirrored symmetry. Left and right pieces should not be rotated simply to improve fabric utilization when doing so changes stretch or surface reflection. Velvet, sequins, printed motifs, and directional satin need consistent orientation. Cut components should be numbered and bundled so matching shade groups remain together.
- Confirm the correct production pattern and grading version.
- Verify marker placement, grain line, nap, and stretch direction.
- Check notches, drill points, corners, and seam allowances.
- Match left and right panels before the full lay is released.
- Separate shade groups and identify bundles by style, size, and color.
- Compare the first cut components with the master pattern or template.
A cutting error around the opening is often impossible to repair. Trimming can make a shape larger, but missing seam allowance, an incorrect corner, or a misplaced attachment point may require recutting the complete panel. Early verification prevents a pattern or marker error from being repeated through an entire lay.
Pilot Production
A pilot run tests whether sample-room quality can be reproduced under actual line conditions. The sample maker may have assembled the complete dress slowly and personally, while bulk production divides the work among several operators, machines, and process stages. Every handoff creates a potential variation in seam allowance, elastic feeding, clipping, turning, pressing, and measurement.
The first piece or pilot group should verify cut-panel accuracy, stabilization placement, sewing sequence, opening symmetry, edge flatness, strap and hardware attachment, finished measurements, pressing result, dressing function, and comparison with the approved sample. High-risk operations should be identified before the line is fully released.
The pilot may also reveal that a theoretically correct method is too dependent on hand correction. In that case, the process may need a template, guide, folder, positioning mark, different sewing sequence, or revised seam construction. It is far less expensive to make that change after a handful of garments than after hundreds have reached final inspection.
Inline Inspection
Inline inspection should focus on the operation where a defect is created. Waiting until final inspection is too late when the problem has already been repeated throughout the line. Elastic tension should be checked immediately after application. Corner quality should be reviewed after turning. Opening symmetry should be checked after pressing, when the finished shape is visible.
- After cutting: compare shape, grain, and mirrored panels with the master template.
- After stabilization: verify tape or elastic position, width, and tension.
- After edge sewing: inspect seam smoothness before turning.
- After turning: compare corners, curves, and left-right symmetry.
- After strap or hardware attachment: measure length and check attachment security.
- After closure insertion: review overall garment balance and dressing function.
- After pressing: confirm final opening dimensions and edge flatness.
Common defects include rippled edges, lining rolling outward, unequal openings, side-seam rotation, excessive gaping, puckered satin, twisted straps, visible reinforcement, loose embellishment, and misaligned hardware. Inspection frequency should reflect the risk of the operation. A simple neckline keyhole may need routine monitoring, while a large asymmetric underbust opening may require checks at several stages.
Final Consistency
The approved pre-production sample should be the physical standard for bulk. It should be supported by the final technical pack, measurement chart, bill of materials, pattern version, workmanship instructions, approved color, and packaging requirements. Inspectors should compare shape and appearance as well as measurements, because two openings can share the same width and height while having visibly different curves.
- Opening width, height, placement, and visual shape.
- Left-right symmetry and relationship to garment seams.
- Main garment measurements and agreed tolerances.
- Edge flatness, seam quality, and lining concealment.
- Strap length, closure function, and hardware security.
- Decoration attachment, shade consistency, and surface condition.
- Labels, barcodes, hangtags, folding, and packing requirements.
Material substitutions should not be made without approval. A different elastic, lining, fusible tape, zipper, ring, or adhesive can change tension, color, hand feel, strength, or edge appearance. Repeat orders should also begin with a fresh material and first-piece review because fabric lots, operators, machines, and production conditions may differ from the previous run.
Duolan Apparel’s dress-focused manufacturing system combines product development, fabric and trim coordination, pattern engineering, sampling, decorative processes, bulk production, and delivery management. The wider production network includes 16 self-operated fashion garment factories, more than 20 long-term satellite factories, about 300 sewing lines, and over 50 quick-response lines. Stable monthly capacity is reported at approximately 6.5 million garments, supported by SMETA and SMETA 2-Pillar audit records. Capacity is valuable only when paired with disciplined technical control, which is why complex cut-out styles are allocated according to construction risk, process capability, and quality requirements.
Develop Your Cut-Out Party Dress With Duolan Apparel
Successful cut-out party dress manufacturing depends on the connection between design intent and production discipline. The opening must be positioned from clear reference points, supported by the correct fabric and internal construction, tested through real movement, graded with controlled exposure, and reproduced through measurable cutting, sewing, pressing, and inspection standards. When these decisions are made early, the garment is more likely to retain its visual impact without sacrificing security, comfort, or bulk consistency.
For a productive development review, prepare your technical pack, reference images or original sample, preferred fabric direction, size range, target quantity, launch date, and any specific coverage or compliance requirements. The development team can then assess the cut-out structure, identify fit and production risks, recommend material or construction adjustments, and plan an efficient route from prototype to approved bulk production.
Share:
Our Services
Categories
Table of Contents
Here, developing fashion collections is more than manufacturing garments — it’s a collaborative process focused on transforming ideas into well-executed, market-ready products. From fabric sourcing and sample development to scalable production and delivery coordination, every stage is built to support quality, consistency, and efficient collection launches across global markets.

