 Skip to content
How to Grade Halter Dresses: Which Rules Keep Every Size Consistent?
Your trusted Women’s Apparel Development & Manufacturing Partner from China
- Jerry
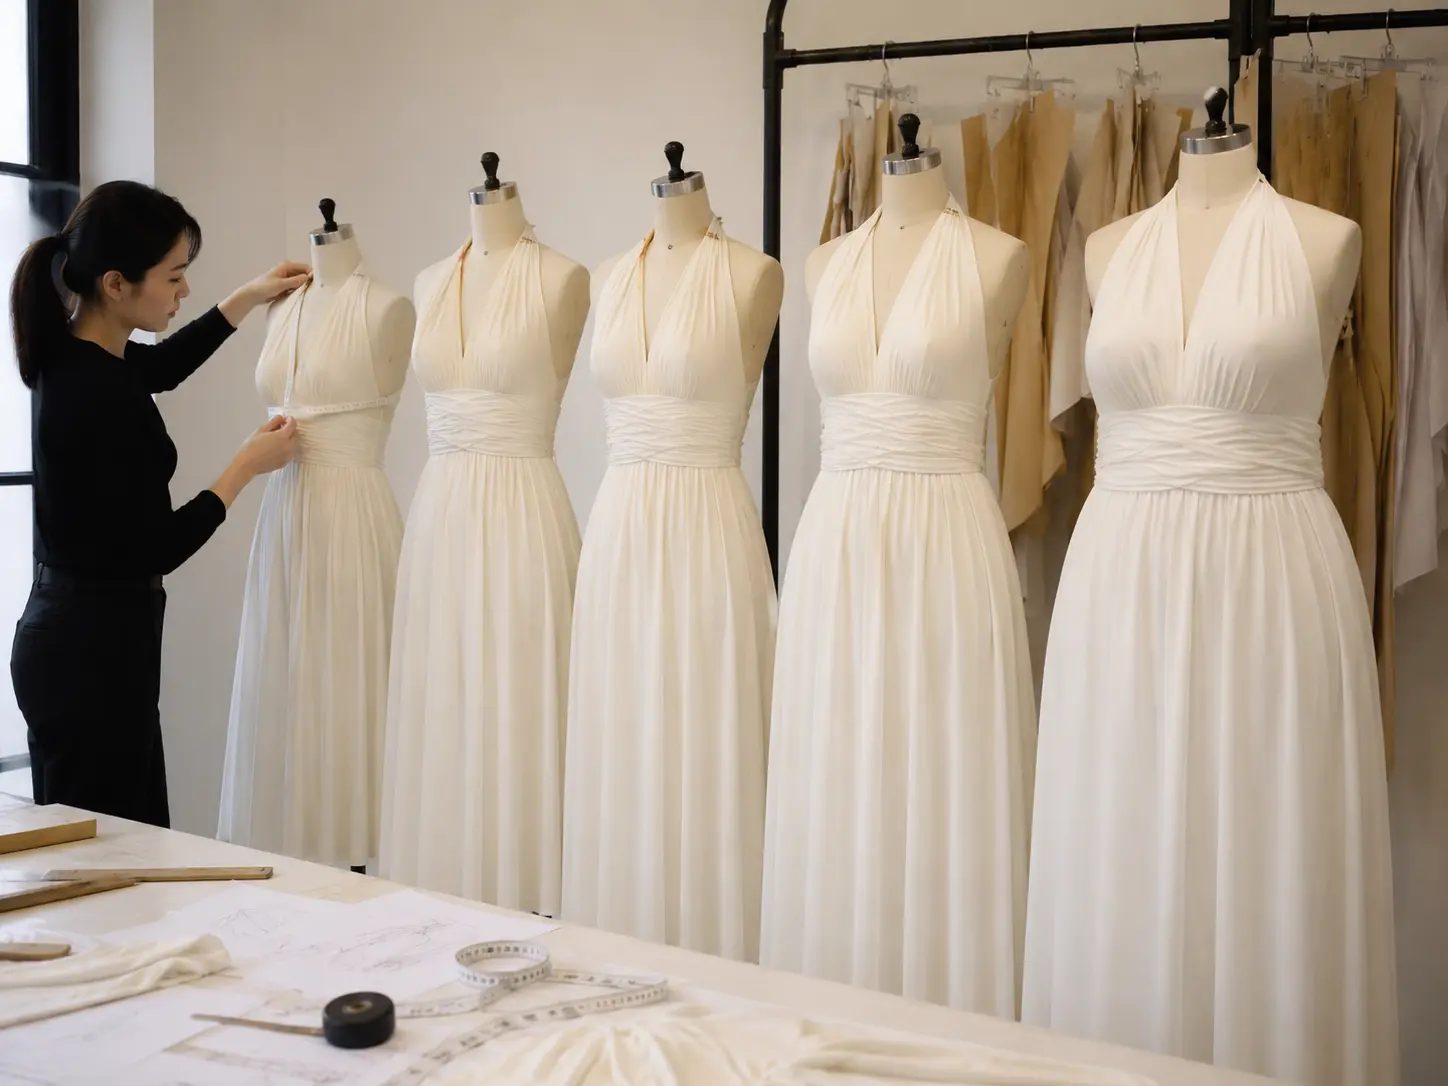
A halter dress can look perfectly balanced in the approved sample and still fail when the pattern is expanded across a full size range. The smallest size may pull at the neck, the largest may gape at the armhole, and the bust point can drift even though every finished measurement appears to follow the size chart. This happens because a halter bodice does not behave like a standard sleeveless block. Its neckline, bust shaping, diagonal armhole, back opening, waist control, and neck support work as one connected system, so a small grading decision in one area can change comfort and coverage somewhere else.
To grade a halter dress correctly, begin with an approved base pattern, establish market-specific grade increments, distribute growth across the neckline, bust, armhole, waist, and skirt, and then verify the smallest, base, and largest sizes. The neck treatment, fabric stretch, internal support, and back construction must be graded as part of the same fit system rather than as separate details.
The real goal is not to make every pattern piece larger or smaller. It is to preserve the design’s visual identity, coverage, support, and comfort as body proportions change. Picture a sleek size-small sample approved on Friday, a complete size nest released on Monday, and an extra-large fitting on Thursday where the neckline stands away from the body. The spreadsheet may be correct, yet the dress is not. The following guide explains where those failures begin and how experienced pattern and product teams prevent them before bulk fabric reaches the cutting table.
What Is Halter Dress Grading?
Halter dress grading is the controlled process of developing smaller and larger sizes from an approved base-size pattern. The goal is not simply to enlarge or reduce every piece, but to preserve neckline security, bust placement, armhole coverage, waist balance, skirt proportion, internal support, and the original visual character across the complete commercial size range.
Pattern Grading Basics
A commercial halter dress usually begins with one approved base size, such as a US 6, UK 10, EU 38, or a brand-defined medium. Once the base sample has passed fit review, its pattern becomes the reference for the remaining sizes. Each important pattern point receives a horizontal and vertical movement, commonly called a grade rule. The side seam may move outward to create more bust, waist, or hip room, while the neckline, bust point, underarm, waistline, and hem move by smaller and often different amounts.
For example, a straight-size system may increase total bust circumference by approximately 4 cm between adjacent sizes. On a symmetrical dress, that increase is distributed across the front and back pattern sections rather than added to one seam. The distribution does not have to be equal. A fitted halter with shaped bust panels may need more growth through the front than through an open back. The finished measurement, pattern balance, and appearance of the approved design must all remain correct; meeting the measurement alone is not enough.
- Finished measurements must follow the approved size specification.
- All matching pattern pieces must retain compatible sewing lengths and construction points.
- Neckline, armhole, bust, waist, and skirt proportions must still look like the approved design.
- Support and comfort must remain practical at the smallest and largest sizes, not only at the base size.
Grading and Resizing
Pattern grading is different from adjusting a pattern for one individual wearer. A personal alteration responds to a specific body difference, such as a fuller bust, narrower back, longer torso, or shorter waist. Industrial grading creates standardized sizes for a defined market and customer profile. Uniform digital scaling is also not proper grading because it changes every feature proportionally, including seam allowances, neckline depth, strap width, zipper opening, and hem length, even though human bodies do not increase at one constant percentage.
Grading between sizes is another related but separate task. A home sewer may blend from a medium bust to a large hip, while a commercial pattern team needs a repeatable rule for each size and every related component. A useful way to check the process is to ask whether the team is modifying one garment for one person or building a product system for many customers. Halter dress manufacturing requires the second approach because the pattern must remain controllable across sampling, size-set approval, repeat orders, and bulk production.
Process | Main purpose | Typical use | Key limitation |
Pattern grading | Create a commercial size range | XS-XL, US 2-14, or extended sizes | Requires an approved size chart and grade rules |
Personal alteration | Fit one specific wearer | Full-bust, narrow-back, or torso adjustment | Cannot be treated as a standard market size system |
Grading between sizes | Blend selected body areas | Medium bust with large hip | Does not create a complete commercial size nest |
Uniform scaling | Enlarge or reduce everything by one percentage | Rough visual references or graphics | Distorts garment proportions, construction, and seam allowances |
Pattern correction | Repair a fit or construction problem | Neckline, balance, bust, or armhole revision | Must be resolved before the final grade is approved |
Grading Methods
Manual grading remains valuable because it makes the placement of growth easy to understand. In cut-and-spread grading, the pattern is divided along selected lines and then opened or overlapped by calculated amounts. Pattern shifting moves the complete piece between marked grade positions before the new outline is traced. These methods work well for training, simple pieces, and early development, but they become slower when a halter dress includes shaped cups, princess seams, draped panels, full lining, power mesh, boning channels, or asymmetrical details.
CAD grading is widely used in commercial development because it allows the technician to assign separate horizontal and vertical movements to each grade point and display all sizes as one nested pattern. The system can check seam lengths, preserve notches, revise a single rule, maintain file history, and export patterns for plotting or automated cutting. Software does not judge whether a rule is suitable, however. It will reproduce an inaccurate instruction perfectly, which is why the technician still needs a strong understanding of body proportion, fabric behavior, construction, and the intended silhouette.
- Display all sizes together to inspect the progression of curves and key points.
- Measure corresponding seams in every size before pattern release.
- Keep notches, drill points, grainlines, and piece names synchronized.
- Revise one grade rule without redrawing the complete size range.
- Store approved versions for repeat orders, new colorways, and later fabric developments.
Base Pattern Approval
The base pattern must be stable before grading begins because any unresolved defect will be copied across the complete size range and may become more severe at the ends. Before release, the team should confirm front and back balance, bust capacity, bust-point position, neckline width and depth, strap length, underarm coverage, waist placement, hip level, skirt fall, closure location, and the relationship between shell, lining, facing, and internal support pieces. Curved and shaped seams should be walked at the sewing line rather than judged from the cut edge.
The intended production fabric must also be technically confirmed. A pattern approved in stable crepe cannot automatically be transferred to stretch satin or soft jersey. Even fabrics with similar fibre content can differ in weight, recovery, surface friction, drape, opacity, and hanging growth. The clearest approval status is that base fit, finished measurements, material, and construction are approved for grading. A sample approved only for photography is not necessarily a reliable grading base when its wearing comfort, support, or internal construction remains unresolved.
- Confirm the fit and balance on the intended fit model or approved dress form.
- Resolve all open comments before releasing the grade rule to the pattern team.
- Verify seam lengths, notches, drill points, grainlines, and closure positions.
- Lock the approved fabric, lining, support components, and construction method.
- Record the pattern version and approval date so later revisions remain traceable.
Which Measurements Set the Grade?

The grade is set by combining the target body-size chart, finished-garment specification, intended ease, fabric behavior, and silhouette. Halter dresses need particular attention to high bust, full bust, neck, armhole depth, bust-point position, torso length, underbust, back opening, and strap length because these measurements directly influence support, coverage, proportion, and comfort.
Body Measurements
Bust, waist, and hip measurements form the basic size framework, but they do not describe a fitted halter bodice in enough detail. The garment is supported around the neck, upper chest, bust, waist, and back rather than by a conventional shoulder seam. High bust and full bust should therefore be treated as separate measurements. Two customers can share the same full-bust circumference while having different cup volume, back width, and upper-chest shape, so a rule based only on full bust can place too much growth in the back and too little in the front.
Underbust measurement becomes more important when the design includes cups, an empire seam, boning, elastic support, or a corset-inspired frame. Torso length also affects the complete silhouette. If the bust level moves downward while the waist remains fixed, the bodice can become compressed; if both points are lowered too much, the dress may look long-waisted. The brand should select one defined body chart for the intended market and avoid combining measurements from unrelated charts, because that creates an inconsistent customer profile.
- Full bust, high bust, and underbust circumference
- Waist, high-hip, and full-hip circumference
- Neck-base circumference and upper-chest width
- Across-front and across-back width
- Front and back neck-to-waist length
- Bust height and bust-point separation
- Armhole depth and desired finished dress length
Garment Measurements
Finished-garment measurements translate the body chart into an actual product and must include both standard circumference points and halter-specific structural points. Every point of measure needs a precise definition, a clear measuring method, and an agreed tolerance. Terms such as armhole, bust width, or neckline opening can refer to several different methods, so a diagram in the technical package is often more reliable than a written label alone, especially when the dress contains curves, drape, gathers, or stretch materials.
Measurement differences of 0.5 to 1 cm can come from technique rather than an incorrect pattern. One technician may measure an armhole along the curved seam, while another records straight depth from a horizontal reference. A shaped bust width may be measured flat at a fixed distance below the underarm or through the fullest point of the garment. The method has to remain unchanged across development, size-set review, pre-production approval, and quality inspection so the team is comparing the same feature each time.
Point of measure | What it controls | Common grading risk | Illustrative change per size |
Bust circumference | Overall upper-body room | Too much growth is placed in the back | About 4 cm in many straight-size systems |
Waist circumference | Bodice and skirt fit | The silhouette becomes too loose or restrictive | Often similar to bust, depending on brand |
Hip circumference | Skirt fit and movement | High hip and full hip become unbalanced | Commonly 4-5 cm, depending on system |
Neckline width | Upper-chest coverage | Larger sizes become too open | Usually less than 1 cm |
Front neck drop | Visual neckline depth | The style becomes progressively lower | Frequently held or changed slightly |
Armhole depth | Side coverage and comfort | The underarm drops too far | Often around 0.3-0.6 cm |
Bust-point spacing | Dart and cup alignment | Shaping moves away from the apex | Often around 0.3-0.6 cm |
Back waist length | Vertical body balance | The waist seam becomes misplaced | Commonly around 0.4-0.7 cm |
Neckband length | Comfort and support | Neck pressure or gaping | Based on neck, ease, closure, and stretch |
Dress length | Overall proportion | Larger sizes appear shorter | May be fixed or increased by size |
Grade Increment Planning
A grade increment is the total change between two adjacent sizes, and that total must be distributed among the relevant pattern pieces. Consider a simplified 4 cm total bust increment. If the pattern represents four quarter-body sections, the starting calculation may be 1 cm per quarter. A fitted halter can require another allocation, with slightly more growth through the front bust and less across an open back. The finished circumference remains correct, but the garment follows the body more naturally because the growth is placed where it is needed.
Horizontal and vertical movements must be recorded separately. A bust point may move 0.4 cm outward and 0.3 cm downward, while the neckline grows only slightly and the armhole receives a controlled vertical change. Ease should already be established in the base pattern; grading should not be used to repair a poor ease decision. A bodycon stretch dress may use zero or negative ease, while a stable woven occasion dress needs enough room for breathing, sitting, and movement. All rules should be stored in one controlled grade sheet rather than added informally to individual sizes.
- Define where additional circumference enters the garment and how it is shared between front and back.
- Separate horizontal width changes from vertical length and position changes.
- Control neckline and armhole growth independently from bust circumference.
- Decide whether dress length, slit height, hem sweep, and strap length change by size.
- Apply the same approved rule to the shell, lining, facings, and internal support pieces.
Grade Breaks
A grade break occurs when the increment or pattern logic changes within the size range. It is useful when one straight-size block no longer represents the proportions of the intended customer. A lightly fitted jersey halter from XS to XL may work with one continuous rule, while a structured woven style extending to 4XL may require a second block or revised rule after a defined size. The decision should come from fit data, customer measurements, and construction needs rather than from a desire to keep the CAD nest mathematically simple.
Extended sizes may need more front bust capacity without an equal increase in back width, and they can also require wider straps, greater side coverage, stronger support, or more controlled neckline growth. Petite and tall ranges should be treated as proportion systems rather than standard sizes with shorter or longer hems. Bust height, waist level, torso length, slit position, strap length, and skirt balance may all change. A smooth digital nest can still conceal a poor grade, so physical testing on both sides of a proposed grade break remains essential.
- Front-to-back bust distribution and bust-point position
- Armhole depth, neckline growth, and side coverage
- Cup, boning, elastic, and internal support requirements
- Strap width, attachment position, and back coverage
- Dart intake, panel configuration, and waist shaping
- Petite, tall, and extended-size torso proportions
How Do You Grade the Halter Bodice?

A halter bodice should be graded as one connected structure. Neckline, strap, diagonal armhole, bust shaping, underbust, waist, back opening, lining, and internal support must be developed together. Changing one area in isolation can create neckline gaping, neck pressure, side-bust exposure, misplaced shaping, seam mismatches, or a dress that meets the measurement chart but does not sit correctly on the body.
Neckline and Strap
The neckline should first be classified by its shape and function because a high-neck collar behaves differently from a plunge V, gathered tie-neck, crossover front, or cowl neckline. The full bust increment should not be applied to the neckline. Neck and upper-chest dimensions normally grow more slowly than the bust, and excessive edge growth makes larger sizes too open. In many designs, most additional bust room belongs below the neckline through darts, princess seams, gathers, or shaped side panels rather than at the neck opening itself.
Straps and neckbands require their own finished-length rules. A fixed band must account for neck growth, intended ease, closure overlap, and fabric stretch, while the seam allowance remains unchanged. Self-tie straps may keep a stable tying section even though their attachment points move with the bodice. Adjustable straps should be checked at minimum and maximum usable length, with the slider, ring, or clasp remaining in a comfortable position. After grading, the neckline seam must be walked against its facing, binding, or neckband in every size at the sewing line.
- Control center-front depth separately from upper neckline width.
- Keep the strap or neckband attachment aligned with the intended support point.
- Check closure overlap, hardware clearance, and usable adjustment range.
- Redraw the neckline curve smoothly after moving the grade points.
- Measure the corresponding facing, binding, or stabilizing tape in every size.
Armhole and Side Coverage
The diagonal armhole is one of the most sensitive areas of a halter dress because it often follows a partly bias direction from the underarm toward the neck. Small changes in length, angle, or fabric tension can create visible gaping. The armhole should be graded from both ends: the upper point follows the neckline or strap attachment, while the lower point responds to bust width, underarm depth, and side-seam development. Treating the entire edge as one simple curve usually hides the real source of fit problems.
Larger sizes need additional circumference, but they do not always need a much deeper armhole. Excessive vertical growth can expose the side bust and reduce support. Smaller sizes can develop the opposite problem when the edge becomes too short or high, causing cutting and restricted movement. When gaping appears, shortening the whole edge is not automatically correct; the cause may be excessive neckline length, insufficient bust projection, weak recovery, poor facing tension, or stretching during sewing. Stabilizing tape or elastic can support an accurate pattern but should not be used to force an inaccurate edge into place.
Bodice area | Main grading objective | Typical failure | Practical control |
Neckline edge | Preserve coverage and visual shape | Larger sizes gape | Limit edge growth and review curve length |
Neck strap | Maintain comfort and support | Neck pressure or looseness | Grade finished length, not seam allowance |
Upper armhole | Follow upper-bust development | The edge stands away from the body | Control the curve and sewing-line length |
Lower armhole | Maintain side-bust coverage | The underarm becomes too low | Limit vertical drop and test movement |
Bust area | Add projection and width | Bust compression or drag lines | Distribute more growth through the front |
Back opening | Maintain stability | The back flares or rotates | Grade separately from a closed bodice |
Underbust | Support the bust frame | The seam rides upward | Match body, cup, and elastic development |
Waist seam | Preserve horizontal balance | The front waist lifts | Add controlled front vertical development |
Bust and Waist
Bust grading must control both circumference and three-dimensional shape. Adding width only at the side seam often produces a dress that meets the specification but does not follow the body. A darted halter needs a review of bust-point position, dart intake, dart length, and the distance from the dart tip to the actual apex. As sizes increase, the bust point may move outward and downward by different amounts. Princess seams require coordinated changes across the center-front and side-front pieces so the seam remains positioned over the bust rather than drifting toward the side.
Gathered or draped bust sections also need a clear fullness rule. Keeping the same raw gathering amount can make larger sizes look flatter, while increasing it mechanically can add unwanted bulk. Cup-supported styles may require grouped cup sizes rather than one continuously graded cup. The cup, pocket, lining, underbust seam, and shell must be developed together. At the waist, the front often needs more vertical development because of bust projection. Lowering the entire waist seam evenly can make the back too long and change the intended silhouette, so front, side, and back balance should be assessed on the body.
- Track bust-point movement horizontally and vertically.
- Walk dart legs, princess seams, and underbust seams after grading.
- Decide whether visible gathers or drape remain constant or change by size.
- Coordinate cup, cup pocket, lining, and shell development.
- Check front waist lifting, side-seam swing, and center-back balance.
Skirt and Components
Below the waist, the grade depends on the silhouette. A bodycon skirt requires controlled high-hip and full-hip growth, while an A-line skirt may take additional width at the side seam without changing the original flare angle. A bias-cut skirt needs fabric testing because the garment can lengthen and narrow under its own weight. Gathered skirts need a decision about whether the gathering ratio remains constant, and slits must be graded from a defined reference point so their visible proportion does not change unintentionally across sizes.
Every component attached to the shell must be graded or matched after the main pattern changes. This includes full or partial lining, neckline and armhole facings, binding, cups, cup pockets, boning channels, power-mesh panels, elastic, waist stays, stabilizing tapes, zipper guards, modesty panels, and fusible pieces. Notches and drill points should remain separated, clearly identifiable, and positioned inside the seam line. A graded-component checklist is more reliable than assuming the CAD system has updated every piece correctly, especially when some components use separate material or size rules.
- Preserve the approved high-hip, full-hip, and hem proportions.
- Define whether slit height is controlled from the hem, waist, or floor.
- Match every shell seam to its lining, facing, or support component.
- Review zipper length, closure position, and modesty coverage by size.
- Confirm notches, drill points, grainlines, and pattern-piece quantities before release.
How Do Fabric and Fit Change the Grade?

Fabric behavior determines how much ease, support, and edge control a halter dress needs. Stable woven fabrics, stretch wovens, jerseys, and power mesh should not automatically use the same grade. Stretch percentage, recovery, weight, drape, lining, seam elasticity, opacity, and garment length can all change how the neckline, bust, armhole, waist, and back opening perform in each size.
Woven and Stretch Fabrics
Stable woven fabrics depend mainly on pattern shape, darts, seams, and closures, so their finished measurements usually follow the approved specification closely. Knits and stretch wovens can use zero or negative ease, but fibre composition alone does not show how much reduction is safe. Two fabrics described as 95% polyester and 5% elastane can behave very differently because of knit structure, yarn, weight, finishing, and recovery. The team needs actual material testing rather than a rule copied from another style or supplier.
A practical test records the relaxed length, extended length, stretch in both directions, immediate recovery, delayed recovery, behavior after steaming or washing, and performance across a representative sewn seam. Stretch percentage is calculated as the extended length minus the original length, divided by the original length, multiplied by 100. A sample that extends from 10 cm to 12 cm has 20% stretch, but that does not mean the dress should use 20% negative ease because opacity, comfort, support, seam strain, and movement must also be considered.
- Measure the relaxed specimen without tension.
- Extend it to the intended working limit and record the length.
- Repeat the test in the crosswise and lengthwise directions.
- Release the specimen and record immediate and delayed recovery.
- Test after steaming, washing, or resting when those processes apply.
- Sew a representative seam and repeat the test under realistic construction conditions.
Stretch, Recovery, and Weight
Stretch describes how far a material can extend, while recovery describes how well it returns. Recovery is often more important at a halter neckline and armhole because weak recovery allows the edge to grow during wear. Lengthwise stretch also matters: a heavy midi or maxi skirt can pull downward on the bodice, deepen the neckline, and increase pressure at the back neck. This effect may not appear during a brief fitting, so hanging tests and longer wear trials are useful for high-risk styles.
The shell and lining should work together rather than fight each other. A stretch shell combined with a stable woven lining can restrict movement and redirect tension toward the neckline, zipper, or armhole. A lining with too much stretch can provide insufficient support. A lightly fitted stretch woven may use little or no negative ease, while a bodycon jersey may use a moderate reduction, often around 5 to 12% in selected areas. These figures are development references rather than universal standards, and the approved amount must come from the actual fabric and fit test.
- Crosswise and lengthwise stretch under realistic wearing load
- Immediate and delayed recovery after extension
- Fabric weight, drape, surface friction, and hanging growth
- Seam elasticity and recovery after sewing and pressing
- Lining compatibility and the balance between support and movement
- Opacity and surface appearance when the fabric is extended
Halter Style Differences
Halter dress is a broad style family rather than one standard construction. A high-neck design relies on controlled neck width and upper-chest shape, while a plunge halter needs careful control of center-front depth and side coverage. A tie-neck style offers adjustment but still depends on balanced attachment points and sufficient usable length. Crossover fronts need their overlap angle checked as bust volume increases, because the wrap can move outward and reduce center-front coverage even when the total bust measurement is correct.
Gathered halters need a deliberate fullness ratio so the gathering does not disappear in larger sizes or become bulky in smaller ones. Cowl halters should be graded through the fitted foundation rather than by enlarging only the draped edge. Corset-supported versions may require new cup groupings, revised boning positions, or stronger internal panels in extended sizes. Backless halters place more load on the neck and waist because there is less back structure, so the grade must preserve security instead of treating the open back as a decorative cutout.
- High-neck halter: control neck width and upper-chest contour.
- Plunge halter: protect center-front depth and side coverage.
- Tie-neck halter: maintain attachment balance and usable tie length.
- Crossover halter: preserve overlap angle and bust coverage.
- Gathered or cowl halter: control fullness, drape, and edge length.
- Corset or backless halter: coordinate support, cups, boning, waist, and back security.
Fit Diagnosis
A fit problem should be traced to its technical cause rather than corrected only at the visible symptom. Neckline gaping can result from excessive edge length, insufficient bust shaping, a stretched facing, weak recovery, or a front panel that lacks projection. Neck pressure may come from a short strap, too much negative ease, a heavy skirt, or inadequate support at the waist and back. Side-bust exposure can be caused by excessive armhole depth, insufficient cup coverage, poor strap placement, or an armhole curve that has moved too far outward.
Bust compression often means the front received too little of the circumference grade, even when the total measurement is correct because extra growth was placed in the back. A front waist seam that lifts can indicate insufficient vertical bust development, while a side seam swinging forward often shows that the front needs more width or projection. Fit comments should identify the location, direction, and amount of change. A comment such as removing 0.6 cm from the upper front armhole while preserving bust width gives the pattern team a measurable instruction that can be checked in the next sample.
- Describe the visible issue and the likely structural cause separately.
- State the exact location, direction, and amount of the pattern change.
- Identify every related lining, facing, elastic, or support component that must be updated.
- Check whether the issue comes from pattern, sewing, pressing, or material behavior before revising the block.
- Photograph the fitting from consistent front, side, back, and detail views for traceability.
How Is the Size Run Approved?

A size run is approved through graded-pattern auditing, measurement verification, physical fitting, movement testing, and production-readiness review. The base, smallest, and largest sizes should normally be assessed, together with any grade-break size. A clean CAD nest is useful evidence, but it cannot replace real checks of neckline security, bust placement, comfort, side coverage, balance, support, and wearer movement.
Graded Nest Audit
The graded nest displays all sizes layered together and helps the technician identify reversed movements, sudden jumps, uneven curve development, and points that move in the wrong direction. The audit should cover horizontal and vertical movement, correct size sequence, smooth neckline and armhole progression, dart-leg equality, princess-seam lengths, waist and side-seam matching, shell-to-lining relationships, facing and binding lengths, notch and drill-point placement, grainline direction, closure positions, seam allowances, piece naming, and size identification.
Curved seams should be walked at the sewing line because a nest can look smooth while the actual stitching lengths differ. Points intended to remain fixed, such as a center-front fold, neckline apex, style pivot, or hardware attachment, deserve special attention. Version control should be strict: every pattern file needs a style code, size range, version number, date, and approval status. Informal names such as final, latest, or final revised create avoidable production risk and make repeat orders difficult to trace.
- Confirm the direction and value of every critical X and Y grade movement.
- Walk neckline, armhole, princess, waist, and side seams in all sizes.
- Check shell, lining, facing, and support-piece relationships.
- Inspect notches, drill points, grainlines, closures, and hardware positions.
- Record every discrepancy and correction in a controlled grade audit report.
Size-Set Sampling
The base size confirms the original pattern, while the smallest and largest sizes show whether the grade preserves proportion at the ends of the range. A practical size-set plan often includes the smallest commercial size, the approved base size, the largest commercial size, an intermediate size when the range is wide, the first size after a grade break, and any size where the cup or internal support construction changes. The exact sampling plan should reflect the silhouette, material, size range, and commercial risk of the style.
For an XS to XL range, XS, M, and XL may provide a useful first review. For XS to 4XL with a grade or support change near XL, the team may need XS, M, XL, 2XL, and 4XL. Fit models or representative wearers provide information that a dress form cannot, including neck pressure, movement restriction, slipping, closure difficulty, and comfort over time. The wearer should stand, sit, walk, turn, raise the arms, and bend lightly because halter garments often look secure in a static pose but shift during normal movement.
- Fit the smallest, base, and largest sizes as the minimum working set for many ranges.
- Add intermediate or grade-break sizes when the range, support system, or silhouette changes.
- Use representative bodies whenever comfort, mobility, or closure access must be assessed.
- Photograph consistent front, side, back, and detail views during every fitting.
- Separate pattern issues from workmanship and material problems before ordering a revision.
Measurement and Fit Review
Samples should be allowed to rest before measurement, especially when the fabric is stretchy, bias-cut, steamed, or heavily handled during sewing. Tolerance should reflect the importance of the measurement and the difficulty of the construction. Critical neckline, strap, bust, and armhole points normally require tighter control than hem sweep or total length. Measurements must be taken with the same method, equipment, and garment condition so the requested specification and actual result can be compared fairly.
During the fit review, check the neck first, including pressure, closure position, strap width, and whether the neckline remains flat in movement. At the bust, assess apex alignment, coverage, projection, support, and symmetry. At the armhole, inspect front and side coverage with the arms relaxed and raised. The back should remain stable without rotating or flaring, and the waist and skirt should be checked for horizontal balance, side-seam direction, hip tension, slit placement, and hem level. A measurement report should record the specification, actual result, tolerance, and required action.
Review item | Illustrative tolerance or requirement | Main reason |
Neckline width | Often around +/-0.5 cm | Directly affects coverage and gaping |
Strap placement | Often around +/-0.5 cm | Controls balance and support |
Bust circumference | Commonly +/-0.5-0.8 cm | Critical for fitted halter styles |
Waist circumference | Commonly +/-0.5-0.8 cm | Controls silhouette and waist stability |
Armhole depth | Often around +/-0.5 cm | Affects side-bust exposure and mobility |
Hip circumference | Commonly +/-0.8-1.0 cm | Depends on fabric and intended fit |
Dress length | Frequently around +/-1.0 cm | Longer styles may require a wider allowance |
Shell-to-lining match | Must sew without unintended tension | Prevents distortion and edge rolling |
Smallest-size fit | Physical approval required | Detects restriction and lost proportion |
Largest-size fit | Physical approval required | Detects gaping and support failure |
Grade-break size | Physical approval required | Confirms the transition between size blocks |
Movement test | No slipping, cutting, or unintended exposure | Confirms real wearing performance |
Production Release
The size run is ready for production only when the pattern, size specification, material, support system, and construction method have been approved together. The final review should confirm base-size approval, current grade rules, validated smallest and largest sizes, approved grade-break sizes, size-set measurements within tolerance, matching shell and support pieces, confirmed fabric stretch and recovery, specified cups and elastic, correct notches and grainlines, updated construction notes, and locked pattern and specification versions.
A first-piece or pilot-stage review provides additional protection for high-risk halter, backless, corset, satin, mesh, and heavily draped styles. Bulk fabric handling, pressing, operator technique, machinery, and repeated assembly can reveal problems that did not appear in a single development sample. The first pieces should be checked against the approved pattern, measurement chart, construction details, and reference sample before full production continues. This step is less expensive than correcting the same avoidable problem across hundreds or thousands of finished garments.
- Base fit, size chart, and grade rules are formally approved.
- Smallest, largest, and grade-break sizes have passed measurement and fit review.
- Shell, lining, facings, elastic, cups, boning, and support pieces match in every size.
- Fabric behavior, construction method, and pressing standards are locked.
- The pre-production sample and first production pieces represent the approved standard.
- Pattern, specification, bill of materials, and construction files share the same version status.
A successful halter grade should feel natural in every approved size. The customer should not see a small pattern that has been mechanically enlarged. Neckline shape, side coverage, bust position, waist balance, support, and skirt proportion should remain recognizable throughout the range. That consistency comes from a stable base pattern, explicit grade rules, realistic fabric testing, disciplined size-set fitting, and careful transfer from product development into bulk manufacturing.
Duolan Apparel supports fashion brands with halter-dress pattern development, CAD grading, fit correction, fabric and trim coordination, sample revision, and production-readiness review. Brands can begin with a complete tech pack, an original sample, a target size chart, reference images, or a collection direction. Sharing the intended market, fabric, size range, support requirements, target quantity, and launch calendar allows the development team to identify grading and production risks before sampling begins and prepare a clearer quotation for custom halter dresses or a coordinated dress collection.
Share:
Our Services
Categories
Table of Contents
Here, developing fashion collections is more than manufacturing garments — it’s a collaborative process focused on transforming ideas into well-executed, market-ready products. From fabric sourcing and sample development to scalable production and delivery coordination, every stage is built to support quality, consistency, and efficient collection launches across global markets.

