Skip to content

How Do You Develop an Asymmetric Neckline Pattern for Fit, Balance, and Production?
Your trusted Women’s Apparel Development & Manufacturing Partner from China
- Jerry
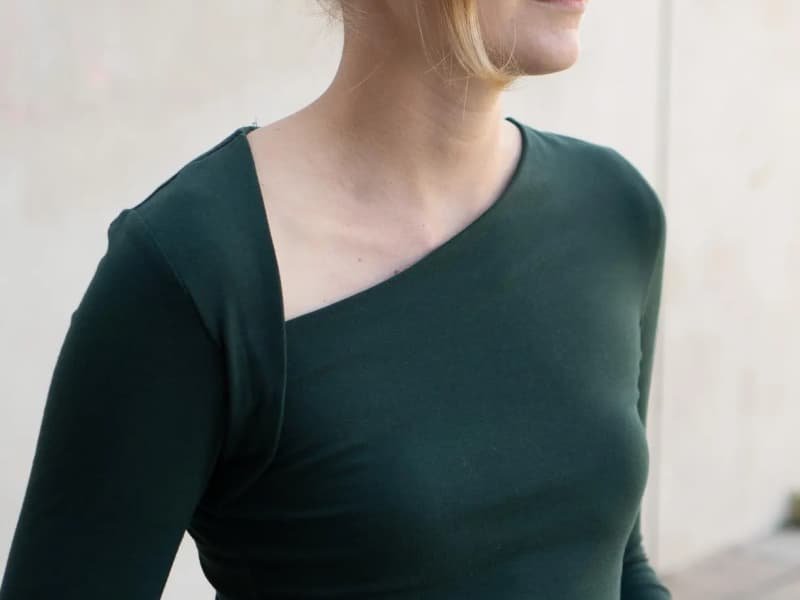
An asymmetric neckline can look almost effortless in a sketch: one shoulder is removed, the neckline drops diagonally across the chest, or a cutout interrupts the bodice in an unexpected place. On the pattern table, however, that simple visual change can affect nearly every relationship in the upper garment. The left and right neckline lengths are different, shoulder support is no longer shared evenly, the bust may be covered at two different heights, and sections of the edge may sit on very different grain angles. If those changes are treated as decoration rather than structure, the first sample can gape, rotate, pull toward one shoulder, or look correct only when the model stands perfectly still.
A reliable asymmetric neckline pattern is developed from a full, balanced bodice rather than from a mirrored half-pattern. The pattern maker keeps the bust, shoulder, armhole, waist, side seam, and grain references under control while establishing the asymmetric design line. The neckline is then tested with the intended fabric, facing or lining, and support structure, corrected through fitting, graded deliberately, and verified again before production release.
The interesting part is that the best technical work usually disappears once the dress is finished. A customer should notice the clean diagonal line, the exposed shoulder, the drape, or the sculpted shape – not the internal decisions keeping the garment in place. That is the standard worth aiming for. The sections below follow the same sequence an experienced development room would use: understand what asymmetry changes, draft the full bodice, balance fit and support, account for fabric behavior, stabilize the neckline, and finally prove that the pattern can survive grading and production without losing the original design.
What Makes an Asymmetric Neckline Pattern Different?
An asymmetric neckline changes more than the visible neck shape. Once the left and right sides stop mirroring each other, shoulder support, bust shaping, neckline length, armhole balance, grain direction, and garment weight may all behave differently. A reliable pattern therefore treats both sides independently while keeping the underlying body landmarks properly balanced through fitting, movement, and final construction review.
Full-Pattern Control
With a conventional symmetrical bodice, a pattern maker can often work from half of the front and half of the back because the opposite side is expected to mirror it. That shortcut becomes risky with one-shoulder, diagonal, asymmetric cutout, folded, or sculpted necklines. The left and right sides may contain different amounts of fabric, end at different points on the shoulder or armhole, and carry different amounts of load. Developing a full front – and, where the design continues around the body, a full back – allows both sides to be measured, fitted, notched, and corrected independently rather than assumed to behave like mirror images.
The full pattern also changes how the style is controlled in cutting and production. A strongly asymmetric front may no longer be a normal cut-on-fold piece, and visually similar left and right components can be easy to reverse. Production patterns therefore benefit from clear LEFT and RIGHT identification, grainlines, cut quantities, notches, face-up instructions where relevant, and unmistakable orientation marks. These details are not administrative extras. On an asymmetric garment, flipping a single pattern piece can create an entirely different neckline, while a wrong grain direction can change stretch and drape even when the outline still looks correct.
Structural Balance
Visual asymmetry and structural imbalance are not the same thing. A dress can deliberately expose one shoulder or drop the neckline on one side while still sitting squarely on the body. To achieve that, the pattern maker keeps stable references such as center front, center back, bust apex, waist level, shoulder point, armhole balance, side seam, and grainline. The new style line is developed around these landmarks rather than replacing them. When a sample looks wrong, those reference points help show whether the problem is actually at the neckline or is being caused by a deeper front-to-back or left-to-right balance issue.
One practical way to read the garment is to ask where it is anchored, where fabric has been removed, and where the remaining fabric will try to move when the wearer sits, turns, or lifts an arm. In a one-shoulder dress, the retained shoulder may carry much of the upper-body load, while the open side depends on bust contour, underarm shaping, lining tension, elastic, internal stay tape, or waist support. A diagonal neckline with two shoulders may distribute load more evenly, yet still create unequal tension across the bust because the edge crosses the body at different heights. The design can be visually off-center; the forces inside the garment cannot be unmanaged.
Different Asymmetric Shapes
Different asymmetric necklines create different technical risks, so a solution that works on one style should not be copied blindly to another. A one-shoulder fitted dress tends to be sensitive to shoulder anchoring, underarm containment, and rotation toward the supported side. A diagonal neckline that keeps both shoulders may be less dependent on a single anchor but more sensitive to bust shaping and diagonal edge growth. An asymmetric cutout can interrupt a normal tension path through the bodice, while a draped or folded neckline introduces extra volume, grain changes, and additional layers that can alter how the neckline settles after pressing.
For a development team, the most useful first question is therefore not simply, ‘What shape is this neckline?’ It is, ‘What is supporting the garment after this neckline removes or redirects part of the original bodice?’ That question is especially important for bodycon, occasion, party, corset-influenced, open-side, and one-shoulder dresses, where the garment is expected to sit close to the body and the neckline is a focal point. When the underlying balance is correct, the wearer sees a confident design line. When it is wrong, she sees the symptoms instead: gaping, pulling, drifting seams, uneven coverage, or a neckline that gradually changes position during wear.
Control Area | What to Record | What It Helps Diagnose |
Center front | Neckline crossing point and vertical position | Visual proportion and garment rotation |
Bust apex | Distance to neckline and shaping seams | Coverage, gaping, and bust volume |
Shoulder | Finished length and angle on each side | Upper-body support and diagonal pulling |
Armhole | Depth, shape, and balance points | Mobility and open-side stability |
Side seam | Position at bust, waist, and hip | Front/back balance and rotation |
Waist | Level around the torso | Vertical balance and twist |
Grainline | Direction on every major piece | Drape, torque, and edge distortion |
How Do You Draft the Full Bodice?
Draft the asymmetric neckline from an already balanced bodice block, open the necessary pattern pieces to full width, and mark the new neckline while preserving bust, waist, shoulder, armhole, and grain references. After the design line is established, redistribute darts and shaping, walk every joining seam, and develop facing or lining patterns from the corrected shell rather than from an early draft.

Start With a Stable Block
The base block matters more than many designers expect. If the starting bodice already has an incorrect shoulder slope, bust position, waist length, or armhole balance, adding asymmetry makes every fitting problem harder to diagnose. Before drawing the neckline, confirm that the block represents the intended fit category and fabric behavior. A fitted woven occasion dress, a stretch bodycon style, and a soft draped jersey top may share a similar neckline shape, but they do not share the same ease, contour, or support logic. A stable block gives the team a reliable baseline so later changes can be traced to the asymmetric design rather than to hidden problems in the original fit.
Once the block is opened to full width, the neckline should be plotted from measurable points instead of sketched freely. Mark center front, center back where relevant, both bust points, waist, shoulder tips, armhole balance points, and grainlines before introducing the style line. Then locate where the neckline crosses center front, how close it sits to the bust apex, where it reaches the shoulder or armhole, and how it connects to the back. This approach works whether development begins from a tech pack, a reference image, an original garment, or a mixed brief. The source may be visual, but the working pattern must become measurable and repeatable.
- Confirm the approved base size and intended fit category.
- Open the front and any relevant back pieces to full width.
- Mark center lines, bust points, waist, shoulders, and grainlines.
- Locate the asymmetric design line with measurable reference points.
- Check coverage and shoulder relationships before moving shaping.
- Walk seams and build the facing, lining, and support pieces after shell correction.
Dart and Seam Control
An asymmetric neckline often crosses an area that was originally shaped by a bust dart, shoulder dart, waist dart, princess seam, or panel line. Removing the visible dart does not remove the three-dimensional volume it was controlling. That suppression has to be transferred somewhere else – into a side dart, waist dart, princess seam, asymmetric seam, neckline dart, pleat, gather, or controlled stretch, depending on the design and fabric. On close-fitting dresses, even a small change to the location or amount of shaping can affect whether the neckline lies against the body or stands away from it, especially when the lower side of the neckline passes near the fullest part of the bust.
After dart manipulation, compare the working pattern with the original block and walk every joining seam. Confirm that front and back shoulder seams match according to the intended construction, panel seams are compatible, and any intentional ease or gathering is documented rather than left for the sample machinist to guess. A development room should also keep a simple version trail so that each fit correction can be traced back to a specific pattern change. This becomes important when several comments arrive together, because the neckline, bust, armhole, and side seam may all appear to need correction even though they are reacting to one underlying balance issue.
Facing and Lining Development
The shell pattern is only part of the neckline. Facing, lining, stay tape, elastic, interfacing, cups, or boning can change how the finished edge behaves, so those pieces should be developed after the shell is corrected but before the neckline is considered production-ready. For clean-finished fashion dresses, factories commonly use neckline seam allowances in the region of roughly 6-10 mm and larger allowances such as 10-15 mm on many joining seams, although the final values should follow the brand’s construction standard, fabric thickness, machinery, and sewing method. These figures are useful working references, not universal rules, and they should never replace the approved technical specification.
Pattern identification becomes more important as internal pieces multiply. A facing that looks almost symmetrical can still be different on each side, and a lining with different stretch or shrinkage behavior can pull the shell out of position. Each pattern piece should therefore carry a clear name, size, version, orientation, grainline, cut quantity, notches, seam allowance, and any fusing or support instruction needed by the sewing room. If the garment is fully lined, fit the lining as part of the system rather than assuming it is a neutral layer. A lining that is too tight can drag the neckline inward; one that is too loose may fail to support the open side.
How Do You Balance Fit and Support?
Fit and support are balanced by controlling three connected zones: the bust, the upper anchor, and the open or lower side of the neckline. The garment should remain stable when the wearer stands, turns, sits, or moves her arms. If one zone is weak, the pattern often compensates elsewhere through gaping, pulling, side-seam rotation, an uneven waist, or loss of coverage.

Bust and Coverage
The bust is usually the most sensitive area because an asymmetric neckline crosses it at different heights. One side may sit above the fuller part of the bust while the other runs closer to the apex or underarm. The two sections therefore experience different outward pressure even when the neckline appears as one continuous line. A pattern can have the correct edge length and still gape if the volume beneath it is wrong. Shortening the neckline is not always the first correction; the team should first determine whether the issue comes from excess edge length, bust suppression, shoulder position, underarm containment, or fabric stretch. Correcting the wrong variable can make the neckline tighter while creating pulling somewhere else.
A useful fitting checks the bust apex position, upper-bust contour, distance from neckline to apex, underarm coverage, center-front stability, and waist-to-bust tension. The model should not be assessed only in a posed front view. Ask her to relax her shoulders, turn, sit, raise and lower her arms through normal movement, then return to a neutral posture. Occasion and party dresses need to remain secure during the movements people actually make at dinners, weddings, events, or on a dance floor. A neckline that is stable only while the wearer stands still with perfect posture is not yet a dependable fit.
Shoulder and Open-Side Anchoring
On a one-shoulder style, the retained shoulder may be the primary upper anchor for the entire bodice. If that shoulder is too long, the neckline can drift outward and the open side can feel loose. If it is too short, tension may run diagonally across the chest, pull the neckline upward, or lift the opposite armhole. The open side needs its own form of control, which may come from underarm contouring, elastic, lining, internal tape, bust support, waist fit, cups, boning, or a combination of several elements. The correct solution depends on whether the garment is a soft stretch style, a stable woven dress, or a more structured occasion piece.
A simple way to understand the bodice is as a three-point support system: the upper anchor at the shoulder or strap, the side anchor around the bust and underarm, and the lower anchor at the waist or torso. If one point releases, the garment tends to move toward the strongest remaining point. This is why a shoulder adjustment can alter the side seam, or a small waist correction can improve apparent neckline stability. The goal is not to make every area tighter. Excess negative ease can create new distortion, particularly when a fabric stretches strongly across the body but has limited vertical stretch or poor recovery.
Rotation and Side-Seam Movement
Side seams are excellent diagnostic markers because they reveal how the whole garment is balancing around the torso. When a seam moves forward, the first question should be whether the front needs more room at the bust or upper torso rather than whether the seam line itself is drawn incorrectly. When it moves backward, check front width, back balance, and shoulder position. If the whole dress rotates toward the supported shoulder, investigate shoulder load, grain direction, asymmetric tension, and the relationship between the outer shell and lining. A visible problem at the side seam can easily be the final symptom of a problem that began much higher on the garment.
During fitting, mark the side seam at bust, waist, and hip rather than judging only one point. A seam can look vertical at the waist while already drifting several millimeters near the bust, and that early movement may become more noticeable after grading or after the fabric changes. It also helps to separate structural comments from visual preferences. ‘Lower the neckline by 15 mm because the design looks too conservative’ is not the same request as ‘remove excess edge length because the neckline gaps.’ Both modify the same visible area, but they solve different problems and should be recorded as different types of revision.
Which Fabrics Change the Pattern?
Nearly every fabric can change an asymmetric neckline, but stretch, recovery, drape, weight, thickness, and bias movement have the greatest influence. The pattern should be validated in material that closely represents the intended production fabric. A neckline developed in stable toile, firm crepe, or sample jersey may need correction when the final fabric stretches, hangs, or recovers differently during wear and sewing.

Stretch and Recovery
Fiber composition alone does not tell you how a fabric will behave. Two materials with the same polyester-and-elastane percentages can have different knit structures, weights, finishes, stretch directions, and recovery. For an asymmetric neckline, those differences affect both fit and edge stability. A simple internal development test can start with a clearly marked gauge length and compare horizontal stretch, vertical stretch, and – when the neckline runs diagonally – the behavior along the actual neckline direction. After the fabric is released, measure how closely it returns to the original gauge. When a brand or laboratory has a specified test method, that standard should take priority; internal checks are most useful for comparison during development, not as substitutes for certified testing.
Negative ease should also come from the measured fabric and the intended compression level rather than from a generic percentage copied from another style. A soft jersey, compact double knit, power mesh, and stretch satin can all require different pattern reductions even when the finished silhouette looks similar. Recovery matters just as much as maximum stretch. A fabric that stretches easily but does not return well can allow the lower neckline to grow during wear, while a firm fabric with strong recovery may hold the edge but create too much pressure if the pattern is reduced aggressively. The fabric has to support the fit strategy rather than fight it.
Drape, Weight, and Bias
Drape controls how the neckline settles around the bust and shoulder. A soft satin may create an elegant line but offer little structural support; a compact crepe may hold a sharper diagonal; mesh can become unstable when layered or weighted; velvet adds thickness and directional handling issues. The same outline therefore does not guarantee the same appearance across materials. Weight is also important because an asymmetric garment may concentrate more load on one shoulder or one side of the bodice. A fabric that is significantly heavier than the development fabric can change where the garment wants to hang, even if its stretch percentage is similar.
Bias behavior deserves special attention because the neckline can cross the grain at several different angles. One 100 mm section may be relatively stable while the next 100 mm approaches bias and grows more easily during cutting, handling, pressing, or sewing. Development teams should compare the fabric before and after handling rather than relying on touch alone. If a diagonal edge consistently lengthens during sample making, the solution may involve revised pattern geometry, controlled handling, support tape, or construction changes. Simply trimming the finished neckline shorter after it has grown hides the cause and makes repeat production harder.
Lining and Interfacing
An outer shell can fit correctly during an early fitting and change after internal layers are added. A fusible interfacing may stabilize the edge but also make a soft satin look rigid if it is too heavy. A facing can hold the neckline shape but roll outward when seam bulk or understitching is poorly controlled. A lining can add welcome support around the bust and open side, yet it can also distort the shell if its stretch, shrinkage, or pattern length differs. For that reason, the finished neckline should be evaluated as a layered system rather than approved from the shell alone.
A practical sequence is to review the shell by itself, then the shell with stabilization, then the facing, then the lining, and finally the complete garment after pressing. When the neckline changes only after one of those stages, the team has useful evidence about where the problem entered the garment. This is particularly important for satin, mesh, fitted jersey, corset or bustier structures, and other shape-sensitive dresses. For brands developing these styles from tech packs, references, or original samples, a supplier that connects fabric behavior with pattern adjustment can usually resolve issues more efficiently than one that treats sourcing, pattern making, and fit as separate conversations.
Development Check | Practical Measurement | What It Reveals |
Horizontal stretch | Marked gauge before and during extension | Fit and negative-ease potential |
Vertical stretch | Same gauge test along lengthwise direction | Shoulder and garment-length growth risk |
Recovery | Gauge after release and a short rest | Whether the neckline may grow during wear |
Fabric weight | Supplier or laboratory GSM where available | Load placed on shoulder and support points |
Diagonal growth | Measure along the actual neckline direction | Bias-related distortion risk |
Layer comparison | Shell vs. shell plus facing/lining | Tension introduced by internal construction |
How Do You Stabilize the Neckline?
A stable asymmetric neckline comes from the correct pattern first and reinforcement second. Gaping, dropping, or twisting can result from excessive edge length, incorrect bust shaping, poor shoulder balance, diagonal fabric growth, mismatched lining tension, or weak anchoring. Reinforcement works best when it supports an already balanced pattern instead of forcing a poorly fitting neckline into position during fitting and production.

Gaping Diagnosis
Gaping is easier to solve when it is classified by when and how it appears. Static gaping is visible while the wearer stands naturally and often points toward pattern geometry, excessive edge length, insufficient bust contour, or poor shoulder position. Movement gaping appears when the wearer turns, reaches, or sits and may indicate weak anchoring or unsuitable ease. Construction gaping starts after facing, lining, binding, or elastic is attached, which suggests the shell may have been correct before finishing. Progressive gaping becomes worse during handling or wear and often points toward fabric growth, weak recovery, or insufficient stabilization along a diagonal or bias-sensitive edge.
This distinction prevents a very common mistake: repeatedly shortening the neckline until the garment becomes tight in the wrong places. If the shell sat correctly before lining, changing the shell first may create a new fit problem while leaving the original lining issue untouched. Whenever possible, make one controlled correction at a time and record it. Adjust the neckline contour, shoulder, underarm, or internal support for a specific reason, then refit. If several major areas are altered together, the next sample may look better or worse, but the team will not know which change produced the result.
- Static gaping: visible while standing naturally; check geometry, bust contour, and shoulder position.
- Movement gaping: appears when turning or sitting; check anchoring, ease, and open-side control.
- Construction gaping: appears after facing or lining; compare internal and outer edge lengths.
- Progressive gaping: worsens during handling or wear; check fabric growth, recovery, and diagonal stability.
Twisting and Dropping
Twisting usually signals imbalance somewhere around the torso rather than a simple problem with the drawn neckline shape. Start with fixed references: is center front still centered, are the side seams in the intended position, is the waist level, and has one armhole shifted? Then check grain direction and shoulder load. If the shell is balanced before lining but rotates afterward, the lining or facing deserves investigation before the main pattern is changed. The goal is to follow the direction of tension through the garment rather than correct whichever edge looks most visibly wrong at first glance.
Open-side dropping is slightly different because that side may have no direct shoulder support. The neckline may need containment from bust shaping, underarm contouring, waist fit, controlled elastic, stable facing, internal tape, cups, or boning depending on the garment. A small correction near the underarm or bust can sometimes be more effective than shortening the entire neckline. Structured styles can use internal support, but boning or cups should reinforce a logical pattern rather than compensate for one that is fundamentally unbalanced. Soft stretch styles may rely more heavily on fabric recovery and elastic control, so the solution must match the material and silhouette.
Reinforcement Without Bulk
The strongest reinforcement is not always the best one. Fashion dresses often need the outside edge to look light even when the inside is doing significant structural work. Narrow stay tape, lightweight fusible, knitted or clear elastic, stable facing, lining, internal support tape, cups, and boning are all useful in the right context. The choice should answer a specific problem: controlling edge length, supporting the bust, preventing diagonal growth, or anchoring the open side. If the reinforcement is added simply because the neckline feels risky, it can create stiffness, visible ridges, bubbling, or an edge that no longer drapes like the original design.
Before approval, evaluate whether the reinforcement maintains edge length, changes drape, shows through the outer fabric, affects skin comfort, or requires an operation that is difficult to repeat consistently. Seam construction matters as well. Narrow clean-finished edges may need careful grading, clipping, understitching, and pressing so the facing rolls inward rather than outward. A sharply curved section and a nearly straight diagonal section may require different handling along the same neckline. The finished edge should look effortless from the outside. When the technical solution becomes visible as hard lines, stretched sections, or bulky turning, the support system has started to interfere with the design it was meant to protect.
How Do You Test the Pattern for Production?
Test the asymmetric neckline through a controlled sample sequence: fit the base size, record structural and visual corrections separately, update the actual pattern, verify representative sizes, and confirm the final fabric and internal construction. Before bulk release, the approved sample, pattern version, measurements, lining, support materials, sewing method, and critical neckline checkpoints should all agree across the production team members.

First-Sample Review
A first sample is most useful when everyone knows what it is supposed to prove. One version may focus on silhouette and neckline placement, another on fit, and a later sample on final construction or production fabric. Treating every prototype as if it has the same purpose creates unnecessary revisions because the team can reject a sample for details it was never intended to validate. Before fitting, define the priority: neckline shape, bust fit, coverage, shoulder support, drape, fabric behavior, construction method, or overall visual proportion. That makes the review more focused and helps the pattern maker decide which comments deserve immediate structural correction.
For a fit-sensitive asymmetric bodice, a practical review includes neckline position and contact, bust apex relationship, bust coverage, retained shoulder position, open-side stability, armhole balance, center-front position, side-seam position, and waist level. Photograph front, back, and both sides from a consistent height, then add close-ups of the neckline, shoulder, bust, and open underarm. The wearer should also sit, turn, relax her posture, and move her arms through normal everyday range. The purpose is not to make an evening dress perform like activewear; it is to check that ordinary movement does not immediately change coverage, rotate the garment, or release the neckline.
Revision and Grading
Fit comments are easier to manage when they are separated into structural fit, visual preference, fabric or trim, and production construction. Ten visible comments do not necessarily require ten independent pattern changes. A neckline that gaps, a center front that shifts, and a side seam that rotates may all come from one balance problem. If each symptom is corrected separately, the pattern can become overworked and the next sample may introduce new tension. Record the issue, the intended action, the affected pattern piece, and the result in the following sample so the team can see which corrections actually solved the problem.
Grading also needs more thought than simply enlarging the asymmetric outline. The relationship between neckline, bust level, shoulder width, armhole depth, and coverage should remain intentional across the size range. For fit-sensitive styles, reviewing a smaller size, the base size, and a larger representative size is a practical working method before assuming the grade behaves correctly, although individual brands may require a different or complete size-set process. A low neckline that is acceptable in the base size can become too open in a larger size if horizontal and vertical grade increments are applied mechanically without considering the changing body beneath the design line.
Production Lock
Approval should connect the visual sample to a controlled technical package. Production cannot reproduce a comment such as ‘this one looks right’ unless the exact pattern, material, measurement specification, support structure, and sewing method are locked. Confirm the approved pattern version, grading status, final or approved-equivalent fabric, lining, elastic or reinforcement, cups or boning where used, measurement chart, workmanship instructions, left/right orientation, and any critical neckline tolerances defined by the brand. Measurement tolerances should come from the project’s technical standard rather than a generic internet figure because visually exposed points such as strap position, neckline crossing, and bust placement may need tighter control than less sensitive measurements.
For complex or shape-sensitive dresses, first-piece or pilot verification is especially valuable because a sample-room machinist may handle a diagonal edge differently from a bulk sewing line. The first production piece shows whether the approved method still works with production operators, production machinery, bulk materials, and production pressing. When Duolan develops this type of project, the practical objective is to carry the decisions made during pattern, fabric, fit, and sample review into a production-ready version rather than restart the conversation at bulk stage. That continuity is what allows an asymmetric neckline to remain the same design after grading, repeated sewing, inspection, and later repeat orders.
Production Gate | Minimum Point to Confirm | Typical Evidence |
Pattern | Correct approved version and orientation | Dated or versioned CAD pattern |
Fit | Critical base-size corrections closed | Fit notes and approved sample |
Fabric | Bulk or approved-equivalent behavior | Approved swatch or test record |
Lining | Stretch, size, and construction relationship | Approved lining specification |
Support | Tape, elastic, interfacing, cups, or boning where used | BOM and workmanship detail |
Measurements | Brand specification and tolerances | Final measurement chart |
Grading | Asymmetric proportions preserved | Grade nest or size-set review |
Workmanship | Neckline sewing and pressing method | Construction sheet or PP sample |
Orientation | Left/right cutting clearly defined | Pattern labels and marker instructions |
Bulk release | High-risk points verified | First-piece or pilot approval |
Asymmetric neckline development is successful when the garment looks intentionally unbalanced but behaves in a controlled, predictable way. The neckline should stay where it was designed to sit, the bust should remain supported without obvious strain, side seams should not travel around the body, and the same silhouette should survive fabric changes, grading, and production handling without becoming a different garment. Reaching that point usually requires more than drawing a dramatic line on a bodice block. It requires a full-pattern view, careful shaping, fabric testing, layered construction review, movement fitting, disciplined revisions, and a production handoff that preserves what was approved. For fashion brands developing one-shoulder, diagonal, cutout, bodycon, occasion, or other fit-sensitive dresses, involving an experienced pattern and sample team early can save far more time than trying to repair a structurally weak neckline after several sample rounds. The finished dress should make the technical work disappear, leaving only the shape, confidence, and visual intent the customer was meant to see.
Frequently Asked Questions
How do you draft an asymmetric neckline pattern?
Start with a bodice block that already fits the target size and open it to a full front rather than working from a mirrored half. Mark center front, bust points, waist, shoulders, armholes, and grainlines before placing the asymmetric neckline. Then transfer any darts or shaping that the new line crosses, walk all joining seams, and create the facing or lining from the corrected shell. The first sample should confirm neckline position, bust coverage, shoulder balance, side seams, and movement before the pattern is treated as final.
Do you need a full front pattern for an asymmetric neckline?
For a clearly asymmetric neckline, a full front is usually the safest working method because the left and right sides no longer have the same shape, edge length, or support role. A full back may also be needed when the design changes shoulder placement, continues around the back, or creates different left and right back shapes. Working on the full pattern makes it easier to control bust points, grain direction, neckline intersections, notches, and cutting orientation, and it reduces the risk of accidentally assuming symmetry where none exists.
What causes an asymmetric neckline to gape?
Gaping can come from excess neckline length, insufficient bust shaping, incorrect shoulder position, weak underarm containment, fabric growth, or tension introduced by the facing or lining. The useful clue is when the gaping appears. If it is visible while standing still, check pattern geometry and bust contour. If it appears mainly during movement, review anchoring and ease. If it starts after lining or facing is attached, investigate the internal layer before changing the shell. Repeatedly shortening the neckline without diagnosing the cause can create pulling elsewhere.
How do you stop a one-shoulder dress from slipping?
A one-shoulder dress stays in position through a balanced support system rather than through the shoulder alone. The retained shoulder, bust and underarm contour, and waist or torso fit need to work together. Depending on the fabric and silhouette, the open side may also use controlled elastic, lining, stay tape, cups, boning, or another internal support. If the dress keeps slipping, first check whether the shoulder is too long, the open side lacks containment, or the whole garment is rotating. Simply tightening every area can make the dress uncomfortable without solving the underlying balance problem.
How do you grade an asymmetric neckline?
Grade the asymmetric neckline in relation to the body rather than enlarging the outline as a graphic shape. Shoulder width, bust level, armhole depth, neckline crossing points, and coverage all change with size, so the design line should remain intentional as those dimensions move. For fit-sensitive styles, it is useful to review representative smaller, base, and larger sizes – or the size set required by the brand – before approving the grade. A neckline that looks correct in one size can become too low, too open, or poorly anchored when standard increments are applied mechanically.
Which fabrics are easiest to use for asymmetric necklines?
Stable fabrics with predictable drape are generally easier to control during early development than materials with high stretch, weak recovery, or strong bias growth, but the best fabric depends on the intended silhouette. Firm crepes and structured wovens can hold a clean diagonal line, while jersey, mesh, satin, and softer draped fabrics can create more fluid effects but may need additional pattern or edge control. Whatever fabric is chosen, test stretch, recovery, weight, diagonal behavior, and the interaction with lining or facing before approving the final neckline pattern for production.
Share:
Our Services
Categories
Table of Contents
Here, developing fashion collections is more than manufacturing garments — it’s a collaborative process focused on transforming ideas into well-executed, market-ready products. From fabric sourcing and sample development to scalable production and delivery coordination, every stage is built to support quality, consistency, and efficient collection launches across global markets.