 Skip to content
How Do You Pattern an Asymmetric Dress : A Guide to Fit, Fabric, and Production
Your trusted Women’s Apparel Development & Manufacturing Partner from China
- Jerry
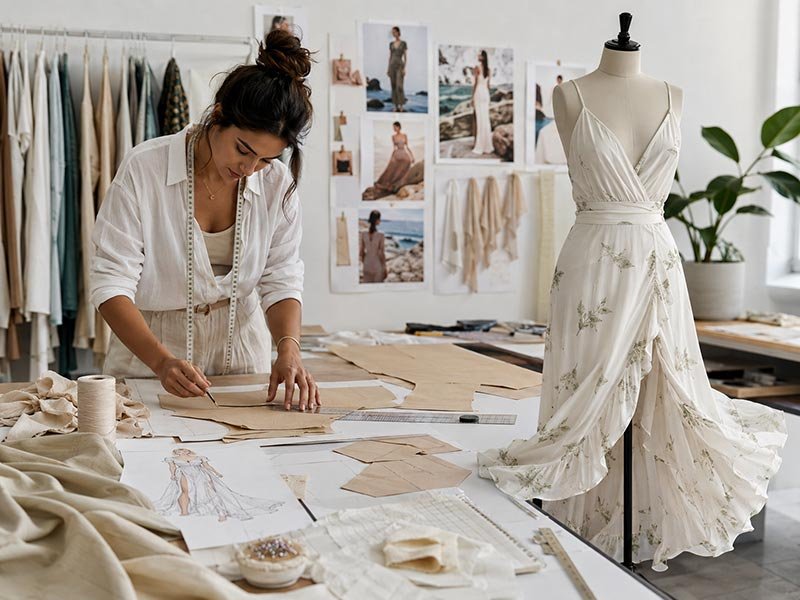
An asymmetric dress can look effortless on a model while being surprisingly demanding on the pattern table. Once the neckline, shoulder, waist seam, drape, opening, or hem becomes uneven, the pattern can no longer rely on the natural balance of a mirrored garment. A line moved only a few millimeters may affect bust support, neckline tension, side-seam position, hem level, and the way the entire dress rotates around the body.
To pattern an asymmetric dress, start with a suitable full-size dress block, establish fixed body and balance points, draw the asymmetric design lines, manipulate darts and volume, add the required support structure, and test the result in the intended fabric. The pattern should then be corrected, trued, graded, documented, and approved through a pre-production sample before bulk cutting begins.
That sequence sounds orderly, but real development is rarely a straight line. A diagonal neckline that looks elegant in a sketch may gape when worn. A high-low hem may change after hanging overnight. A draped waist panel may collapse when the original fabric is replaced. One satin sample can even look perfect while standing still and rotate several centimeters toward the supported shoulder as soon as the model walks. The cause may not be the shoulder at all; it may be the interaction between grain, bust shaping, lining tension, and an unbalanced side seam. That is where professional asymmetric pattern development truly begins.

What Makes an Asymmetric Dress Pattern Different?
An asymmetric dress pattern is different because its left and right sides are not mirror images. It normally requires a full front or back pattern, independent control of each side, clearly marked balance points, and greater attention to support, grain direction, cutting orientation, and fit. The design may look uneven, but the garment itself must remain stable and comfortable.
Visual Asymmetry and Structural Balance
The first mistake is assuming that an asymmetric dress should also behave asymmetrically. It should not. The design may have one shoulder, one sleeve, a diagonal neckline, or an uneven hem, but the garment still needs stable bust placement, controlled side seams, a predictable waist level, and a center of gravity that does not shift during wear.
Think about a one-shoulder dress. The eye sees a strong diagonal line, but the body still expects the garment to remain centered. When too much tension is carried by the retained shoulder, the dress may rotate toward that side. When the unsupported edge is too long, the neckline may gape. When the lining is shorter or differently balanced from the outer shell, the garment may twist even though the paper pattern appears correct.
Protect the center front, center back, bust apex, bust level, natural waist, full hip, shoulder-neck point, underarm level, side-seam position, and grainline before introducing the design. These references may disappear visually in the finished dress, but they allow the pattern maker to distinguish deliberate drama from uncontrolled distortion.
Common Asymmetric Structures
Most commercial asymmetric dresses belong to a small number of structural families. Recognizing the family helps the pattern maker choose a proven method instead of treating every style as a completely new problem.
Design Type | Main Technical Risk | Primary Control Point | Useful First Test |
One-shoulder neckline | Rotation and neckline gaping | Shoulder tension and opposite underarm | Walk, turn, and raise both arms |
Diagonal neckline | Exposure and edge growth | Bust position and neckline contour | Compare static fit with arm movement |
Asymmetric hem | Uneven hanging after cutting | Grain, weight, and relaxation | Hang the sample before final hemming |
Side drape | One-sided weight pulling the dress | Drape anchor and waist stability | Temporarily remove the drape and compare |
Diagonal waist seam | Distorted shaping or puckering | Dart intake and seam truing | Walk each seam between notches |
One-sleeve dress | Unequal upper-body weight | Armhole, shoulder, and lining | Check side seams from front and back |
Asymmetric cutout | Loss of edge stability | Contouring and reinforcement | Test coverage while sitting and reaching |
Uneven panels | Mismatched seam lengths | Notches, grainlines, and assembly order | Sew a partial panel trial before the full sample |
One-shoulder, bodycon, mesh, satin, corset-inspired, and draped styles are especially sensitive because they combine close fit with reduced support. A relaxed asymmetric tunic can tolerate movement. A fitted party or occasion dress usually cannot.
Why Full Patterns Matter
A conventional dress front is often drafted as a half pattern and cut on the fold. That works only when both sides are identical. Once the design crosses the center line or places different features on each side, a complete front or back becomes necessary.
Trace the approved half block, flip it across the center line, and join both halves without losing the original reference points. Keep the center line marked even when the finished dress has no center seam. It remains essential for checking garment rotation, bust position, waist alignment, and whether the uneven hem is intentional.
Label every piece from the wearer’s perspective: wearer’s left and wearer’s right. This prevents a common sample-room error in which a front-view sketch is interpreted from the viewer’s perspective and the design is made on the wrong side. Single-layer cutting is normally safer because folded cutting can produce duplicate pieces or reverse the required orientation.
Where Imbalance Begins
The visible asymmetric feature is not always the source of the problem. A gaping neckline may be caused by a tight lining. A dropped hem may come from bias growth. A twisting waist may be caused by a heavy draped panel pulling on one side.
- Different grain directions between shell and lining
- Unequal side-seam lengths or mismatched waist levels
- Incorrect bust volume on one side of the pattern
- An unsupported armhole treated like an ordinary armhole
- Pressing or sewing that stretches a diagonal edge
- A zipper or drape placed away from the garment’s balance point
- Pattern pieces flipped incorrectly during single-layer cutting
A practical fitting method is to mark horizontal bust, waist, and hip lines on the toile and photograph it against a level background from the front, back, and both sides. The design lines may slope, but the underlying balance references should remain where intended. This simple visual check often reveals whether the pattern is stylishly asymmetric or technically out of balance.

Which Block, Measurements, and Fabric Should You Use?
Use a block that already matches the intended silhouette, support level, and fabric behavior. Confirm body and finished-garment measurements before introducing asymmetry. Stretch, recovery, drape, weight, thickness, and opacity should be tested early because the same paper pattern can fit very differently in satin, mesh, jersey, velvet, chiffon, or sequined fabric.
Choosing the Right Block
The best block is not always the one that looks closest to the sketch. It is the block whose ease, shaping method, and construction logic match the intended dress. A fitted woven one-shoulder style is usually better developed from a fitted bodice or dress sloper than from a loose shift block. A stretch bodycon dress should begin from a tested knit block. A corset-inspired dress needs a structured foundation that accounts for cup, underbust, waist, and boning placement from the start.
Before selecting the base, decide whether the fabric is woven, stretch woven, stable knit, or high-stretch knit; whether the silhouette is close, semi-fitted, or fluid; whether the outer shell or an internal layer will carry tension; and whether the style must grade reliably through a commercial size range.
Dress Type | Suitable Starting Block | Typical Fit Approach | Main Caution |
One-shoulder woven dress | Fitted bodice or dress sloper | Controlled positive ease | Neckline contour and internal support |
Bodycon knit dress | Tested stretch block | Zero or negative ease | Recovery, seam stretch, and opacity |
Draped jersey dress | Semi-fitted knit block | Local volume over a controlled base | Weight distribution and side-seam pull |
Corset-inspired dress | Structured bodice block | Close fit with an internal foundation | Cup shape, boning, and waist stability |
High-low satin dress | Woven dress or skirt block | Moderate wearing ease | Bias growth and hem relaxation |
Mesh panel dress | Fitted block with lining layer | Fit controlled primarily by the inner layer | Transparency and edge stability |
These are starting principles rather than fixed formulas. A poor block cannot be rescued by adding an attractive diagonal line. If the starting bust point, shoulder angle, or ease is wrong, every later correction becomes more difficult and less reliable.
Measurements Beyond the Basics
Bust, waist, and hip measurements are not enough for many asymmetric dresses. Diagonal necklines, cutouts, high-low hems, and one-shoulder structures create positional lengths that cannot be estimated from horizontal circumferences alone.
- Shoulder-neck point to the opposite underarm or neckline endpoint
- Shoulder-neck point to bust apex and bust-point height
- Diagonal neckline length and intended neckline depth
- Front waist length on each side and back waist length
- Bust span, underbust circumference, and across-front width
- Armhole depth and underarm height on the unsupported side
- High hip, full hip, slit height, and cutout position
- Center-front, side, and center-back finished dress lengths
Keep body measurements, finished-garment measurements, and pattern measurements separate. They are not interchangeable. The paper pattern may include dart suppression, seam shape, turn-of-cloth, and process allowances. The finished garment reflects the sewn and pressed result. Clear separation prevents vague comments such as “the waist is too large” when the real cause is fabric growth, misplaced shaping, or a lining that is pulling the shell.
Ease, Stretch, and Recovery
Ease should be distributed according to function. Tightening the entire upper body does not automatically make an asymmetric neckline more secure. The unsupported edge may need localized contouring while the back, bust, and arm movement still require room.
For stretch fabrics, test extension and recovery in the exact direction used on the garment. A simple calculation is: stretch percentage = (extended length – original length) / original length x 100. A 10 cm sample that stretches comfortably to 13 cm provides about 30% stretch. If it returns to 10.5 cm instead of 10 cm, that small permanent growth can still loosen a neckline or create hip bagging during wear.
Stable woven fitted dresses normally require positive wearing ease. Stretch wovens may use reduced positive ease. Stable knits can use zero or slight negative ease, while high-recovery knits may accept more. Draped styles often need local volume over a more controlled inner layer. These are not universal numbers; fabric recovery, thickness, seam construction, lining, and the brand’s fit standard determine the final result.
Fabric Behavior and Support
Fabric is part of the pattern equation. A calico toile can confirm seam placement, but it cannot fully predict how satin, chiffon, mesh, velvet, jersey, or sequins will behave. Satin highlights seam puckering and can lengthen on the bias. Chiffon shifts during cutting and usually needs an inner layer to carry closures. Mesh can stretch at exposed edges. Jersey may change after heat and stitching. Velvet has nap direction and can creep. Sequined fabric adds weight and may pull down one side of the dress.
Support may include stay tape, clear elastic, fusible or sew-in interfacing, power mesh, cups, underwire, boning, an internal waist stay, silicone grip elastic, or full or partial lining. Add support to solve a specific problem rather than as a reflex. A stiff facing may stop an edge from growing but make it stand away from the body. A waist stay may stabilize a heavy drape more effectively than making the neckline tighter.
For fitted asymmetric dresses, development works best when fabric sourcing, pattern work, lining, support, and sample fitting are reviewed together. Treating them as separate tasks is one of the fastest ways to create a sample that looks right on the hanger and fails on the body.
How Do You Draft the Asymmetric Design?
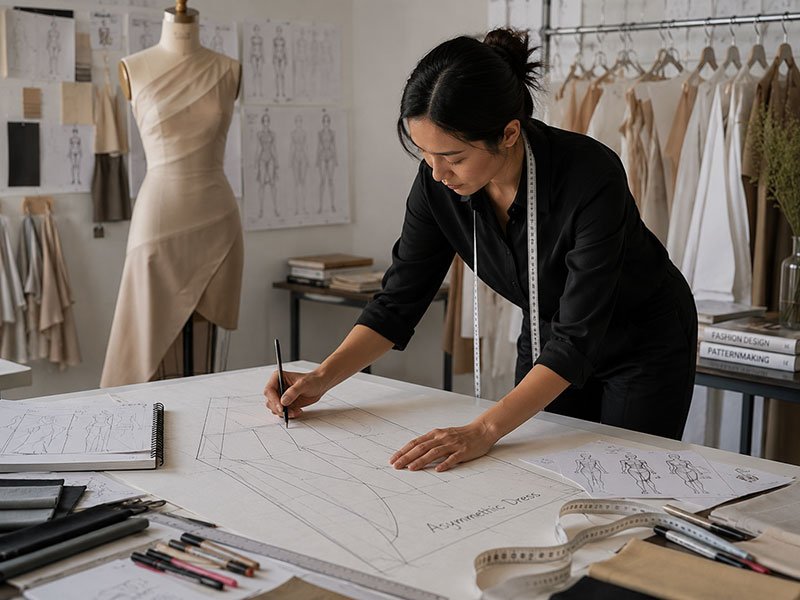
Draft the design on a complete front or back pattern, keep the original block visible, and place every asymmetric line using body landmarks rather than the sketch alone. Convert visual features into sewable pieces, preserve the original shaping value, check grain direction, and walk all joining seams before adding seam allowances.
Opening and Marking the Block
Trace the approved block without seam allowance. Mark the center line, bust line, waist, hip, bust apex, original darts, grainline, shoulder points, and notches. Flip the half block around the center line to create a complete front or back. Keep the original lines in a different color or on a locked CAD layer so every later change can be traced.
Before drawing the asymmetry, mark the intended feature on a body or fitting form whenever possible. A fashion sketch may show a beautiful diagonal but rarely defines exact bust coverage, underarm height, shoulder width, cutout security, or what happens when the wearer sits. Translate the visual idea into measurable points: where the line starts, where it crosses the body, where it ends, and which body landmarks it must avoid or control.
This is also the stage to decide the likely construction. A neckline that appears to be one simple line may actually require a facing, lining, clear elastic, or internal panel. A diagonal waist line may need to absorb dart value. A drape may need an anchor inside the waist. Pattern drafting becomes more reliable when the sewing and support logic are considered before the pieces are separated.
One-Shoulder and Diagonal Necklines
Begin with a full fitted bodice or dress block. Establish the retained shoulder width, then draw the neckline toward the opposite armhole, underarm, or side seam. Check the supported shoulder, unsupported edge, bust relationship, and back balance as one system.
Localized contour reduction is often needed along the diagonal edge. As a cautious starting point, a fitted toile may reveal a total local reduction of roughly 0.5-1.5 cm, depending on size, fabric, neckline depth, and internal support. This is not a production rule. Pin the excess on the body and transfer it into a dart, seam, or panel rather than simply trimming the edge shorter. Over-reduction can create pulling, indentation, or underarm discomfort.
Test the sample while the wearer raises both arms, reaches forward, turns, and sits. A neckline that appears secure during a static fitting may open when the shoulder moves. The lining and support layer must be fitted at the same time because an otherwise correct shell can still rotate or gape when the inner construction is wrong.
Hems, Drapes, and Volume
For an asymmetric hem, establish measurable high and low points instead of drawing the curve by eye. Record the center-front, wearer-left side, wearer-right side, and center-back finished lengths. Blend the transition smoothly unless the design intentionally includes a point or corner.
Fluid skirts should relax before the final hem is approved. Bias sections can lengthen after cutting, steaming, sewing, or hanging. Depending on fabric weight and construction, the sample may need several hours or overnight before rebalancing. This is especially important for satin, chiffon, crepe, and flared panels. The corrected hem must be transferred back to the paper pattern rather than adjusted only on the physical sample.
Drapes and gathers are usually created through slash-and-spread development. Record the original seam length, expanded length, gather start and stop points, and distribution notches. A ratio near 1.3:1 creates light fullness in many fine fabrics, while 1.5:1 to 2:1 produces more visible gathering. Thick velvet, bonded fabric, or sequins often require less because extra volume quickly becomes bulky and heavy.
Panels and Seam Engineering
Treat asymmetric panel lines as construction seams, not surface decoration. Once the diagonal line is approved, separate the pieces and determine whether it can absorb all or part of the existing dart value. Place the pieces in their sewn position, close the shaping, and smooth the seam around the bust, waist, or hip so it does not form a point or hollow.
Walk every joining seam from notch to notch. Equal numerical length is necessary, but it is not enough. Two curves can measure the same and still be difficult to sew if they oppose each other too strongly or if the grain directions react differently. Add intermediate match points to long diagonal seams so an operator does not stretch one layer to meet the other.
Review sharp corners and narrow points before adding seam allowance. A triangular panel may look elegant on paper but leave too little internal space for turning, clipping, and pressing. Refine the shape only as much as needed to make it repeatable. The aim is not to dilute the design; it is to preserve the design through sampling and production.

How Are Darts, Support, and Fit Controlled?
Control darts, seam shaping, neckline tension, lining, and internal structure as one system. Dart value may move into diagonal seams, gathers, pleats, or panels, but it cannot disappear. Fit should be checked for bust support, neckline security, shoulder balance, side-seam position, and movement before the visual design is approved.
Dart Transfer and Shaping
Dart manipulation changes the location of shaping while preserving the amount required by the body. Close the original dart and open the new location around the bust apex. In an asymmetric design, the left and right sides can use different dart positions as long as the finished bust volume, waist length, and contour remain balanced.
Useful destinations include the shoulder, neckline, armhole, side seam, diagonal waist seam, princess seam, gathered area, pleat, or draped panel. When a new seam passes close to the bust apex, part or all of the dart can be absorbed into it. If the line sits too far away, forcing all shaping into that seam may distort the panel; some dart value may need to remain elsewhere.
Do not end a firm dart directly at the bust apex. Move the point back and shape the legs according to fabric and bust volume. Soft fabrics often need a less abrupt dart. Firm fabrics can support a more defined shape. After transfer, true the seam in its sewn position and walk both sides before adding notches and seam allowance.
Bust and Neckline Support
An asymmetric dress often removes one of the usual sources of support: a second shoulder, a full back, or a balanced neckline. The missing support must be replaced inside the garment. Common systems include contoured bust seams, princess seams, cups, underbust seams, underwire, vertical or diagonal boning, power mesh, internal waist stays, grip elastic, and stable side panels.
Support should not come entirely from making the neckline tighter. When the edge carries the whole dress, it can dig into the body, distort the bust, and still fail to stop rotation. A better design shares the load through the retained shoulder, side seams, waist, lining, and internal foundation.
- Localized neckline contour reduction may begin around 0.5-1.5 cm in a toile, then be verified on the body.
- Clear elastic is sometimes cut approximately 2-8% shorter than the edge, but recovery and puckering must be tested.
- Boning channels are often spaced according to seam layout and support needs rather than a fixed formula; roughly 6-12 cm may be a useful trial range in some fitted bodices.
- Early fit samples may keep about 1.5-2.5 cm seam allowance at selected side seams to allow controlled correction.
These are only trial ranges. Fabric, size range, dress weight, neckline depth, and the chosen foundation can change them substantially. The outer fabric, lining, cup, elastic, and boning should be fitted together because a correct shell can still fail when the support layer is cut on the wrong grain or at the wrong length.
Diagnosing Fit Problems
Describe fit problems through evidence rather than reactions such as “it feels wrong.” Drag lines point toward tension, but similar symptoms can come from the pattern, fabric, sewing, pressing, or lining. Use controlled tests to isolate the source.
Visible Problem | Likely Cause | First Check | Typical Technical Response |
Diagonal neckline gapes | Excess contour or edge growth | Pin local excess and compare cut vs. finished edge | Transfer contour reduction into a dart or seam; stabilize the edge |
Dress rotates toward one shoulder | Unequal weight, grain, or tension | Check side seams, lining, and drape weight | Rebalance the pattern and redistribute support |
Unsupported edge cuts in | Edge too short or underarm too high | Release the edge before reshaping | Restore length and lower or refine the curve |
Side seam moves forward | Insufficient front width or bust volume | Compare front and back balance | Add front balance and revise bust shaping |
Bust collapses | Insufficient volume or internal support | Test shell with and without foundation | Add shaping, cups, seams, power mesh, or waist anchoring |
Diagonal seam puckers | Curve mismatch or poor handling | Walk seams and inspect notches | True curves, improve match points, and refine sewing method |
Hem drops on one side | Bias growth or uneven weight | Hang and remeasure the sample | Rebalance the hem and update the paper pattern |
Lining pulls the shell | Lining too short or differently balanced | Release lining and compare layers | Correct lining length, grain, and attachment points |
Work in layers. Release the lining and see whether the shell improves. Remove a heavy drape temporarily. Open a side seam. These small experiments prevent the pattern from being altered to compensate for a sewing or support problem.
Movement and Wear Tests
A sample that looks correct while standing can fail in real use. Ask the wearer to raise both arms, sit, walk, turn, reach forward, bend slightly, climb a step, and rotate the torso. Watch whether the neckline lifts, the dress rotates, the underarm cuts in, the zipper twists, or the hem changes position.
Use the intended undergarment or built-in cup system. Fit can change significantly between a standard bra, strapless bra, adhesive cup, and integrated support. For party and occasion dresses, test sitting and dancing-type movement because the wearer may remain active for hours rather than posing for a photograph.
Record movement comments separately from static fit comments. “Neckline sits correctly when standing but opens during right-arm lift” is actionable. “Neckline needs improvement” is not. Good asymmetric fit is not a frozen front-view shape; it is a controlled garment that keeps its intended position throughout normal wear.

How Do You Prepare the Pattern for Sampling?
Prepare the sample pattern by truing every seam, marking grainlines and match points, adding construction-specific seam allowances, developing lining and support pieces, and issuing clear single-layer cutting instructions. Each piece should identify the wearer’s side, fabric face, cut quantity, material layer, size, and revision date.
Truing and Seam Walking
After the design is developed, place the pieces together as they will be sewn. Check shoulders, side seams, waist seams, diagonal panels, neckline transitions, armholes, darts, lining joins, and hems. Walk each seam from one control point to the next, comparing both length and curve behavior.
Close darts temporarily and true the outer edge in its sewn position. Pay special attention to necklines, cutout corners, shoulder points, and hems. A smooth paper line can form a protruding or recessed corner after turning. Acute angles may need reduced allowance, clipping instructions, or a small reinforcement piece.
CAD systems measure seam length quickly, but equal numbers do not guarantee an easy operation. A long convex curve joined to a shorter concave curve may require intermediate notches, controlled easing, clipping, or a revised seam shape. The sample pattern should be technically sewable, not merely geometrically complete.
Grainlines, Notches, and Labels
Every asymmetric piece needs its own grainline. Do not assume all pieces follow the original center-front direction. Mark straight grain, intentional bias angle, nap direction, print direction, sequin direction, stripe or plaid references, and any permitted rotation.
For draped pieces, the grain may control the entire visual effect. A marker planner should not rotate the piece for fabric efficiency unless the pattern specifically allows it. Directional fabrics such as satin, velvet, and sequins can look different when turned 180 degrees even if the shape still fits.
- Use notches at bust, waist, hip, dart legs, gather start and stop points, pleat folds, drape anchors, panel intersections, zipper stops, lining joins, and hem reference points.
- Use different notch combinations for front, back, and unique asymmetric joins.
- Add intermediate match points to long diagonal seams so cumulative stretching does not move the final corner.
- Label style number, piece name, wearer’s side, size, cut quantity, material layer, grainline, and revision date on every pattern piece.
Seam Allowance and Internal Pieces
Seam allowance should follow the fabric and construction method rather than one universal factory number. Narrow enclosed neckline seams may use around 0.7-1.0 cm. Many panel seams use about 1.0 cm. General side seams often use 1.2-1.5 cm, while selected development samples may retain 1.5-2.5 cm for fitting. Hems may range from narrow rolled finishes to 2-4 cm allowances depending on fabric and design.
These are working ranges, not rules. Transparent mesh may require a narrow clean finish. Satin may need enough allowance for control without adding bulk. A curved seam may need clipping. A sharp point may need reduced allowance. Write the intended allowance directly on the pattern and in the operation sheet so the sample room does not rely on memory.
Internal pieces may include full lining, bodice lining, partial lining, facing, power mesh, cup pockets, boning channels, underbust support, a waist stay, modesty panels, or underlayers for cutouts. The lining should not always copy the shell exactly. It may need different ease, shorter length, reduced drape volume, or a more stable grain direction.
Cutting and Sample Instructions
Asymmetric pieces are usually safest to cut in a single layer. The cutting instruction should state whether the fabric is face up or face down and whether the piece is cut once or as a pair. Before cutting the full sample, review the complete layout and confirm that the feature appears on the correct wearer’s side.
- Check grain, nap, shine, pile, and sequin direction before placing the first piece.
- Confirm print or motif placement across the bust, diagonal seam, and hem.
- Number similar panels so left and right components remain together.
- Stay-stitch or stabilize high-risk diagonal edges immediately after cutting.
- Allow bias or fluid skirt pieces to rest when the fabric is known to grow.
For high-risk fabrics, cut and sew a trial panel before committing the complete sample. A short test can reveal curling, edge growth, sequin clearance problems, seam slippage, or pressing marks. That small investment is usually faster than correcting a complete dress after the fabric has already been cut.

How Do You Test, Grade, and Approve the Pattern?
Test the dress through a structured sample sequence, record every fit correction, and verify movement as well as appearance. Grade the full asymmetric pattern from controlled body reference points. Before bulk production, approve the final pattern, graded sizes, measurements, fabric, trims, support system, workmanship, and pre-production sample.
First Sample Review
The first toile should answer structural questions before the team spends time perfecting surface details. It does not need flawless finishing, but it should reveal whether the silhouette, neckline, shoulder, bust, waist, hip, side seams, drape, cutout coverage, hem relationship, closure, and movement work together.
Use the intended fitting conditions. A low-back dress fitted over a standard bra can give a misleading result if the final garment uses built-in cups. Photograph the sample from the front, back, and both sides at consistent camera height. Mark the center line, bust, waist, hip, and intended high and low points.
Write measurable comments. “Remove 1 cm from the diagonal neckline between the shoulder point and front notch” is useful. “Make the neckline tighter” is not. Separate pattern issues from sewing defects. A stretched neckline may come from handling, and a puckered panel may come from machine feed rather than an inaccurate seam length.
Fit Records and Revision Control
Every sample should carry a clear version number. Record the fitting date, size, model measurements, fabric, lining, photographs, measurement results, pattern comments, construction changes, responsibilities, and approval status. Use wearer’s left and wearer’s right consistently so no one has to guess which side a comment refers to.
When one correction affects several pieces, update them together. Lowering an underarm may change the front, back, lining, facing, elastic length, and support panel. Updating only the shell creates a new mismatch at the next sample. Archive rejected versions rather than leaving them in the active folder.
A clean development sequence may include first prototype, fit sample, revised sample, salesman or photography sample, and pre-production sample. Not every project needs every stage, but the team should know which sample is testing concept, which is testing fit, and which is the final manufacturing reference.
Grading the Asymmetry
Grade the complete left and right sides; do not grade one half and mirror it. Some points move with body growth, while others need controlled visual placement. The bust apex, shoulder width, armhole depth, and waist move according to the size rule. A cutout must remain within coverage boundaries. Drape volume may increase less than body circumference. Hem differences should remain visually proportional.
Inspect the graded nest for crossed lines, distorted curves, shrinking seam allowances, and rapidly changing angles. A diagonal neckline that fits the base size may become too open in a larger bust size or too high at the underarm in a smaller size. Wide size ranges may require separate shaping rules instead of simple proportional scaling.
High-risk fitted styles should be tested beyond the base size. Many teams review at least one smaller or larger size, depending on the commercial range and the most likely risk. The exact validation plan should reflect the brand’s size architecture, fit model, fabric, and sales market rather than a generic grading formula.
Pre-Production Approval
The pre-production sample should use approved or genuinely bulk-representative materials. A substitute fabric can hide problems in stretch, weight, shine, opacity, support, or drape. The physical sample and technical file should be approved together: the sample communicates appearance and hand feel, while the file controls measurements, tolerances, grading, materials, and construction.
Approval Item | Practical Check | Production Risk if Missed |
Pattern version | Matches the latest approved file and sample comments | Wrong shape or obsolete correction cut in bulk |
Size specification | Finished measurements and tolerances are confirmed | Inconsistent fit across pieces and sizes |
Shell fabric | Weight, stretch, recovery, shade, and direction are approved | Different hang, support, or visual appearance |
Lining and support | Length, ease, opacity, cups, boning, elastic, and interfacing are verified | Twisting, exposure, collapse, or gaping |
Construction | Seams, stitches, finishing, pressing, and assembly order are confirmed | Puckering, weak joins, or inconsistent workmanship |
Orientation | The asymmetric feature appears on the correct wearer’s side | Reversed cutting or mirrored production |
Hem and drape | Final high-low points and drape anchors are checked after relaxation | Uneven bulk appearance or one-sided pulling |
Trims and packaging | Zipper, labels, hardware, folding, and protection are approved | Functional issues, distortion, or presentation damage |
Highlight critical-to-quality points on the inspection sheet. For asymmetric dresses, these often include neckline length, shoulder position, bust balance, side-seam alignment, cutout coverage, drape attachment, zipper position, hem difference, and wearer-side orientation. Bulk production becomes reliable only when the approved pattern, sample, bill of materials, operation method, and inspection criteria all describe the same garment.
From Pattern Concept to Custom Production
A strong asymmetric dress begins with a visual idea, but it succeeds through disciplined pattern engineering. The full pattern must remain balanced. The fabric must support the intended line. Darts and internal construction must manage the body in three dimensions. The sample must be tested in movement. The graded pattern must preserve coverage and proportion. Finally, the approved standard must be transferable from the sample room to repeat production.
Duolan Apparel develops fashion dresses, occasion dresses, party dresses, fitted and bodycon dresses, fashion sets, and related fashion-led products for established brands, buying teams, sourcing offices, and designer-led labels. Its documented manufacturing network includes 16 self-operated women’s fashion factories, more than 20 long-term satellite factories, 300 sewing lines, over 50 flexible quick-response lines, and integrated pattern, sample, fabric, process, quality, and order-coordination resources. Project capacity, timing, and line allocation should always be confirmed against the exact style, materials, quantity, and delivery calendar.
For a custom asymmetric dress development review, send the tech pack, sketch, reference image, or original sample; target fabric or required fabric behavior; size chart and fit standard; intended asymmetric feature; color and trim requirements; expected quantity by style and color; target delivery window; sales market; and any testing or compliance requirements. Clear inputs allow the pattern and sample teams to assess fit risk, construction feasibility, material behavior, and production readiness before sampling begins.
Share:
Our Services
Categories
Table of Contents
Here, developing fashion collections is more than manufacturing garments — it’s a collaborative process focused on transforming ideas into well-executed, market-ready products. From fabric sourcing and sample development to scalable production and delivery coordination, every stage is built to support quality, consistency, and efficient collection launches across global markets.

