 Skip to content
Backless Dress Construction Explained: How Do Support, Pattern, Fabric, and Fit Work?
Your trusted Women’s Apparel Development & Manufacturing Partner from China
- Jerry
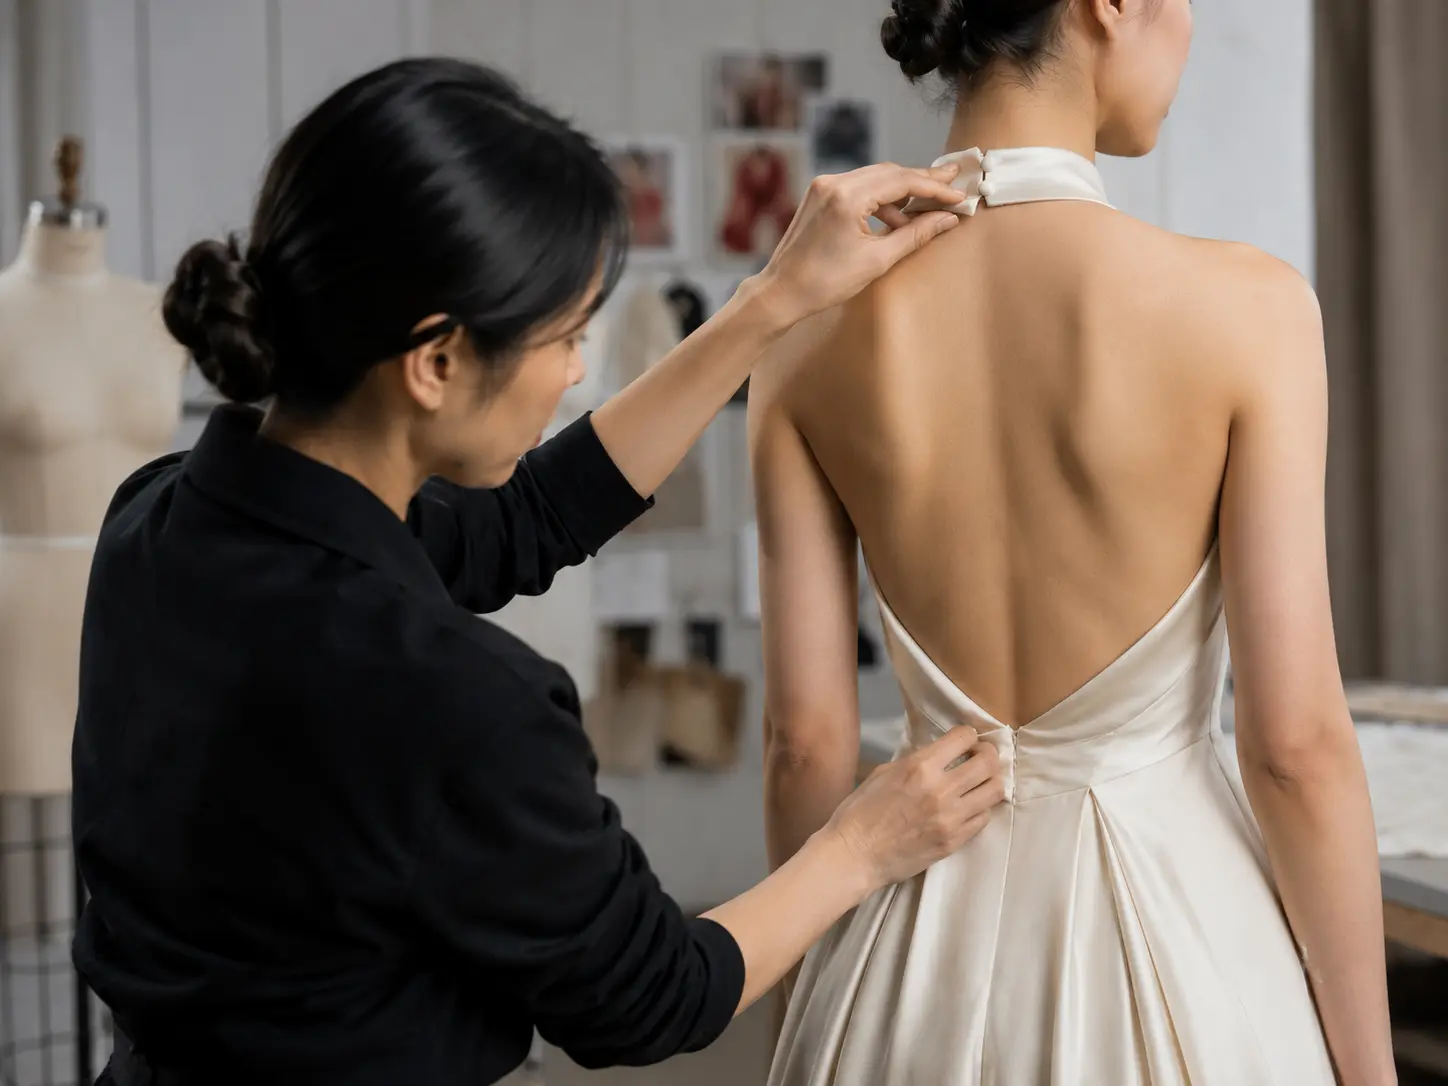
A backless dress often looks effortless. The front may appear smooth, the shoulder line may be delicate, and the open back may seem to exist simply because fabric has been removed. In reality, removing the back changes the entire engineering of the garment. A conventional dress distributes tension across the front bodice, shoulders, side seams, waist, and back panel. Once much of that rear structure disappears, every remaining component must work harder, and small technical errors become visible quickly on the body.
A backless dress stays secure by redirecting support from the missing back panel into the front bodice, side seams, straps, waist anchor, lining, and internal structure. Its performance depends on matching the opening shape with the correct pattern, fabric recovery, cups, boning, edge stabilization, and movement testing so the garment remains balanced throughout wear.
That is why two dresses with nearly identical front views can perform completely differently. One stays close to the body through dinner, photography, and dancing, while the other begins to gape at the side bust before the wearer leaves the fitting room. The difference is rarely one dramatic mistake. It is usually a chain of decisions involving back depth, strap position, fabric recovery, cup shape, waist tension, and assembly sequence. Follow that chain, and the apparent simplicity of a backless dress begins to reveal the careful work hidden inside it.
What Is Backless Dress Construction?
Backless dress construction is the complete system that keeps an open-back garment balanced, secure, and wearable after much of the rear bodice has been removed. It includes the pattern shape, side coverage, straps, lining, cups, boning, waist control, closures, and edge stabilization. The correct system depends on opening depth, fabric behavior, dress weight, size range, and support expectations.
What Makes a Dress Backless?
A dress is not technically backless simply because the rear neckline is lower than usual. The construction changes significantly when the opening removes enough fabric to affect shoulder stability, side-seam position, waist control, or the wearer’s ability to use a conventional bra. A shallow V-back that finishes above the bra band can often be developed from a standard fitted bodice, while a low scoop reaching toward the waist usually needs more deliberate support and stronger control through the side body.
The opening should be defined through measurable points rather than visual terms such as low, wide, or dramatic. A useful technical package records the lowest point of the opening, its width at several horizontal levels, the distance from the opening to the side seam, strap positions, and minimum side-bust coverage. These details show how much of the original rear support has been removed and which remaining parts must take over its function.
- Back depth measured from the high shoulder point or back neck point
- Lowest opening point measured relative to the natural waist
- Opening width recorded at upper, middle, and lower back levels
- Finished strap width, placement, and adjustment range
- Side-bust coverage and intended undergarment solution
Which Back Shapes Need Different Builds?
Different back shapes create different tension paths. A low V-back directs force diagonally from the shoulder area toward the waist, while a wide scoop places stress along a long curved edge. A halter design sends more of the load toward the neck and underbust, and a cross-back design distributes tension through two diagonal straps. A cowl back deliberately includes extra fabric, so the goal is to control the drape rather than force the opening tightly against the body.
The shape also determines where distortion is most likely to occur. A V-back can lengthen along the bias, a scoop may gape at its deepest curve, and a lace-up back can distort around poorly reinforced loops. The silhouette name alone is therefore not enough to select the construction. The pattern, material, strap system, and garment weight must be reviewed together so the actual load path is supported rather than guessed.
Back shape | Main support path | Common construction approach | Main development risk |
Low V-back | Shoulder to waist diagonals | Stable straps, taped edges, fitted waist | Diagonal edge growth |
Wide scoop back | Side body and waist | Controlled elastic, lining, waist anchor | Gaping at the curve |
Halter back | Neck, underbust, side seams | Halter band, cups, underbust support | Neck pressure |
Cross-back | Diagonal straps | Fixed or adjustable straps, stable front bodice | Uneven strap tension |
Lace-up back | Waist, loops, lacing | Reinforced loops, facing, selective boning | Distortion around loops |
Cowl back | Shoulders and waist | Drape control at shoulder and waist | Excess sagging |
Illusion back | Mesh panel and perimeter seams | Stable mesh, reinforced joins | Mesh stretch or seam failure |
How Does Back Depth Affect Stability?
Back depth affects stability because every section removed from the rear bodice reduces the fabric available to control downward and sideways movement. The deeper the opening becomes, the more support must be transferred to the waist, straps, front bodice, or an internal foundation. Width is equally important. A narrow opening may extend low while preserving useful fabric near the side seams, whereas a wide opening can weaken the upper garment even when its lowest point is not especially deep.
Small pattern changes can have a surprisingly large effect. Lowering an opening by roughly 10–20 mm may move the edge into a weaker grain direction or reduce the remaining side panel enough to change coverage and tension. This is especially noticeable in fitted satin, crepe, and other woven materials with limited recovery. Whenever the opening changes, the bust coverage, side-seam position, strap tension, and waist anchoring should be checked again on a fit model rather than approved from a flat pattern alone.
How Do the Main Components Work Together?
Backless construction works as a coordinated system. The outer fabric creates the visual design, but cups may shape the bust, boning may resist collapse, lining may control the shell, straps may manage upper tension, and an internal waist structure may limit downward movement. The balance between these parts matters more than the strength of any single component. Adding rigid boning to a loose waist does not stop the dress from slipping, and tightening the straps cannot correct a cup positioned too low.
A stable design has a clear answer to three questions: what shapes and contains the bust, what prevents the garment from moving downward, and what keeps the open edge close to the body. If every answer depends on one narrow strap or one line of elastic, the design may be too fragile for extended wear. Strong construction spreads the load across several components so the wearer can move naturally without repeatedly adjusting the garment.

How Does a Backless Dress Stay Up?
A backless dress stays up by redirecting support into the front bodice, side panels, straps, and waist. Cups shape the bust, boning prevents collapse, and a waist stay can carry part of the garment’s weight. Final stability comes from balanced tension, because no single component can compensate for poor pattern shape, excessive skirt weight, or weak fabric recovery.
Do Built-In Cups Provide Support?
Built-in cups can provide coverage and shape, but they do not automatically create lift. A soft foam cup stitched only to the lining may prevent show-through and create a smoother profile, yet it may do little to stop the dress from moving. For stronger support, the cup must connect to a stable structure such as an underbust seam, cup cradle, power-mesh panel, side boning, or fitted waist. The cup should sit against the body rather than float inside the outer shell.
Cup placement is often more important than cup thickness. The bust apex should align with the wearer’s natural apex, while the lower cup edge should sit at the intended underbust level. A cup placed too high can flatten the lower bust and leave empty space beneath it. A cup placed too low can weaken the neckline and make the front appear loose. Larger size ranges may need separate cup groups or revised internal patterns rather than one shallow cup enlarged proportionally across all sizes.
How Do Boning and Waist Stays Work?
Boning and waist stays solve different problems. Boning keeps the bodice upright and resists vertical folding, while a waist stay anchors the garment around the body so the full weight does not hang from the straps. Boning is commonly positioned along princess seams, side seams, or front panels. In fashion dresses, practical widths often fall around 4–12 mm, although the correct choice depends on the channel, fabric, dress weight, and required flexibility rather than a universal number.
A waist stay may be made from petersham ribbon, firm elastic, woven tape, or another stable internal material. It is secured to the inner structure and closed independently or together with the dress fastening. The strongest structure is not always the best one. Excessive rigidity can create visible ridges, heat, or discomfort. The aim is enough resistance to preserve the silhouette while allowing the wearer to sit, breathe, and move without feeling trapped inside the dress.
Component | Main function | Typical placement | Common failure |
Foam cup | Shape and coverage | Front bust | Cup floats away from body |
Boning | Prevents bodice collapse | Princess, side, or front seams | Visible ridges or discomfort |
Waist stay | Resists downward movement | Natural waist | Too loose to anchor |
Underbust elastic | Controls lower bust | Below cups | Rolling or excess pressure |
Power mesh | Adds controlled support | Inner front or side body | Wrong stretch direction |
Grip elastic | Maintains edge contact | Neckline or open-back edge | Uneven tension or irritation |
Shoulder strap | Provides upward support | Front bodice to shoulder | Stretching or pressure |
Halter strap | Lifts and draws inward | Neckline to neck | Neck strain |
Which Straps Control Tension?
Straps control both upward pull and the direction in which the bodice is held against the body. A straight shoulder strap lifts vertically, a halter strap pulls upward and inward, and a cross-back strap creates diagonal tension. Narrow straps look delicate but concentrate pressure into a smaller area, which may suit a lightweight slip dress yet become uncomfortable on a heavily embellished bodice or long layered skirt. Wider straps spread the load but can change the visual character of the design.
Attachment position should be tested as carefully as strap length. A strap placed too close to the neck may pull the front neckline inward, while one placed too far toward the shoulder may slide or pull the side bodice outward. Fixed straps require precise finished-length control; adjustable straps offer flexibility but add rings, sliders, and bartacks that must withstand repeated tension. During fitting, the wearer should sit, reach, raise both arms, and turn so the team can see whether the bodice returns to its intended position.
Is an Inner Corset Required?
An inner corset is not required for every backless dress. A light jersey style with cross straps may rely on stretch recovery, negative ease, and controlled elastic. A fitted satin occasion dress with a low back, defined bust, and heavy skirt may need cups, boning, a waist stay, and a separate inner bodice. The phrase inner corset can describe anything from a fully boned cup-and-cradle foundation to a lighter power-mesh layer with selective support.
Extra structure becomes more useful when several risks appear together: a very low opening, minimal straps, a shaped bust, heavy fabric, a wide size range, or long periods of movement. Even then, the best answer is the lightest structure that reliably meets the fit requirement. More boning can make the dress rigid, stronger compression can distort the shell, and multiple layers can trap heat. The internal foundation should create confidence without becoming the main thing the wearer notices.

Which Fabrics and Linings Work Best?
The best fabrics and linings are those whose stretch, recovery, weight, drape, and opacity match the intended structure. Stable woven fabrics create clean open-back edges but allow little fitting error. Stretch fabrics follow the body but can grow during wear. Linings, underlinings, and support layers should reinforce the dress without changing its drape, surface smoothness, or comfort.
Which Fabrics Hold a Clean Edge?
A clean open-back edge begins with a material that can maintain its shape through cutting, sewing, pressing, and wear. Firm crepe, stable satin, compact woven blends, and selected structured jerseys can produce controlled V-back or scoop edges when reinforced correctly. Bias and curved edges need additional care because they are more likely to stretch. Soft satin, chiffon, and fine mesh may change shape simply from hanging, handling, or being fed unevenly through the sewing machine.
Staystitching, narrow tape, controlled interfacing, organza strips, or clear elastic can preserve the original pattern length, but the method must suit the shell. A heavy fusible may stabilize the edge yet show through satin, while a rigid tape may make a soft jersey stand away from the body. Cut pieces should be kept flat, vulnerable edges should be stabilized early, and matching edges should be sewn in consistent directions. A clean edge is the combined result of grain control, reinforcement, seam balance, and careful pressing.
How Do Stretch and Recovery Affect Fit?
Stretch shows how far a material can extend, while recovery shows how closely it returns to its original dimensions after the force is released. A fabric may feel comfortably stretchy during a fitting yet recover poorly after several hours, allowing the waist, side seam, or back opening to loosen. Horizontal stretch affects body fit and bust containment. Vertical stretch affects length, waist position, and the load carried by the shoulder or halter straps.
Negative ease is often used in fitted stretch dresses, meaning the garment is smaller than the body so the fabric provides hold. The suitable reduction varies with stretch and recovery and should not be applied blindly across the bust, waist, and hips. Too much negative ease can pull the side seams forward, flatten the bust, or make the edge cut into the skin. Practical development compares swatch dimensions before extension, under controlled extension, after release, and after repeated cycles so the pattern is based on actual fabric behavior.
Which Linings Add Structure?
A lining should support the shell while remaining compatible with its movement and drape. Stable woven linings work well with structured woven shells but can restrict jersey or stretch satin. Stretch tricot linings move more comfortably with bodycon garments, although they may provide limited shaping. Power mesh is useful when controlled stretch and stronger recovery are needed, particularly around the bust, side body, or inner waist. Its direction of stretch must be planned carefully because rotating the material can change its holding strength.
Underlining is different from ordinary lining because it is attached to the shell pieces and handled as part of the outer layer. It can improve opacity, support embellishment, reduce seam impressions, and stabilize delicate fabric before assembly. The most reliable build assigns separate jobs to separate layers: the shell creates the visual effect, the underlining controls the shell, the structural layer supports the body, and the skin lining covers internal seams. Trying to make one thin lining perform every task usually produces compromise.
Material or layer | Main advantage | Primary risk | Practical control method |
Stable satin | Polished surface and clean silhouette | Puckering and visible internal lines | Selective underlining, balanced seams, controlled pressing |
Crepe | Good drape with moderate stability | Edge growth on curved or bias areas | Stay tape or lightweight reinforcement |
Fashion mesh | Transparency and layered visual effect | Weak support and seam stretching | Stable lining, reinforced joins, tested seam strength |
Power mesh | Controlled internal support | Excess compression or visible edges | Correct stretch direction and graduated tension |
Jersey | Comfort and body contour | Growth and weak recovery | Recovery testing, elastic control, planned negative ease |
Sequin fabric | Strong visual impact | Weight, abrasion, bulky seams | Clear seam allowances and reinforced inner support |
Stretch lining | Mobility and comfort | Insufficient shaping | Match recovery to shell and support needs |
Underlining | Opacity and shell stability | Added bulk or altered drape | Test as a combined fabric system |
Do Satin, Mesh, and Jersey Need Different Builds?
Satin, mesh, and jersey behave differently enough that they should not share one standard construction. Satin reveals seam puckering, cup edges, boning channels, and uneven pressing on its smooth surface, so the internal engineering must be clean and strategically placed. Fashion mesh may create transparency without meaningful support, while power mesh can function as a structural layer. The technical package should clearly identify which role the selected mesh is expected to perform.
Jersey follows the body and can make an open back easier to fit, but weak recovery can cause the edge to grow. Bindings, elastic finishes, and seams must stretch without remaining permanently longer. Sequin fabrics add weight, abrasion, and bulky seam allowances, so the inner layer often carries most of the load. Velvet needs careful pile control and low-pressure finishing, while chiffon usually depends on another layer for structure. Material choice should begin with the intended wearing performance, not appearance alone.

How Is the Pattern and Bodice Built?
The pattern and bodice are built by defining the open-back shape and redistributing the lost support into the bust, side body, straps, and waist. The front and back must remain balanced on the body, while the lining and internal structure control the opening. Accurate flat measurements are essential, but the final pattern must be confirmed through fitting and movement.
How Are Bust and Waist Balanced?
The bust and waist must work together. The bust area needs enough volume to contain the body without flattening or gaping, while the waist must be secure enough to prevent the entire dress from dropping. Bust shaping may come from darts, princess seams, separate cups, gathers, or moulded components. Princess seams offer controlled shaping and useful boning positions, while separate cups can create stronger three-dimensional form but require accurate cradle and underbust placement.
The waist seam does not automatically act as an anchor. It must fit the body, connect to the internal structure, and resist the downward load of the skirt. If the waist is loose, wearers often tighten the straps to compensate, which can lift the neckline temporarily while creating pressure elsewhere. Fit checks should compare the bust apex, underbust level, centre-front length, side-front length, waist level, and cup-to-side-seam transition. Measurements matter, but the three-dimensional relationship between these points determines whether the bodice truly works.
How Are Side Seams Shaped?
The side seam becomes especially important in a backless dress because it may be the main vertical connection between the front bodice and the waist. Its position affects side-bust coverage, visual balance, and the apparent width of the back opening. If it rotates forward, the dress may expose too much side bust and make the front panel look narrow. If it moves too far backward, the opening can appear smaller and the front may pull across the body.
Underarm height requires the same balance. Raising the side line improves coverage but may rub the arm; lowering it creates a cleaner open look but demands stronger cup placement and side support. Side panels may be conventional woven pieces, shaped power mesh, transparent illusion mesh, boned corset panels, or stretch jersey with planned negative ease. Illusion mesh may look visually absent, yet it still carries tension, so seam strength, recovery, and attachment area should be evaluated as structural features rather than decoration.
How Are Back Edges Stabilized?
Back edges are stabilized through pattern control, careful handling, and reinforcement that suits the fabric. Stay tape provides firm control, clear elastic adds flexible recovery, and narrow organza or self-fabric strips can support delicate woven shells. Fusible interfacing may work on opaque materials but can become visible through smooth satin or pale colors. The amount of tension also matters. Elastic that is too loose cannot prevent gaping, while excessive tension creates rippling, skin indentation, or a gathered appearance.
Sewing direction should remain consistent on symmetrical edges. If one side of a V-back is sewn from shoulder to waist and the other in the opposite direction, fabric feeding may create visible asymmetry. Common failures include a facing longer than the shell, lining rolling outward, unequal left-to-right elastic tension, and pressing that changes the edge length. Understitching can keep the lining inside, but it cannot correct a pattern edge that is fundamentally too long for the body.
How Are the Parts Assembled?
The assembly sequence should protect the shape of the shell and allow internal components to be installed accurately before they become inaccessible. A structured bodice may include the outer shell, underlining, cups, cradle, power mesh, boning channels, waist stay, lining, straps, zipper, hooks, and skirt attachment. The exact order varies, but the internal build should be mapped before sewing begins so one layer does not distort another or block access to a later operation.
A practical sequence often starts with stabilizing the shell, applying underlining, constructing the bust, building the inner support layer, installing boning and the waist stay, securing the straps, joining shell and lining, and then adding closures and the skirt. Heavily embellished fabrics may require delayed closing so the underside remains accessible, while a cowl back may need a different shoulder sequence to protect the drape. Technical packs should include internal views, seam types, component dimensions, elastic settings, and attachment locations rather than exterior fashion drawings alone.
- Inspect, identify grain direction, and stabilize vulnerable shell pieces.
- Apply underlining or structural layers required by the approved build.
- Construct bust seams, cups, cradle, and inner support panels.
- Install boning channels, waist stay, and reinforced strap anchors.
- Join shell and lining around the neckline and open-back edge.
- Install closures, attach the skirt, and complete final pressing and fit checks.

How Are Fit and Production Risks Controlled?
Fit and production risks are controlled by testing the complete dress on the body, recording measurable standards, and checking sensitive operations before full production. The main concerns are gaping, slipping, side-bust exposure, strap pressure, edge growth, seam distortion, and sample-to-bulk variation. A reliable process links fit approval, material approval, construction instructions, first-piece review, and inline inspection.
What Causes Gaping and Slipping?
Gaping usually means the open edge is longer than the body path it must follow, the fabric has stretched, or tension is pulling away from the opening. Slipping usually means the dress lacks a reliable waist anchor, the straps are too long, or the skirt weight is greater than the bodice can support. Several causes can create the same visual symptom, so tightening the nearest seam without tracing the load path may solve one issue while creating another.
A practical diagnosis starts by confirming the waist level and whether it remains in place after movement. The team then checks strap length and angle, cup position, side-seam location, and the open edge independently. Skirt weight should not be ignored. A long lined skirt, dense sequin fabric, or multiple gathered layers can pull a well-fitted bodice downward. In that situation, strengthening the waist attachment may be more effective than tightening the neckline and increasing pressure on the shoulders or neck.
How Is Movement Tested?
Movement testing reveals problems that a static fitting cannot show. The wearer should walk, sit, stand, raise both arms, reach forward, rotate the torso, bend slightly, and climb a step. The evaluator watches whether the waist returns to its original level, the cups remain aligned, the side seam rotates, and the open edge recovers. The objective is not to make the dress immobile, but to ensure that movement remains controlled and the garment returns to its intended position.
Short fitting videos from the front, side, and back can reveal strap imbalance or edge lifting that happens too quickly to observe in real time. Comfort feedback is equally important because a dress can look stable while placing excessive force on a halter strap or underarm edge. A practical internal wear check of roughly 10–20 minutes is often more informative than a two-minute review, although it is not a universal formal standard. Pressure, heat, rolling elastic, and repeated adjustment should all be recorded.
How Is Sizing Graded?
Backless dresses need careful grading because bust volume, shoulder width, back width, and waist circumference do not increase at identical rates. Applying the same increment to every edge can distort the opening or reduce support in larger sizes. Cup position is a common risk. If the side seam moves outward but the cup remains nearly unchanged, the bust apex may shift toward the center and side coverage may decrease. Strap attachment points may also need to move to preserve the intended angle.
Key grading checkpoints include cup depth and width, bust apex distance, underbust level, side-bust coverage, underarm height, strap length, back-opening width, the lowest opening point, waist-stay length, boning length, and closure position. At least one size above and below the base size should receive focused fit review for sensitive styles. Wider size ranges may need additional fit models or separate cup groups because functional consistency cannot always be achieved by enlarging the original pattern proportionally.
How Does the Sample Transfer to Bulk?
A sample transfers successfully to bulk only when every feature that created the approved fit is converted into a measurable instruction. An approved garment alone is not enough if the team has not recorded elastic settings, cup location, boning type, strap length, back-opening measurements, seam methods, and pressing requirements. The pre-production sample should use actual or formally approved bulk materials because changing the lining, cup, elastic, zipper, or mesh can alter fit even when the outer pattern remains unchanged.
First-piece review is especially valuable for satin, mesh, halter, corset, bustier, and very low-back styles. Small differences in elastic tension, seam feeding, cup placement, or pressing can be repeated across an entire order if they are not caught early. Inline inspection should focus on features most likely to drift, including strap symmetry, cup position, waist-stay length, side-seam alignment, edge tension, boning placement, puckering, lining visibility, and closure alignment. The goal is to reproduce the pattern, materials, tension, and operation sequence that made the sample work.
Production stage | Main control point | Practical record | Risk reduced |
Development sample | Construction concept | Structure notes and material options | Incorrect support direction |
Fit sample | Balance and movement | Fit comments, photos, revised measurements | Gaping, slipping, poor coverage |
Revised sample | Correction accuracy | Updated pattern and closed comment list | Repeated fit errors |
Pre-production sample | Final materials and workmanship | Approved sample, BOM, stitch and seam details | Sample-to-bulk mismatch |
First-piece review | Line interpretation | Measurements and visual approval | Process interpretation errors |
Inline inspection | Consistency during sewing | Measurement checks and defect records | Drift across the order |
Final inspection | Finished quality and packing | Appearance, function, quantity, packaging | Shipment-level defects |

From Open-Back Concept to Production-Ready Dress
A successful backless dress is not created by cutting away the rear bodice and adding a pair of straps. It is created by deciding where the missing support will go, selecting materials that can hold the intended shape, fitting the bust and waist as one system, and proving the garment through movement. The most convincing result feels natural on the wearer because the technical work is distributed quietly through the pattern, internal structure, and finishing rather than concentrated in one uncomfortable component.
For fashion brands and product teams, development becomes more predictable when the brief includes the intended back depth, size range, support level, target fabric, skirt weight, undergarment expectation, and wearing occasion. These details help the pattern and sample team identify risks before several rounds of revision are spent correcting the wrong structure. A good sample should not only photograph well; it should also provide a repeatable foundation for grading, material approval, first-piece review, and stable bulk production.
Duolan Apparel develops fashion dresses, occasion dresses, party dresses, and fitted silhouettes, including backless, halter, corset, bustier, satin, and mesh constructions. The manufacturing network described in the company’s objective facts includes 16 self-operated womenswear factories, more than 20 long-term satellite factories, 300 sewing lines, over 50 flexible quick-response lines, and SMETA 2-Pillar audit experience. These resources support structured sampling, fit correction, production planning, and repeat manufacturing for established fashion programs.
To request a technical review or quotation, send the available tech pack, reference images, original sample details, target fabric, size specification, estimated order volume, and required launch date. The development team can evaluate back depth, support structure, material behavior, fit risks, sample requirements, and production feasibility before the first prototype is started.
Share:
Our Services
Categories
Table of Contents
Here, developing fashion collections is more than manufacturing garments — it’s a collaborative process focused on transforming ideas into well-executed, market-ready products. From fabric sourcing and sample development to scalable production and delivery coordination, every stage is built to support quality, consistency, and efficient collection launches across global markets.

