 Skip to content
How Do You Grade a Backless Dress Without Losing Fit or Support?
Your trusted Women’s Apparel Development & Manufacturing Partner from China
- Jerry

A backless dress can look beautifully balanced in the base size and still fail badly after grading. The smaller size may pull tightly across the bust, while the larger size develops a loose back edge, slipping straps, or an opening that exposes more than the designer intended. These problems happen because a backless dress has fewer structural areas holding the garment against the body. The back opening, side seam, bust shaping, waist fit, and straps must work together as one support system.
To grade a backless dress successfully, start with an approved base-size pattern, apply separate horizontal and vertical grade rules, preserve the designed back opening, reposition straps and support components, and validate at least one smaller and one larger size. The pattern should follow body growth, fabric behavior, and construction – not be enlarged as one proportional shape.
For a fashion brand, the important question is not whether a CAD system can create several nested sizes. Almost any grading program can move points. The real question is whether every resulting size will still look intentional, stay secure during movement, and reproduce consistently in production.
One poorly controlled point can change the entire garment. A strap attachment shifted by only a few millimetres can pull the neckline outward. A back curve made slightly too long can create visible gaping. A waist increment placed in the wrong panel can rotate the side seam. That is why professional grading begins with the garment’s support logic, not with the software command.

What Makes Backless Dress Grading Different?
Backless dress grading is more difficult because the open back removes fabric that would normally stabilize the bodice. Bust growth, waist expansion, strap position, back-edge length, and opening depth must be graded as one connected system. A mathematically larger pattern can still fail if the garment loses support, exposes too much skin, or no longer follows the body.
Fit Depends on Fewer Anchors
A conventional fitted dress can use the shoulder line, upper back, center-back seam, and full armhole to hold the bodice in position. A backless style may remove several of those anchors. The remaining structure must therefore do more work.
Depending on the design, the garment may rely on:
- The waist seam or fitted waist panel
- Side seams and side-back panels
- Halter straps or shoulder straps
- An underbust seam
- Cups and internal elastic
- Boning or a waist stay
- Cross-back straps
- A lace-up or adjustable closure
This is why an open back cannot be treated as a decorative cutout added after an ordinary bodice has been graded. Its width and depth influence the entire balance of the garment.
A larger size usually needs more bust, waist, and torso room. However, increasing the back opening by the same proportion may leave too little fabric around the side body. The dress may fit the measurement chart while still feeling insecure or exposing more of the wearer’s side bust than intended.
The first technical question should always be: Which parts of the garment are carrying the load? Once those areas are identified, the grader can decide which points should move normally, which should move by a reduced amount, and which should remain controlled.
Back Shape Changes the Grade
Different open-back shapes behave differently during grading. A deep V back, a low scoop back, and a cross-strap design may all be sold as backless dresses, but they do not share the same structural risks.
Back construction | Main support area | Common grading risk | Main point to control |
Deep V back | Straps, side seams, waist | V becomes too wide or too low | V point and side-back width |
U-shaped back | Curved edge, waist, shoulders | Edge length increases and gaps | Finished curve length |
Halter back | Neck, underbust, waist | Neck pressure or bust drop | Halter angle and underbust tension |
Cross-back straps | Strap anchors and crossing point | Straps twist or move outward | Attachment position |
Lace-up back | Side panels and lacing gap | Gap becomes too wide or panels overlap | Lacing width and eyelet spacing |
Low-back corset | Cups, boning, waist stay | Larger sizes lose support | Cup, boning, and waist control |
Cowl back | Shoulder points and drape | Drape becomes too deep or collapses | Cowl volume and shoulder spacing |
A fitted U-shaped back must follow the body closely, so a few extra millimetres along the curved edge can create visible gaping. A cowl back intentionally contains extra length, but that length must form controlled drape rather than random looseness.
The grade must therefore preserve both the visual shape and the way the back is supposed to behave when worn.
Proportional Scaling Does Not Work
A backless dress should never be enlarged by applying one percentage to the complete pattern. Human bodies do not grow proportionally in every direction, and garment components do not all need to increase.
For example, moving from one size to the next may require a noticeable change in bust and waist circumference, but only a small change in shoulder width, strap spacing, or back-opening depth. Seam allowances, binding widths, ring sizes, and boning-channel widths may not need to change at all.
Many commercial size charts use circumference steps of about 4-5 cm between adjacent sizes, although the exact interval varies by market and brand. That does not mean each pattern edge receives an equal share. The total increment must be distributed according to the panel structure and intended silhouette.
A 4 cm bust increase may be shared across the front, side-front, side, and side-back areas. Placing too much of that increase near the open back can make the side-back panel unstable. Placing too much at the front can move the side seam and distort the neckline.
Professional grading is controlled point movement, not visual enlargement.
Fabric Alters the Result
The same pattern can behave very differently in stretch jersey, stable crepe, satin, mesh, or velvet. Fabric affects how much the back edge grows, how firmly the waist holds, and how much tension the straps must carry.
Stretch percentage alone is not enough. Recovery is equally important. A fabric may stretch easily but fail to return to its original length after wear. In a backless dress, weak recovery can cause the neckline and back edge to loosen during the day.
Bias-cut satin brings a different risk. It may lengthen or widen after cutting, sewing, pressing, or hanging. A back curve that measures correctly on the paper pattern may grow in the finished garment.
The lining can also control the fit. A highly elastic outer fabric paired with a low-stretch lining will behave according to the lining, not the shell. Grading should therefore be based on the complete construction, including lining, elastic, binding, and internal support.
Which Base Size and Grade Rules Should You Use?
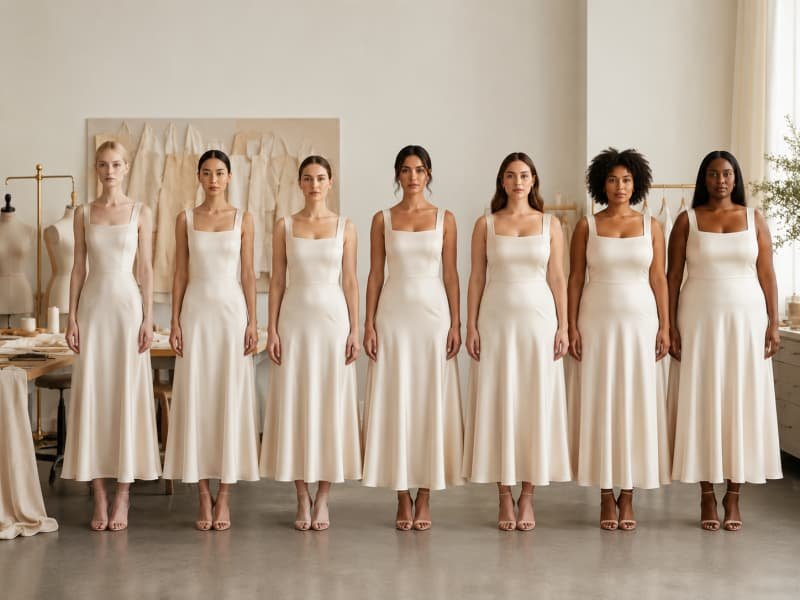
Use a fully fitted and approved middle size as the base, then build grade rules from the brand’s body chart, finished garment measurements, fabric behavior, and intended fit. The base pattern must already have the correct bust balance, back opening, strap tension, and waist position. Grading an unresolved sample only repeats the same problem across the size range.
Select a Commercial Base Size
The base size should sit near the center of the brand’s main selling range. Common choices include S, M, US 6, or US 8, but the best option depends on the customer profile and regional sizing system.
A brand selling mainly XS-L may use S or M as the development size. A wider range may require a central size plus a separate upper-size block. The correct decision depends on how much the body shape changes across the full range.
Before grading, the base-size sample should be approved for:
- Bust placement and coverage
- Underbust position
- Waist level
- Side-seam balance
- Back-opening shape
- Strap angle and tension
- Arm movement
- Sitting comfort
- Lining behavior
- Cup and boning performance
The sample should be made in the final fabric whenever possible. A toile or substitute fabric can help during early development, but the final grade should not be released until the actual material has been tested. Stretch, drape, and recovery directly influence the required finished measurements.
A rushed base-size approval may appear to save time, but it usually creates more corrections later. Every unresolved issue becomes harder to identify once several sizes are involved.
Build Rules From Two Charts
The body measurement chart and finished garment measurement chart serve different purposes.
The body chart describes how the target customer changes between sizes. The finished garment chart records how the design fits around that body. Both are needed.
A backless dress grading package should usually include:
- Bust, underbust, waist, and hip body measurements
- Back waist length
- Shoulder width
- Torso or vertical girth where relevant
- Finished half-bust, half-waist, and half-hip
- Front bodice length
- Side-seam length
- Back-opening width and depth
- Strap length and spacing
- Cup position
- Underbust-seam position
The difference between body and garment measurements indicates ease. A close-fitting stretch dress may use negative ease, while a woven slip dress may include positive ease through the waist and hip.
The following figures show how a common adjacent-size change might be interpreted. They are development examples rather than universal rules.
Measurement area | Example size-to-size change | Possible pattern movement | Key caution |
Bust circumference | +4.0 cm | Distributed across front and back panels | Do not add all width near the opening |
Waist circumference | +4.0 cm | Shared across darts, seams, or panels | Keep waist level balanced |
Hip circumference | +4.0 cm | Distributed across skirt panels | Check side-seam position |
Bodice length | +0.4-0.8 cm | Split at selected length lines | Do not lower every feature equally |
Strap spacing | +0.4-0.8 cm total | Controlled movement at attachment points | Check shoulder and back angle |
Back depth | 0-0.3 cm | Often held or minimally changed | Protect coverage and support |
Strap length | Construction-specific | Based on body length and angle | Do not copy circumference grade |
The most important point is that every measurement follows its own logic. A circumference grade cannot be reused as a strap or opening-depth rule.
Control Design-Critical Points
Some points should move less than the surrounding pattern. Others may remain effectively fixed across several sizes.
Typical controlled points include:
- The deepest point of a V back
- The distance from waist seam to back-opening point
- Decorative ring or slider size
- Binding width
- Boning-channel width
- Eyelet diameter
- Seam allowance
- Specific hardware placement
- Zipper stop position
A fixed design point does not always mean the coordinate remains identical. It means the point is governed by appearance or function rather than by automatic size growth.
For example, a deep V may stay 7 cm above the waist in every size, while the top of the V becomes slightly wider to match torso growth. A 10 mm binding remains 10 mm even when the garment grows. Boning length may change, but the channel width remains matched to the selected bone.
These decisions should be written into the grade specification. If they are left open to interpretation, different suppliers may create noticeably different size ranges from the same base pattern.
Consider Size Groups
A single continuous grade may not be suitable for a broad size range. Body shape changes do not remain perfectly linear, particularly through the bust, upper torso, and shoulder area.
A range from XXS to XL may work from one base block if the brand’s fit model and construction are consistent. A range extending further may need separate size groups, cup groups, or support rules.
Upper sizes may require:
- More bust projection rather than only more width
- A different cup shape
- Wider straps
- Stronger elastic
- Longer boning
- A wider side-back panel
- More underbust support
- A revised back-opening proportion
This is not a sign that the original grading failed. It reflects the fact that a design may need to be rebalanced for a different body group.
Brands should define size-group changes during development rather than discovering them during bulk production.

How Do You Grade the Bodice and Back Opening?
Grade the main bodice frame first, including bust, waist, length, and side seams. Then reposition straps and rebuild the back opening as a controlled design line. Measure the new edge length, check its shape in every size, and synchronize it with the lining, facing, elastic, or binding. The software-generated curve should never be accepted without technical review.
Grade the Bodice Frame First
The front bodice, bust shaping, and side seams must be stable before the back opening is finalized. A problem at the front can create symptoms at the back.
If the bust point is too far outward, the garment may pull toward the front and make the back edge appear loose. If the front bodice is too short, the waistline may rise and pull the open back downward. If width is distributed unevenly, the side seam may rotate.
A practical sequence is:
- Apply the bust, waist, and length grade.
- Reposition darts, princess seams, or cup seams.
- Confirm the underbust line.
- Check the armhole or side-front opening.
- Walk the front and back side seams.
- Position the strap anchors.
- Rebuild the back-opening line.
- Grade the lining and support layers.
In princess-seam bodices, the bust increment is often shared across several panels. In darted designs, both dart position and dart intake may change. A corset-inspired bodice may require separate cup and cradle development rather than a simple linear grade.
The finished side seam should remain balanced and visually correct on the body. An open-back dress has little tolerance for side-seam rotation because it directly changes side coverage.
Redraw the Back Shape
The back-opening line should be redrawn in every size from controlled anchor points. Moving two endpoints and allowing the CAD system to form the curve automatically can create excess length or a distorted shape.
For a deep V back, control:
- The upper attachment point
- The side-back entry point
- The V depth
- The angle on each side
- The distance from the V point to the waist
For a U-shaped back, additional curve points are usually needed. The curve should remain smooth without becoming too flat in larger sizes or too tight in smaller sizes.
Measure the opening along the finished seam line. A curve can look correct on screen while becoming several millimetres longer than intended. On a fitted edge, that difference may be enough to create visible gaping.
The nested grade should also be reviewed. Adjacent size lines should progress smoothly. A sudden jump between two sizes usually indicates that a manual correction has interrupted the grade rule.
Reposition Straps Carefully
Strap grading is controlled by body width, torso length, and support direction. It should never be based on a fixed percentage of the original strap.
A strap may need to become longer in a larger size, but the attachment point may move only slightly. Moving it too far outward can pull the back edge away from the body. Keeping it too far inward can create neck pressure or an awkward visual line.
Cross-back straps require particular attention. The crossing point affects both appearance and tension. If the straps cross too high, they may sit close to the neck. If they cross too low, the bodice may lose support.
Each size should be checked for:
- Front attachment position
- Back attachment position
- Strap angle
- Finished length
- Adjustable range
- Hardware position
- Crossing point
- Twisting or rolling
When sliders are used, the adjustable range must suit the actual size. Reusing the same strap length across the complete range may leave larger sizes with too little extension or smaller sizes with excessive loose strap.
Grade Closures and Support Pieces
The closure must be graded with the bodice because it affects entry, adjustment, and support.
A lace-up back requires separate rules for panel width, eyelet spacing, lacing gap, and cord length. The opening should retain a useful adjustment range without becoming excessively wide or allowing the two panels to overlap.
An elastic back section needs documented values for:
- Relaxed cut length
- Finished extension
- Elastic width
- Stitch method
- Attachment points
- Size-group changes
Zippers should be checked against available standard lengths. The pattern may be adjusted to suit a practical zipper length as long as the opening remains comfortable and the final design is unchanged.
Cups, boning channels, and internal panels must follow the graded body shape. An outer bodice can measure correctly while the internal cup or lining remains in the wrong position. Every layer should be checked from the same bust point, underbust level, and waist reference.

How Do You Maintain Fit and Support?
Maintain fit by balancing back-edge length, bust shape, underbust control, waist stability, and strap tension. Support should not be assumed to increase automatically with the pattern size. Larger sizes may need revised cups, stronger elastic, wider straps, more stable side panels, or different boning. The correct solution depends on the design, fabric, and target body range.
Prevent Back Gaping
Back gaping is one of the most common failures in an open-back dress, but the visible gap does not always reveal the real cause.
A loose upper edge may come from straps positioned too far outward. A gap near the waist may result from excess side-back length or insufficient waist shaping. Gaping along the full curve may indicate fabric growth, a stretched seam, or a facing that is longer than the shell.
Before changing the pattern, check:
- Where the edge begins to lift
- Whether the strap is pulling correctly
- Whether the side seam is balanced
- Whether the bust is pulling the bodice forward
- Whether the lining and shell behave differently
- Whether the fabric grew during sewing or pressing
- Whether the waist is secure
Possible corrections include reshaping the curve, removing edge length through a stable seam, adjusting the strap angle, adding stay tape or clear elastic, changing the facing, or redistributing width across the bodice.
Simply pinching excess fabric from the visible edge may solve one sample but create an irregular grade. The correction should be transferred through a logical pattern line and tested in the neighboring sizes.
Balance Cups and Boning
Cups shape the bust, but they do not support the entire dress by themselves. A backless style also needs control through the underbust, waist, side panel, or strap system.
Cup grading should consider:
- Cup width
- Cup depth
- Apex position
- Underbust seam length
- Neckline coverage
- Cup-pocket placement
- Foam or molded-cup thickness
Some size ranges can share cup components across two or three garment sizes. Others require separate cup groups. The decision depends on the brand’s body chart and the level of bust support required.
Boning should remain connected to the structural seams. Boning-channel width usually stays fixed because it must match the selected component, but the bone itself may become longer in longer or larger sizes.
The ends should finish far enough from the seam allowance to avoid damage during sewing. A common production allowance is roughly 10-15 mm from the finished seam, although the exact clearance depends on the construction method.
A waist stay can be especially useful in low-back corset dresses because it anchors the bodice at the waist instead of forcing the straps to carry the complete load.
Apply Negative Ease Carefully
Negative ease is useful in stretch bodycon and fitted dresses, but it should be based on fabric testing rather than a fixed percentage copied across all styles.
The basic calculation is:
Finished garment measurement = body measurement x (1 – negative-ease percentage)
An 80 cm body measurement with 5% negative ease gives an initial finished measurement of 76 cm. That figure is only a starting point. The actual fit also depends on fabric recovery, lining, seam construction, and local body shape.
Stretch should be tested in the direction used around the body. A fabric may have 25% stretch across the width but only 10% along the length. After being extended, it should return close to its original measurement. Poor recovery creates a dress that fits well at first and becomes loose after wear.
Negative ease may also vary by area. The waist may use more compression than the bust. The hip may need greater movement allowance. A lined bodice usually has less usable stretch than the shell fabric suggests.
Fit testing remains necessary because a laboratory stretch value cannot fully predict comfort, support, or appearance.
Control Strap Tension
A strap should keep the bodice in position without cutting into the neck or shoulder. Its performance depends on length, width, angle, material, and attachment strength.
Non-stretch straps require precise finished lengths. Elastic straps need a controlled extension ratio and recovery test. The same elastic cut length should not be used across several sizes unless fitting proves that it works.
Larger sizes may require wider straps or reinforced attachment points, especially when the dress contains a heavier skirt, substantial lining, or internal cups.
During fitting, the strap should be checked while the wearer:
- Raises both arms
- Turns the upper body
- Sits down
- Walks
- Bends slightly forward
- Returns to a neutral position
The strap should remain flat and return to its intended position. It should not pull the front neckline outward, create a visible back gap, or slide toward the arm.
Hardware must be included in the test. Rings and sliders change the effective length and can allow narrow straps to twist.

How Do You Check the Graded Sizes?
Check graded sizes through pattern measurement, seam walking, nested-line review, and physical fitting. A practical minimum is one smaller size, the approved base size, and one larger size. Wider ranges or support-sensitive designs may need additional upper-size samples. CAD can confirm dimensions, but only a fitted garment can confirm coverage, comfort, movement, and support.
Review the Pattern Nest
The first check is visual. The nested grade should show smooth, logical progression from one size to the next.
Look for:
- Lines that cross unexpectedly
- A curve that changes direction
- One size with a sudden jump
- Inconsistent dart movement
- Uneven strap positions
- Side seams that shift irregularly
- A back opening that grows too quickly
A pattern can pass the measurement chart and still contain an unattractive or unstable curve. Visual review helps identify problems before fabric is cut.
Each size should then be measured individually against the approved specification. Do not assume the software applied every rule correctly. A point may have been locked accidentally, a curve may have been edited manually, or a pattern piece may have retained an earlier version.
The grader should distinguish between controlled measurements and reference measurements. Controlled measurements must match the specification within the agreed development tolerance. Reference measurements help monitor proportion but may not be directly graded.
Walk Every Connected Seam
Seam walking means matching the actual stitching lines of connected pattern pieces and checking their lengths, notches, and shaping.
For a backless dress, walk:
- Front and back side seams
- Bodice and skirt waist seams
- Shell and lining edges
- Back facing and shell opening
- Cup and cradle seams
- Boning channels
- Zipper seams
- Strap attachment seams
- Lace-up or elastic panels
The check should be done on the seam line rather than the cut edge, especially when seam allowances differ.
A small amount of ease may be intentional, but it should be specified. An unexplained 6-8 mm difference along a fitted back edge can create puckering or force the operator to stretch one layer during sewing.
Notches should continue to serve their original purpose after grading. They may move, but they must still identify bust levels, matching points, center lines, and construction transitions accurately.
Fit a Representative Size Set
Testing only the base size confirms the original pattern, not the grade. A representative size set is usually more efficient than making every size while still revealing how the design behaves across the range.
Range example | Minimum useful fit set | Additional check when needed | Main purpose |
XS-L | XS, M, L | S or upper-selling size | Confirm lower and upper progression |
XXS-XL | XXS, M, XL | L if support changes | Check wide range and strap movement |
XS-XXL | S, L, XXL | Base size plus cup-group size | Identify non-linear upper-size issues |
Numerical 2-12 | 2, 6 or 8, 12 | Best-selling commercial size | Validate both range ends |
Extended range | Separate core and upper-size fit sets | Highest size in each block | Confirm revised block or support rules |
The fit model should match the brand’s body chart. Two people who both buy size M may have different bust, torso, and shoulder proportions, so an available staff member is not automatically a suitable fit model.
Each sample should be measured before fitting. During the fitting, review static appearance and movement. Photographs should include front, side, and back views, with close-up images of the opening, strap attachment, side seam, and bust area.
Diagnose the Cause
Fit corrections should address the underlying structure rather than the visible symptom.
If the back gaps only in the larger size, ask:
- Did the edge length increase too quickly?
- Did the strap move too far outward?
- Is the bust pulling the garment forward?
- Is the side-back panel too wide?
- Is the waist too loose?
- Did the fabric stretch during production?
- Is the facing controlling the shell incorrectly?
A problem appearing in every size is likely to be a base-pattern or construction issue. A problem that increases gradually through the range is more likely to be a grade-rule issue.
After correction, update the affected pattern pieces, measurements, and size rules together. Changing only the visible shell while leaving the lining or facing unchanged will create a new problem during sewing.
Every revision should carry a version number and date so that the approved grade is not confused with an earlier pattern.

How Do You Prepare the Grade for Production?
Prepare the grade for production by releasing one controlled pattern version with matching measurements, construction details, support specifications, and approved size-set records. Shell, lining, facings, cups, boning, elastic, straps, and closures must be synchronized. High-risk backless styles should complete a pre-production sample and first-piece review before the main fabric quantity is cut.
Release a Complete File Set
Production cannot work safely from a graded pattern alone. The factory needs a complete technical package that explains what was approved and how it should be reproduced.
Production document | Required information | Risk if missing |
Graded pattern files | All sizes, grainlines, notches, seam allowances | Wrong size or outdated pieces used |
Pattern-piece list | Shell, lining, facing, support, and reinforcement pieces | Small components omitted |
Measurement chart | Finished measurements and tolerances | QC has no inspection standard |
Grade-rule sheet | Horizontal and vertical increments | Repeat orders may be graded differently |
Construction sheet | Seam type, stitch method, edge finish | Sewing method changes fit |
Bill of materials | Fabric, lining, elastic, cups, boning, trims | Unapproved substitution |
Size-set report | Fitted sizes, comments, and approvals | Upper-size risks remain unclear |
Approved sample record | Photos, date, version, and reference sample | Production follows wrong sample |
QC checklist | Critical fit and support points | Final inspection focuses only on workmanship |
File names should clearly identify style number, size, and revision. All documents must carry the same version. A revised back curve is not complete until the facing, lining, and measurement chart have also been updated.
When patterns are converted between CAD systems, a verification plot should be checked. File conversion can change scale, curves, drill points, or notches if the import settings are incorrect.
Synchronize Every Layer
The shell may be correct while the internal components distort it. Every piece connected to the graded area must be updated together.
This includes:
- Main bodice pieces
- Lining
- Back and neckline facings
- Fusible support
- Cup pockets
- Boning channels
- Power-mesh panels
- Waist stays
- Elastic
- Binding
- Straps and ties
- Zipper guards
- Lace-up panels
- Decorative trim placements
Elastic and binding often use a ratio rather than matching the shell edge one-to-one. That ratio must be tested and recorded. A 90% elastic ratio, for example, means the elastic is cut to 90% of the measured edge before seam allowances or joining deductions, but the correct ratio varies considerably by elastic quality and fabric.
Cup pockets should be repositioned with the graded bust apex. If the external cup seam moves but the pocket remains in the base-size location, the inserted cup will sit incorrectly.
Placement templates and sewing guides must also be revised. When a strap anchor moves by 4 mm, the production template and QC measurement point must move by the same amount.
Approve Before Bulk Cutting
A practical approval sequence is:
- Approve the base fit sample.
- Complete the graded nest.
- Measure all graded sizes.
- Walk all connected seams.
- Make the selected size-set samples.
- Review fit and movement.
- Update patterns and rules.
- Confirm the revised size set.
- Approve the pre-production sample.
- Release the final files for cutting.
For a complex backless, halter, corset, or heavily fitted dress, a first-piece or pilot review is often worthwhile. The first completed garments reveal whether the approved pattern survives actual spreading, cutting, sewing, pressing, and finishing.
Fabric should be relaxed or pretreated according to its known behavior before the final pattern measurements are judged. Stretch fabrics, bias satin, and heat-sensitive materials can change dimensions during processing.
Bulk cutting should not begin while fit comments, fabric approval, or support components remain unresolved. Once the full order is cut, correcting a back-opening or strap-position problem becomes costly and may be impossible without visible alterations.
Protect Fit During QC
Quality control should include fit-critical measurements, not only general workmanship.
Important checkpoints include:
- Fabric shrinkage and relaxation
- Cut-panel dimensions
- Pair-piece symmetry
- Bust and waist measurements
- Back-opening width and depth
- Finished back-edge length
- Strap position and length
- Cup and boning placement
- Elastic cut length
- Side-seam balance
- Lining alignment
- Pressing distortion
Critical areas usually need tighter tolerances than overall dress length. A brand might allow more variation at the hem than at strap placement or back depth. The final tolerance should reflect the fabric, construction, and inspection method rather than one fixed factory standard.
Inline inspection should begin with the first completed pieces from each line. Finding a repeated 5 mm strap-position error after several hundred garments have been completed is far more difficult than correcting the template after the first few units.
The approved pre-production sample should remain available as the physical reference. Measurement data is essential, but fit-sensitive details such as drape, strap angle, and back-edge contact are easier to judge against an approved garment.
Develop Production-Ready Backless Dresses With Duolan Apparel
Grading a backless dress is not a matter of pressing an increase-size button. It is a controlled development process connecting body measurements, design proportion, fabric behavior, internal support, strap geometry, fit testing, and production quality.
For fashion brands, a reliable grading system should achieve four commercial outcomes:
- Every size still looks like the approved design.
- The opening remains secure during real movement.
- Support remains appropriate across the size range.
- Bulk production reproduces the approved fit consistently.
Duolan Apparel focuses on fashion dresses, party dresses, occasion dresses, fitted dresses, and technically sensitive silhouettes such as backless, halter, bodycon, corset, and bustier styles. Its development system supports CAD pattern work, fit correction, grading, size-set validation, sampling, pre-production confirmation, and scalable manufacturing.
The broader manufacturing organization includes a substantial pattern-and-sample team, 300 sewing lines, and more than 50 flexible production lines. These resources are most useful when they are combined with disciplined technical control: approved pattern versions, measured size sets, synchronized support components, and production checks that protect the original fit.
A development request can begin with a tech pack, reference garment, original sample, measurement specification, or collection concept. To obtain a project review and quotation, prepare:
- Design sketch, reference image, or tech pack
- Target size range
- Body and finished measurement charts
- Fabric composition or preferred fabric direction
- Back opening and strap details
- Cup, boning, lining, or support requirements
- Estimated quantity by style and color
- Required sample and delivery schedule
Share:
Our Services
Categories
Table of Contents
Here, developing fashion collections is more than manufacturing garments — it’s a collaborative process focused on transforming ideas into well-executed, market-ready products. From fabric sourcing and sample development to scalable production and delivery coordination, every stage is built to support quality, consistency, and efficient collection launches across global markets.

