 Skip to content
How Do You Stabilize Low-Back Edges Without Gaping or Stretching?
Your trusted Women’s Apparel Development & Manufacturing Partner from China
- Jerry
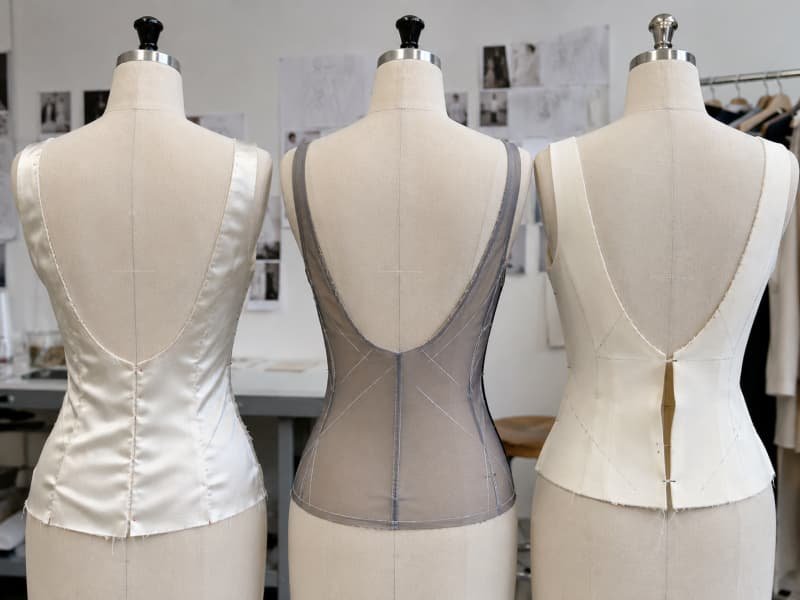
A low-back edge looks simple because the finished garment shows only one clean line across the wearer’s back. In development, however, that line can be one of the most sensitive parts of the entire dress. It may cross several grain directions, depend on shoulder or side-seam tension, interact with lining and elastic, and change shape after pressing. A dress can look correct on the cutting table yet gape the moment the wearer stands, bends, reaches forward, or raises an arm. The problem becomes more visible in satin, mesh, bodycon, halter, and occasion dresses because the exposed edge has nowhere to hide.
Stabilize a low-back edge by confirming that the pattern length matches the body, then protecting that length throughout cutting, sewing, pressing, and wear. Wovens usually need staystitching, tape, interfacing, facing, or lining support. Stretch fabrics may need controlled elastic or recovery lining. The final construction should always be tested on a fitted sample before bulk production begins.
The crucial point is that stabilization cannot rescue every fit problem. Picture a satin party dress that passes a flat inspection but opens two centimeters away from the model’s back during a campaign shoot. The sewing team may add stronger tape, while the pattern team removes length from the curve. Both could be partly right, yet neither correction is dependable until the team identifies what changed, where it changed, and at which stage. That investigation is what separates a temporary fix from a repeatable production method.
What Makes Low-Back Edges Unstable?
Low-back edges become unstable when the pattern contains excess length, the fabric stretches during cutting or sewing, recovery is too weak, or the garment’s support points are poorly balanced. Gaping is rarely caused by one factor alone. Reliable correction begins by checking pattern shape, grain direction, fabric behavior, strap tension, lining, seam construction, and pressing in the order the garment was developed.
Is the Edge Cut on the Bias?
A deep back opening usually crosses several grain directions. Near the shoulder or side seam, the edge may sit relatively close to the straight grain. As the curve drops toward the center back, parts of it can move closer to the bias. Woven fabrics stretch more easily in this direction, especially when they are soft, loosely constructed, or cut from fluid materials such as satin, chiffon, lightweight crepe, and silk-like polyester. The distortion may begin before anyone reaches the sewing machine, simply because the unsupported panel is lifted, hung, pinned, transported, or pressed.
The seam line matters more than the raw edge when checking growth. Mark fixed notches and measure the seam-line distance immediately after cutting, after staystitching, after applying support, and after pressing. A change of only three to five millimeters across a short fitted section can alter body contact, although the exact tolerance must reflect the fabric, curve length, and brand standard. Longer openings may tolerate slightly more movement, but left-to-right symmetry should remain closely controlled because asymmetry is especially visible on an exposed back.
Checkpoint | What to Measure | Warning Sign |
After cutting | Seam-line length between fixed notches | One side is longer, or the panel no longer matches the paper pattern |
After staystitching | Change from the original seam-line length | Several millimeters of growth or uneven feeding |
After facing or lining | Shell-to-facing seam alignment | One layer must be stretched or eased heavily to match |
After pressing | Final curve, center-back depth, and symmetry | Rippling, curling, shine, or a lowered back point |
After fitting | Distance between the edge and the body | Gap increases after sitting, reaching, or turning |
Do Stretch and Recovery Affect Stability?
Stretch describes how far a material can extend, while recovery describes how closely it returns to its starting measurement. These properties are related but not interchangeable. A soft jersey may stretch comfortably yet remain slightly longer after being pulled. A denser compression knit may feel firmer but recover much more reliably. For a low-back bodycon dress, recovery is often more important than maximum stretch because the exposed edge must return toward the body after the wearer moves.
A practical internal comparison uses a marked 100-millimeter section. Stretch it to a controlled length, release it, then measure it immediately and again after a defined resting period. If the mark remains at 103 millimeters, the fabric has retained three millimeters of growth under that specific trial. This is not a substitute for a formal laboratory method, but it is useful for comparing candidate fabrics. Repeat the check after fusing, sewing, and steaming because heat, thread tension, seam type, lining, and elastic can change the behavior of the finished assembly.
Is Gaping a Fit or Sewing Problem?
The most useful diagnostic question is whether the edge fitted correctly before the final construction was added. When the toile or first fitting sample already stands away from the body, the pattern probably contains excess length, an incorrect contour, or poor tension balance. Stay tape can stop further stretching, but it cannot remove unnecessary pattern volume. When the edge fitted before sewing and became loose afterward, handling, differential feeding, pressing, incompatible seam lengths, or material growth is more likely.
The position of the gap gives further clues. Excess concentrated at the deepest center-back point often indicates an edge-length or back-contour problem. Gaping near the upper side may relate to strap placement, armhole shape, or an unbalanced front bodice. A continuous wave frequently points to a stretched seam allowance or a facing attached under uneven tension. During fitting, pin out the excess without pulling the whole garment backward, record where the wedge begins and ends, and transfer the correction to the paper pattern rather than hiding it with tighter straps or temporary fashion tape.
Are the Support Points Balanced?
A low-back edge is controlled by the full bodice structure. Shoulder straps, halter ties, side seams, waist seams, center-back closures, internal waist stays, cups, boning, elastic, and lining can all influence where the opening sits. Shortening a halter tie may pull a gaping edge closer to the body, but it may also raise the bust, increase neck pressure, distort the armhole, and lift the waistline. Tightening the edge itself can drag the side seams backward or make the deepest curve curl inward.
Before making adjustments, mark the waist, side seams, bust point, and strap positions on the fitting sample. Observe those references while the wearer stands, sits, reaches forward, and rotates the upper body. When the entire bodice moves, the garment needs structural rebalancing. When the bodice remains correctly positioned but the edge separates locally, pattern length and recovery deserve closer attention. The aim is not to make the opening as tight as possible; it is to distribute tension so the dress remains secure without visible strain or discomfort elsewhere.
Which Stabilizer Should You Use?
Direct answer: Choose a stabilizer according to the shell fabric, curve depth, required flexibility, transparency, finished thickness, and the amount of control needed. Woven stay tapes and interfacing provide dimensional stability, while elastic, knit tape, power mesh, and recovery lining suit stretch constructions. The selected support should preserve the approved pattern shape without producing stiffness, puckering, visible ridges, adhesive marks, or uncomfortable pressure.

Is Stay Tape Best for Wovens?
Stay tape is often effective for woven low-back edges because it controls the seam line without interfacing the entire bodice. The term, however, covers products with very different behavior. Straight-grain woven tape offers firm length control but can resist a deep curve. Lightweight bias fusible follows a curved opening more easily while allowing limited give. Twill tape is durable but may be too bulky for fine occasion fabrics, and a heavy adhesive can create a visible ridge on satin or lightweight crepe.
The final choice should match the design rather than a generic material category. A structured crepe dress with a moderate low back may tolerate a narrow woven stay. A fluid satin with a deeper curve may need a fine bias fusible that shapes smoothly without tiny folds. Transparent chiffon, lace, or mesh may require organza, a self-fabric support strip, or an almost invisible specialist product. In lightweight development, trials often begin around six to twelve millimeters wide, but the approved width must be based on seam allowance, curve, support level, and face-side visibility.
Stabilizer | Common Use | Practical Trial Range | Main Risk |
Straight-grain woven tape | Stable wovens and gentle curves | 6-10 mm wide | May resist deep curves or create a firm edge |
Bias fusible stay tape | Satin, crepe, and curved woven openings | 8-12 mm wide | Adhesive or ridge may show through |
Knit fusible tape | Jersey and flexible curved edges | 8-15 mm wide | May be too soft for high-tension areas |
Clear elastic | Stretch mesh and bodycon styles | 4-8 mm wide | Puckering when the reduction is excessive |
Organza stay | Delicate woven, lace, or heat-sensitive fabric | 6-15 mm cut strip | Requires accurate shaping and handling |
Power mesh support | Fitted stretch bodices | Partial panel or full support lining | Can change stretch, pressure, and comfort |
Do Knits Need Clear Elastic?
Clear elastic is useful when a stretch edge needs recovery and gentle drawing-in, but it is not a universal repair. The pattern must already be close to correct. If the opening contains substantial excess length, very short elastic can create gathers, scalloping, pressure, or a wavy seam while the original fit problem remains. The right application ratio must be established using the actual shell, lining, seam type, elastic product, and machine settings, not borrowed from an unrelated neckline or garment.
For an 800-millimeter seam line, a development team might compare 98%, 95%, and 92% trials, giving 784, 760, and 736 millimeters before any joining allowance. These are test points rather than universal specifications. The strongest reduction is not necessarily the best. A deep stretch-mesh curve may need more control near the upper sides and little reduction at the deepest center point. Clear elastic also varies in firmness, thickness, heat resistance, surface friction, and long-term recovery, so the exact supplier reference must be retained for bulk production.
Which Interfacing Adds Support?
Interfacing supports a wider area around the opening and can be valuable when the shell is soft, loosely woven, or unable to maintain a clean contour by itself. The challenge is to add enough structure without turning a fluid dress into a rigid frame. Lightweight tricot can suit some soft wovens and knits because it remains flexible. Fine woven fusible offers stronger directional control for crepe, satin, or tailored occasion styles, while sew-in organza can be safer for heat-sensitive, textured, embellished, or transparent materials.
Do not select interfacing by fabric weight alone. A lightweight satin may need strong dimensional control but an extremely fine base cloth to avoid show-through. A heavier stretch fabric may need a softer product that moves with the wearer. Every trial should be checked for bubbling, shrinkage, strike-through, surface shine, color change, adhesive visibility, and altered stretch direction. Let fused pieces cool fully before evaluation, then bend, steam, stretch, and view them under direct light from both the face and reverse sides.
Are Facing and Lining Enough?
Facing and lining improve finish quality, distribute seam stress, and hide internal construction, but they do not automatically stabilize an edge. When the shell, facing, and lining all stretch along the same curve, joining them may simply create a thicker unstable opening. A facing provides real support only when its grain direction, interfacing, seam length, and pattern shape are engineered for the final curve. It also must be updated whenever the shell pattern changes during fitting.
Understitching encourages the facing to stay inside the garment and creates a cleaner roll, but it cannot remove excess pattern length or reverse an edge that has already stretched. A recovery lining or power mesh can support a fitted stretch dress, although the support pattern may need different negative ease from the shell. The most reliable construction often combines several moderate controls: a corrected pattern, light tape, a properly shaped facing, careful understitching, and a lining that supports the fashion layer without fighting its movement.
How Do You Stabilize Woven Edges?
Direct answer: Stabilize woven low-back edges immediately after cutting, before normal handling changes the curve. Staystitch the seam line, verify its measurement, apply a compatible stay or support, and attach a correctly shaped facing or lining without stretching either layer. Clip, grade, understitch, and press carefully. The finished edge should retain the approved pattern length while remaining smooth, flexible, and visually clean on the body.

How Do You Staystitch the Curve?
Staystitching is completed on a single layer before the edge is joined to a facing or lining. It preserves the seam-line length while the panel moves through the development and sewing process. The stitch line should sit inside the seam allowance, close enough to control the final seam but far enough away that it will not appear after construction. The bodice must be supported on the machine bed, because allowing its weight to hang from the curve can stretch the very area being stabilized.
For a symmetrical low back, sewing from each upper end toward the deepest center point often gives better control than stitching continuously from one side to the other. A stitch length around 2.0 to 2.5 millimeters is a practical starting range for many lightweight and medium woven fabrics, although needle size, thread, and fabric delicacy must be considered. After staystitching, compare the panel with the pattern or a seam-line template. If it has grown, investigate foot pressure, feeding, stitch direction, and handling before trimming anything away.
How Is Stay Tape Applied?
Stay tape should follow the intended seam line naturally. Forcing a straight tape around a deep curve can create tiny pleats or make the finished opening curl inward. Stretching a flexible fusible during application can produce the opposite problem when the tape contracts later and pulls the shell into puckers. Placement should be defined from the seam line rather than judged from the raw edge, especially when cutting tolerances or seam allowances may vary across production bundles.
Fusing requires controlled temperature, pressure, moisture, dwell time, and cooling. Excessive heat can shrink synthetic satin, flatten textured crepe, weaken elastane, create shine, or make adhesive visible through the face. The approved specification should record the exact tape reference, width, orientation, joining method, placement, start and finish points, and whether the ends should be tapered. Abrupt tape endings can produce a visible change in stiffness, so they are usually positioned inside stronger areas such as a strap attachment, seam intersection, or supported side panel.
How Do Facing and Understitching Help?
The facing pattern should be developed from the corrected shell pattern, not copied from an earlier sample version. Walk both seam lines together and confirm that notches, shoulder points, side seams, and center-back references align without stretching. During sewing, support the curve and keep the layers relaxed. After joining, clip concave seam allowances only as deeply as needed for the curve to open, and grade the layers where shell, lining, tape, and interfacing could create a visible ridge.
Understitch through the facing and the seam allowances assigned to the inside, using an even line that controls the roll without weakening the edge. Press the opening over a curved surface that matches the bodice shape. Sliding an iron along the curve can lengthen it, so lift and place the iron, use controlled steam, and allow the section to cool before moving it. A clean result should come from accurate pattern and sewing work rather than aggressive final pressing that temporarily forces a distorted edge flat.
Do Bias-Cut Edges Need Extra Control?
Bias-cut fabrics need a careful balance between stability and drape. Their fluidity is often the reason they were selected, so a heavy stay can destroy the intended movement even if it prevents stretching. The aim is to control the seam line while allowing the body of the dress to fall naturally. Protect the low-back edge early rather than letting an unsupported opening hang for hours and then trying to force it back to the paper pattern before attaching the facing.
Suitable trials may include fine bias fusible tape, narrow organza, lightweight selvage, a shaped sew-in stay, or a supported facing. Compare seam-line growth after handling, visible ridging, adhesive shadow, smoothness after pressing, drape around the shoulder blades and waist, recovery after hanging, and comfort against the skin. In a very delicate satin or silk-like fabric, a nearly invisible support that permits one or two millimeters of controlled movement may perform better than a rigid product that creates a hard outline across the wearer’s back.
How Do You Stabilize Stretch Edges?
Direct answer: Stretch low-back edges need controlled recovery rather than complete rigidity. Begin with a pattern developed for the fabric’s stretch and wearing ease, then test clear elastic, knit stay tape, recovery lining, facing, or power mesh as part of the complete construction. The edge should return close to the body after movement without gathering, cutting into the skin, distorting the bust, or transferring excessive tension to the straps.

How Is Elastic Length Calculated?
Elastic length is calculated from the measured seam line rather than the raw cut edge. Multiply that length by a tested application ratio, then add the overlap or joining allowance required by the construction. There is no universal percentage for low-back edges because elastic firmness, shell recovery, lining, curve shape, size, back depth, seam type, and strap tension all affect the result. A ratio that works on a dense bodycon knit may produce excessive gathering on soft stretch mesh.
Some openings also need zoned tension. The upper sides may require more drawing-in because they respond to shoulder and arm movement, while the deepest center-back section may need almost no reduction. Mark these areas with corresponding notches and record the elastic length between them. Without reference points, operators may distribute the tension differently from one garment to another. The approved method should also identify whether the elastic is applied relaxed, lightly tensioned, or with deliberate differential tension in each zone.
Seam-Line Length | 98% Trial | 95% Trial | 92% Trial |
600 mm | 588 mm | 570 mm | 552 mm |
700 mm | 686 mm | 665 mm | 644 mm |
800 mm | 784 mm | 760 mm | 736 mm |
900 mm | 882 mm | 855 mm | 828 mm |
Development note: These calculations exclude joining allowance and are comparison trials, not universal production specifications. The complete curved sample must be assessed on the body before any ratio is approved.
How Do You Avoid Puckering?
Puckering usually comes from excessive elastic reduction, uneven distribution, a stretched shell layer, high thread tension, unsuitable presser-foot pressure, or different recovery rates between the materials. Divide the elastic and garment edge into matching sections. Four reference points may be enough for a simple curve, while a deep or irregular opening may require six or eight. Secure the beginning and end, then stretch only the elastic enough to reach each corresponding notch without pulling the garment behind the machine.
Machine settings should be established on production-equivalent material. Needle type, stitch length, differential feed, presser-foot pressure, thread elasticity, and seam allowance all influence the result. Let the edge rest before judging it, because a seam that looks smooth immediately after steaming may develop ripples once the layers cool and recover at different rates. A small amount of gathering on a relaxed garment may disappear when worn, but persistent scalloping, twisting, or uneven tension usually means the ratio or feeding method needs correction.
Do Lining and Power Mesh Improve Recovery?
A recovery lining or power mesh layer can distribute tension across a larger part of the bodice instead of asking a narrow elastic edge to carry all the load. This is particularly valuable in bodycon, stretch mesh, corset-inspired, and fitted party dresses. The support layer may connect to the side seam, waist seam, under-bust structure, or strap attachment, allowing the visible fashion layer to remain smoother and softer around the exposed back.
The support pattern should not automatically duplicate the shell. It may require greater negative ease, different panel lines, a higher internal back, or a different stretch direction. A lining that is too tight can pull the outer fabric into folds, while one that is too loose provides little control and may rise above the edge. Test the shell, lining, and seam as one assembly by marking a 100-millimeter section, stretching it to the intended range, measuring retained growth after release, and repeating the check after pressing.
Is the Edge Comfortable in Motion?
A low-back edge can appear perfect during a static fitting and fail as soon as the wearer sits, reaches, or turns. Movement testing is essential for party, occasion, vacation, dance, and going-out dresses because these garments are worn in active social settings. A useful sequence includes standing naturally, sitting upright, leaning forward, reaching both arms ahead, raising each arm, rotating the torso, and walking at least ten steps. Repeating the sequence reveals whether the edge returns to its original position or gradually remains stretched.
Observe more than the opening itself. Check whether the bust lifts, the waist rises, side seams rotate, straps tighten, or lining becomes visible. Comfort feedback should also be specific. Pressure at the deepest center back indicates a different issue from rubbing below the arm or excessive neck load in a halter style. Shortening the elastic further will not solve a garment that is transferring tension from the wrong structural point. The approved dress should remain secure without requiring fashion tape, repeated adjustment, or an unnaturally rigid posture.
How Do You Prevent Gaping in Production?
Direct answer: Prevent production gaping by approving the pattern, fabric, stabilizer, seam construction, pressing method, and fit as one controlled system. Record seam-line lengths, support placement, elastic ratios, notch positions, tolerances, and visual standards in the technical package. Verify a first piece or pilot run before full production, then inspect symmetry, recovery, edge shape, measurements, and movement performance throughout manufacturing.

Is the Pattern Length Correct?
The low-back edge must match the intended body contour before stabilization is added. A shape developed in non-stretch calico may not transfer directly to stretch satin, mesh, or jersey because fabric weight, drape, stretch, recovery, lining, and internal support change the way the bodice sits. When fitting reveals excess length, pinch it out without moving the entire garment backward. Mark the beginning, end, and maximum depth of the correction so the adjustment can be returned accurately to the pattern.
Rotate the excess into an existing seam, dart, panel line, or a controlled reshaping of the edge. Simply trimming the raw opening may lower the back depth, change the seam allowance, and leave the facing or lining mismatched. After correction, walk every connected component together and confirm the notches. Grading requires the same care. Increasing the edge by an identical amount in every size may not preserve contour or support. Larger sizes may need revised strap spacing, back width, elastic zoning, or bust support rather than simple proportional enlargement.
How Do You Test the First Sample?
The first sample should provide measurable answers, not only an attractive photograph. Inspect it flat before fitting and confirm the pattern revision, shell fabric, lining, support material, elastic type, seam construction, and pressing method. Measure the low-back seam line between fixed points, compare the left and right sides, and verify that the specified support is actually inside the garment. Hidden components are easily missed when a sample is reviewed quickly or transferred between teams.
During the live fitting, photograph the dress from the back, side, and three-quarter angles while the wearer stands naturally. Record the center-back depth, distance between the edge and body, strap position, side-seam balance, waist level, lining visibility, and movement result. Repeat the photographs after the movement sequence. A sample should not be approved when temporary tape, hidden pins, unusually tight straps, or manual adjustment are required to make it look correct. For highly exposed or tension-dependent styles, test the base size and at least one additional size before release.
Which Details Belong in the Tech Pack?
The technical package must explain how the edge is stabilized internally, not only show the visible back shape. Include the finished back depth, seam-line measurements between fixed notches, shell and lining references, stabilizer specification, elastic ratio, grain direction, facing pattern, construction sequence, fusing parameters, and pressing limits. A cross-section drawing is especially helpful where several layers meet because it can show tape placement, elastic enclosure, seam-allowance grading, and understitching more clearly than a long written note.
- Shell, facing, lining, elastic, tape, and interfacing material codes
- Stabilizer width, placement, orientation, start points, and finish points
- Finished seam-line length and back depth at defined measurement locations
- Elastic cut length, joining allowance, tension zones, and matching notches
- Seam type, stitch length, needle, thread, clipping, grading, and understitching
- Fusing temperature, pressure, dwell time, cooling method, and pressing restrictions
- Approved body photographs, measurement tolerances, and size-specific differences
Version control is critical because one pattern change can affect the facing, lining, elastic length, graded nest, bill of materials, construction sheet, and measurement specification. All connected documents should carry the same revision identity. When different departments work from different versions, operators may be forced to stretch components together, recalculate elastic informally, or copy the construction from an obsolete sample. A technically clear package reduces that dependence on memory and allows the approved edge to be reproduced across lines, factories, and repeat orders.
How Is Bulk Consistency Verified?
Bulk consistency depends on checking the edge before faults become enclosed inside the garment. Waiting until final inspection makes correction expensive because tape, elastic, facing, lining, and understitching may already be complete. Fabric behavior should be confirmed before cutting, while grain, notches, symmetry, and pattern revision should be audited at the cutting stage. The stabilization operation should then be checked as a separate component before the facing or lining hides it.
Production Stage | Key Control | Practical Check |
Fabric inspection | Stretch, recovery, shrinkage, shade, and fusing response | Compare bulk lots with the approved material and test record |
Cutting | Grain, pattern revision, notches, and symmetry | Left and right panels match the approved pattern |
Stabilization | Tape type, width, placement, and edge measurement | Compare with the approved component before enclosure |
First piece | Back depth, body contact, recovery, and facing roll | Approve the complete construction before line release |
Inline sewing | Elastic distribution, feeding, seam smoothness, and symmetry | Inspect early units from different operators or bundles |
Pressing | No growth, shine, bubbling, adhesive mark, or ridge | Let the garment cool, then remeasure and inspect |
Final inspection | Measurements, movement, appearance, and workmanship | Compare with the sealed sample and current specification |
Tolerance should reflect the garment and the location. A general circumference may allow a wider range than a highly exposed, fitted low-back edge. Many teams establish tighter internal control at critical points, sometimes around plus or minus three to five millimeters, but the correct value must be agreed during development rather than copied from another style. Inspect multiple units and sizes, and take early pieces from different operators or bundles. After pressing, allow the garments to cool before measuring because warm fabric can appear temporarily shorter, smoother, or more compliant than it will be after packing and wear.
Final production takeaway. A stable low-back edge is not created by one hidden strip of tape. It is the combined result of a correct pattern, suitable fabric, measured support, balanced bodice tension, controlled sewing, careful pressing, realistic movement testing, and disciplined transfer from the approved sample into production. When these decisions are made together, a backless dress can feel secure without looking heavy, tight, or over-engineered, and the same standard can be repeated through the full size range and later production runs.
Custom development inquiry. Duolan Apparel develops backless, halter, bodycon, party, occasion, satin, mesh, and fitted dress programs for established fashion brands, product teams, and sourcing offices. For a technical review and quotation, provide the tech pack or reference sample, fabric direction, size range, estimated order quantity, target market, and required delivery date. The development team can assess the low-back structure, stabilization route, sample plan, material risks, and production feasibility before the style moves into sampling and bulk planning.
Share:
Our Services
Categories
Table of Contents
Here, developing fashion collections is more than manufacturing garments — it’s a collaborative process focused on transforming ideas into well-executed, market-ready products. From fabric sourcing and sample development to scalable production and delivery coordination, every stage is built to support quality, consistency, and efficient collection launches across global markets.

