 Skip to content
Why Does a Backless Dress Gap at the Side? Causes, Fit Checks, and Fixes
Your trusted Women’s Apparel Development & Manufacturing Partner from China
- Jerry
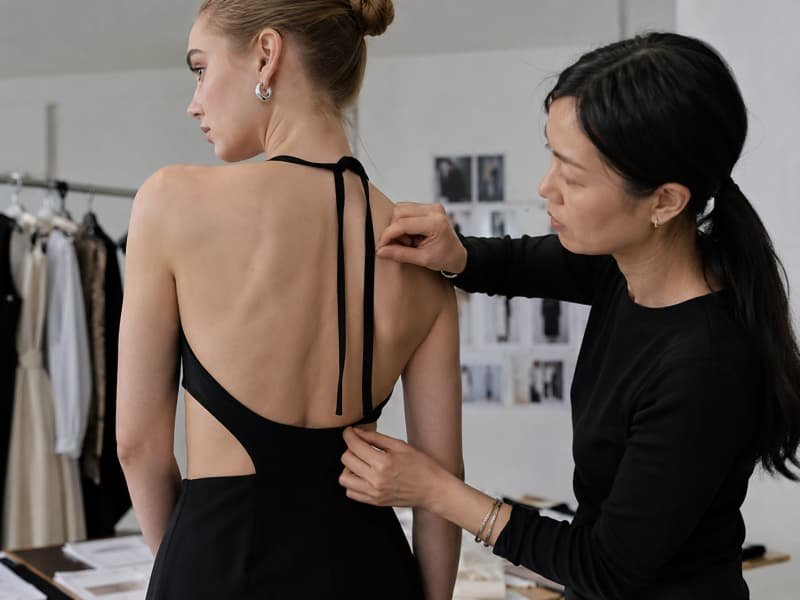
A backless dress can look perfectly smooth on a hanger and still open away from the body the moment someone turns sideways. That small gap near the side seam, underarm, or lower back is more than a cosmetic inconvenience. It may reveal an unstable bodice, an incorrect torso length, poor strap tension, stretched fabric edges, or a pattern that was never properly shaped around the wearer’s body.
A backless dress usually gaps at the side because the bodice has excess length or width, insufficient structural support, incorrectly balanced straps, or an edge that stretched during cutting and sewing. The gap can also appear when the pattern’s bust, waist, and torso proportions do not match the wearer. The correct fix depends on where the garment loses tension, not simply on choosing a smaller size.
For consumers, the problem can make an otherwise beautiful dress feel insecure. For fashion brands, it can lead to fit-related returns, negative reviews, extra sample rounds, and avoidable production corrections. The surprising part is that a one-centimeter reduction in the wrong place may create a new problem, while a smaller adjustment at the correct balance point can make the entire bodice sit smoothly. One fit session often tells the story: the team pins the visible gap, only to discover that the skirt is riding upward and releasing the upper bodice. Understanding that chain reaction is the difference between hiding a symptom and correcting the garment.

What Causes Side Gaping?
Side gaping occurs when the remaining bodice cannot maintain even tension around the body. Excess width or length, incorrect strap pull, weak bust or waist support, stretched open edges, and poor fabric recovery are the most common causes. The visible gap is often only the symptom; the real problem may begin at the shoulder, bust, waist, hip, lining, or back opening.
How an Open Back Changes Support
A standard fitted bodice forms a nearly continuous structure around the torso. The front, side seams, shoulder area, and back panel share the work of supporting the garment. Once a large portion of the back is removed, the dress loses part of that supporting ring.
The remaining anchor points become far more important. Depending on the style, the dress may rely on shoulder straps, a halter neck, side seams, an underbust seam, a fitted waist, a narrow back strap, internal elastic, boning, or a waist stay. If one anchor point is weak or incorrectly positioned, the tension shifts elsewhere. A strap that is too loose may allow the upper bodice to fall outward. A waist that is too loose may leave the lower side edge unsupported. A heavy skirt may pull the whole bodice downward.
This is why a backless dress cannot be developed successfully by simply lowering the back neckline on an ordinary dress pattern. The entire upper-body balance must be reconsidered. The pattern has to control the bust, side body, waist, and open-back edge as one connected system. Even a small amount of extra edge length can become noticeable. On a closely fitted style, an unsupported edge that is only 5-10 mm longer than the body area it must follow may stand away visibly, especially in firm satin, bonded fabric, or structured woven materials.
Where the Gap Usually Begins
The location of the gap provides useful clues. A gap directly below the arm often relates to upper-bodice width, bust shaping, or strap length. A gap closer to the waist is more likely to involve back length, waist contour, or a side seam that has not been shaped deeply enough.
- The side bust between the armhole and bust point
- The lower armhole edge
- The transition from the side seam to the open back
- The lower back near the waist
- The point where a strap joins the bodice
- The shell-and-lining seam around the opening
The visible opening is not always the starting point. A tight skirt can push the dress upward during walking, causing excess fabric to collect above the waist. A heavy skirt can pull downward and lengthen narrow straps. A tight neckline can rotate the side seam and make the side edge appear loose.
For that reason, experienced fit technicians do not begin by pinching the gap closed. They first check whether the waistline is level, whether the side seam is vertical, whether the bust sits in the correct position, and whether the garment returns to its original position after movement.
How Strap Tension Creates Gaping
Straps control both height and direction. When a strap is too long, the neckline and underarm drop, leaving more fabric around the side bust. When a strap is too short, it may lift the front bodice, pull the side seam backward, and create a diagonal opening below the arm.
Halter dresses are particularly sensitive because the force travels upward and inward toward the neck. If the halter strap is tightened to compensate for a loose bodice, the wearer may feel pressure at the neck while the lower side edge still gaps.
The strap attachment point matters as much as the finished strap length. Moving an attachment point by only a few millimeters can change the direction of pull. In narrow-strapped occasion dresses, a left-to-right difference of 3-5 mm may be enough to make one side sit differently from the other.
Straps should be checked while the dress carries its full weight. A narrow satin rouleau strap, soft elastic strap, or bias-cut tie may lengthen after hanging or wearing. Measuring the strap immediately after sewing does not show how it will behave after thirty minutes on the body.
When Gaping Is Not Intentional
Some dresses are designed to sit away from the body. A draped cowl back, loose resort dress, or softly constructed bias-cut style may include controlled ease. That is different from an unintended side gap.
- It exposes the side of the bust unexpectedly.
- It becomes larger when the wearer moves.
- It appears more strongly on one side.
- It makes the lining roll outward.
- It pulls the side seam away from vertical.
- It requires repeated adjustment.
- It changes significantly after a short period of wear.
The question is not whether the fabric touches the body at every point. The question is whether the opening behaves as designed. Controlled drape should look deliberate and remain balanced. Uncontrolled gaping usually interrupts the silhouette and reduces the wearer’s sense of security.

Is It Size, Shape, or Design?
The cause can come from overall sizing, individual body proportions, or the dress design itself. General looseness across the bust, waist, and back usually indicates a size issue. A local gap with an otherwise good fit often points to torso shape or pattern contour. When the same problem appears across several wearers or sizes, the design, grading, material, or construction is more likely responsible.
Is the Whole Bodice Too Large?
An oversized bodice normally shows looseness in several places rather than at one isolated edge. The neckline may sit lower than intended, the waist may feel loose, the armholes may open, and the side seams may shift away from their correct position.
Trying a smaller size can improve the fit, but it is not always the correct solution. Standard dress sizes assume a particular relationship between bust, waist, hip, shoulder width, and torso length. Many wearers do not match that exact proportion.
- Bust compression
- Horizontal wrinkles
- Restricted breathing
- Tightness across the hips
- A neckline that pulls downward
- A side seam that rotates forward
A simple fitting test is to pin the excess evenly at both side seams. If the neckline, waist, and back edge all improve without new pulling, excess circumference is probably part of the problem. If the side edge still stands away after the width is reduced, the issue is more likely related to vertical length, contour, or support.
Does the Torso Length Match?
Torso length is one of the most frequently missed causes of backless-dress gaping. Two people can have the same bust, waist, and hip measurements but very different shoulder-to-waist lengths.
When the bodice is too long, the waist or hip area may stop the fabric from dropping naturally. The extra length then folds, buckles, or opens outward along the side and lower back.
- Horizontal folds above the waist
- A waist seam sitting below the natural waist
- Straps that seem too long even after adjustment
- Gaping that improves when the bodice is lifted
- Excess fabric that can be pinned out vertically
- A lower back edge that collapses rather than lying flat
Front and back torso lengths should be checked separately. A fuller bust may require more front length, while the back remains comparatively short. Reducing both equally can make the front too short and cause the skirt or waist seam to lift. In custom development, useful measurements include shoulder-to-waist, nape-to-waist, side-neck-to-bust, bust-point-to-waist, and side-seam length.
Are the Body Proportions Different?
A backless dress must move over the bust and return toward the underbust and waist. If the wearer has a larger difference between bust and underbust than the pattern allows, the fabric may fit at the fullest point but remain loose below or beside it.
- A narrow back and fuller bust
- A broad back and smaller bust
- A high or low bust position
- A pronounced swayback
- Sloping shoulders
- A short upper torso
- A strong waist-to-hip curve
These differences do not mean the wearer chose the wrong size. They mean the pattern shape does not match the wearer’s distribution of volume. Bust balance is especially important. A garment can match the full-bust circumference and still fit poorly if the bust point, underbust, dart position, or side-panel curve is incorrect.
Visible Symptom | Likely Cause | Useful Fit Check |
Loose at bust, waist, and back | Overall size too large | Compare garment and body circumferences |
Bust fits but lower back gaps | Excess back length or weak waist contour | Pin out vertical excess above the waist |
Side gap appears below arm | Strap length, armhole shape, or bust balance | Adjust the strap temporarily and observe seam position |
One side gaps more | Asymmetric sewing, straps, or body balance | Measure both straps and side seams |
Gap appears after walking | Dress riding up or weak recovery | Walk, sit, turn, then recheck |
Edge rolls outward | Lining tension or poor understitching | Compare shell and lining behavior |
Gap worsens when hips are tight | Lower-body restriction | Check hip ease and skirt movement |
Is the Design Structurally Stable?
Some backless designs are visually attractive but structurally weak. A sketch may show a very low back, narrow side panels, a heavy skirt, and almost no internal support. The design may work for a still photograph but fail during normal movement.
- Deep open back
- Narrow straps
- Low side coverage
- Soft or heavy fabric
- Large skirt volume
- Deep neckline
- Minimal waist control
- No internal support
A design does not become stable simply because the bodice is made tighter. Over-tightening can create seam strain, bust flattening, discomfort, and upward movement.
The more fabric removed from the back, the more clearly the remaining support points must be planned. A secure design may need a fitted waist seam, internal elastic, boning, a stable lining, stronger strap placement, or a slightly revised opening shape. When repeated fittings show the same gap on different models, the problem should be treated as a design issue rather than explained as an unusual body shape.

How Do Patterns Cause Gaping?
Pattern-related gaping appears when the side edge, back opening, darts, seams, or support positions do not follow the body’s three-dimensional shape. The edge may be too long, the side seam too straight, or bust and waist suppression poorly distributed. A pattern can fit correctly in one size and still fail in others if grading changes the opening, strap position, or torso balance incorrectly.
Side-Seam Shape and Balance
The side seam connects several different body zones: underarm, bust, underbust, waist, and hip. On a backless dress, it often carries more structural responsibility than it would on a closed-back garment.
A side seam that is too straight may fit the bust but fail to follow the inward curve below it. A seam that is shaped too aggressively may pull tightly and push excess fabric toward the open edge.
- A seam rotating toward the front may indicate excess back width or insufficient front width.
- A seam rotating toward the back may indicate excess front width, strap pull, or bust imbalance.
- A seam bending near the waist may indicate incorrect torso length or waist placement.
Taking in the side seam is not always a complete correction. It changes the bust, armhole, waist, and sometimes the skirt at the same time. In production pattern work, a better result often comes from distributing the adjustment between the side seam, back edge, dart, princess seam, and strap position. The goal is not merely to remove fabric. It is to remove it from the location and direction where the body does not need it.
Back-Opening Contour
An open-back edge must follow a curved body while remaining stable without the support of a full back panel. If the pattern line is too straight or too long, the edge will stand away.
- Deep V-backs
- Curved scoop backs
- Low square backs
- Side-back cutouts
- Open corset backs
- Asymmetric openings
A back-opening shape that looks attractive on a flat pattern may not wrap correctly around the body. The pattern must remove enough length to create contour, particularly near the side waist and lower edge of the opening.
- Curved seam shaping
- Small concealed darts
- Waist-seam suppression
- Elastic tension
- Princess seams
- Internal mesh panels
- Controlled negative ease
The chosen method depends on the fabric. A non-stretch satin may need more precise seam shaping. A stretch jersey may rely partly on negative ease and recovery. A mesh-backed style may use an almost invisible support panel. The finished edge must be evaluated after lining, facing, binding, or elastic is attached because each finishing method can change the final length and tension.
Darts and Bust Control
Darts convert flat fabric into a three-dimensional form. When dart volume is too small, incorrectly positioned, or transferred poorly into a seam, the excess usually moves toward the nearest unsupported opening.
- A gap beside the bust
- Fabric folding toward the armhole
- A pointed or empty area below the bust
- The bust point sitting too high or low
- Diagonal wrinkles from the side seam
- A neckline that opens despite a fitted waist
The direction of a temporary fitting pin can help identify the missing shaping. Excess that forms a wedge pointing toward the bust usually relates to bust suppression. Excess that points toward the waist often indicates insufficient waist shaping or excessive bodice length.
Modern dresses may hide dart control inside princess seams, panel lines, gathers, pleats, or draping. Removing the visible dart does not remove the need for shaping. Dart position must also be reviewed across sizes. A correctly shaped sample size can fail if the bust point moves too far outward, upward, or downward during grading.
Grading Across Sizes
Backless styles are particularly sensitive to grading because several exposed edges and anchor points must remain balanced. Simply increasing all measurements proportionally can distort the design.
- Back openings becoming too wide in larger sizes
- Straps increasing more than necessary
- Armholes becoming too deep
- Bust points moving too far apart
- Waist shaping increasing too slowly
- Elastic tension remaining unchanged
- Boning lengths not matching the graded torso
- Side coverage becoming insufficient
A fitted sample should not be approved only in the base size. For a commercially important style, reviewing at least one smaller and one larger size is a sensible minimum. Wider size ranges may require additional fittings at the upper end because body proportions do not increase evenly.
Critical dimensions should be checked independently rather than assumed to grow at the same rate. Back-opening depth, strap position, cup position, and side coverage may need more controlled grading than bust or hip circumference. The correct question is not whether every size looks identical. It is whether every size maintains the intended coverage, support, proportion, and freedom of movement.

How Do Fabrics Affect the Fit?
Fabric influences side gaping through stretch, recovery, drape, weight, grain direction, and edge stability. A material may fit well initially but relax during wear, causing an open edge to grow. Bias-cut satins, soft meshes, lightweight jerseys, and fabrics with weak recovery require careful handling, compatible lining, and appropriate stabilization to preserve the approved fit.
Stretch and Recovery
Stretch measures how far a fabric extends. Recovery measures how closely it returns to its original size. These two qualities are often confused.
A fabric can stretch easily but recover poorly. Such a material may feel comfortable during fitting but loosen after sitting, dancing, or wearing the dress for an hour.
- Stretch in the width direction
- Stretch in the length direction
- Recovery after repeated extension
- Fabric weight
- Elastane quality
- Heat response
- Relaxation after cutting
- Performance with the selected lining
A useful workshop screening method is to mark a 10 cm section, stretch it to a controlled length, release it, and measure it again after a short rest period. This is not a replacement for laboratory testing, but it helps compare candidate materials under the same conditions. For example, if a 10 cm section is extended to 12 cm and returns to 10.1 cm, its immediate recovery is stronger than a material that remains at 10.5 cm. The difference may seem small, but across a long open edge it can become visible.
Negative ease should be based on actual material performance. Applying the same pattern reduction to two fabrics with different recovery can produce very different fit results.
Bias and Edge Growth
Deep back openings often contain long diagonal edges. On woven fabrics, diagonal or bias sections are naturally more flexible because the yarns can shift.
- Cutting
- Bundling
- Transport
- Sewing
- Pressing
- Hanging
- Fitting
- Finishing
A pattern may be correct, yet the finished edge may become longer because the cut piece was stretched before it was stabilized.
Fabric Type | Main Fit Risk | Practical Control |
Lightweight satin | Bias growth and seam rippling | Staystitch early and reduce handling |
Stretch jersey | Relaxation and weak recovery | Test recovery and control negative ease |
Soft mesh | Edge distortion and low support | Use stable lining or hidden support mesh |
Heavy embellished fabric | Downward pull on straps and waist | Reinforce anchors and test garment weight |
Bonded or firm woven | Visible standing edge | Improve contour rather than relying on tension |
Bias-cut woven | Length growth during hanging | Hang the sample before final hem and fit approval |
Power mesh | Excess compression or seam stress | Match stretch direction and recovery to the shell |
Staystitching, narrow fusible tape, clear elastic, or controlled binding can reduce growth. The correct method depends on whether the edge must remain firm or retain some flexibility. Operators must avoid pulling the fabric through the machine. Feed balance, presser-foot pressure, seam type, and pressing temperature can all affect the finished length.
Shell and Lining Compatibility
The lining is part of the garment’s fit system. It affects support, friction, movement, opacity, and edge stability.
Problems occur when the lining and outer fabric behave differently. A non-stretch lining inside a stretch shell may restrict movement and pull the dress upward. A highly stretchy lining may provide too little support. A heavy lining may drag a delicate shell downward.
- Stretch direction
- Stretch percentage
- Recovery
- Weight
- Shrinkage
- Surface friction
- Heat sensitivity
- Seam behavior
- Opacity
A lining can also create side gaping if it is cut slightly longer than the shell around an open edge. The excess may roll outward and make the gap look larger. If it is too short, it may pull the shell inward and distort the opening.
The shell and lining should be tested as a complete garment. Approving each material separately does not prove that they will work together. For sheer dresses, a stable support mesh may be more useful than a conventional soft lining. For satin dresses, a smooth lining with controlled stretch can reduce friction and help the shell settle correctly.
Fabric Weight and Structure
A soft fabric may not have enough body to support the intended silhouette. A heavy fabric may place too much load on the straps or waist.
- Can the fabric hold the intended edge shape?
- Can the bodice support the weight of the skirt and trims?
- Will the material return to shape after movement?
A long embellished skirt creates more downward force than a lightweight mini skirt, even when the upper pattern is identical. Narrow straps that work on one version may stretch on the heavier version.
- Firmer lining
- Partial interfacing
- Power mesh panels
- Underbust elastic
- Boning
- Waist stays
- Reinforced strap points
- Wider internal seam allowances
Making the dress tighter is not a reliable substitute for structure. Excessive tightness can create pulling, riding up, seam failure, and discomfort. The best result usually comes from balancing visible softness with hidden support. The dress can still look light and elegant while using carefully placed internal components to stabilize the fit.
How Can Side Gaping Be Fixed?
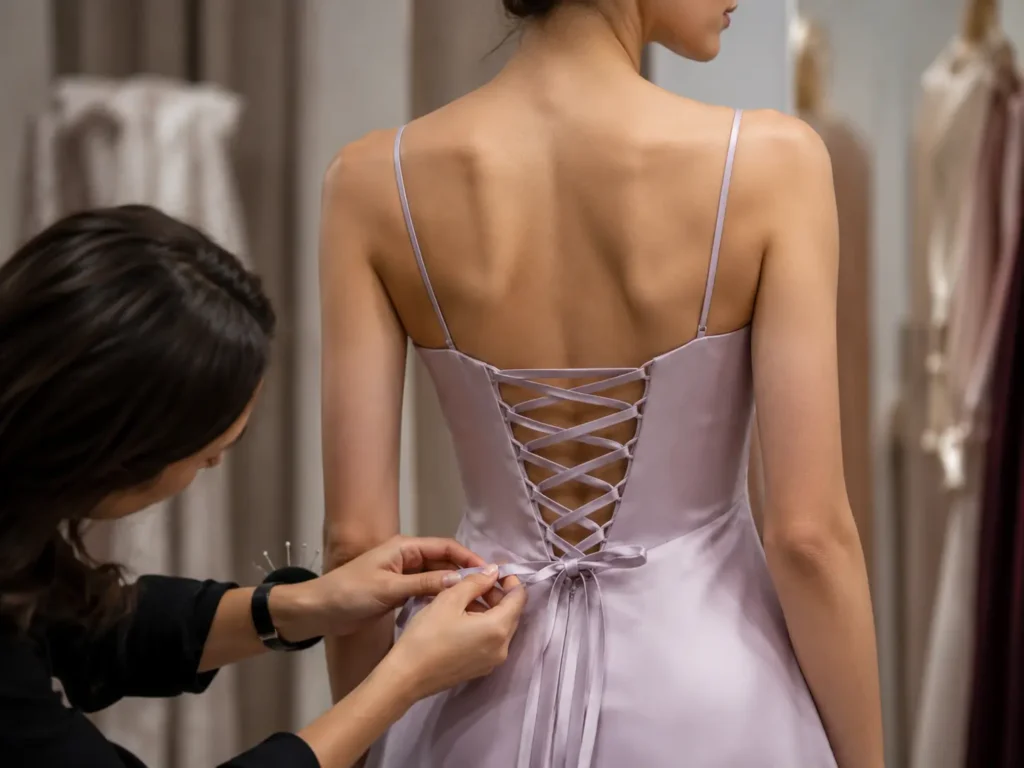
Side gaping can be corrected by changing strap length, reducing excess width or length, reshaping seams or darts, stabilizing the open edge, or adding internal support. The correct repair depends on the original cause. A small local gap may need a simple alteration, while repeated gaping across sizes or samples usually requires a pattern, fabric, or construction change.
Start With the Least Disruptive Fix
Strap adjustment is usually the first check because it is quick and reversible. Shorten the strap temporarily and observe the whole garment rather than focusing only on the gap.
- Raise the neckline to the intended position
- Place the bust correctly
- Close the side edge without pressure
- Keep the side seam vertical
- Allow comfortable movement
If the neck or shoulder becomes uncomfortable before the gap closes, the strap is not the main cause.
The next step is to identify whether the excess is horizontal, vertical, or diagonal. Pinning should follow the direction of the excess rather than simply folding the open edge inward. A horizontal pinch usually suggests extra circumference. A vertical pinch suggests excessive torso length. A diagonal pinch often points toward bust shaping, dart control, or an incorrectly contoured opening.
Temporary fitting pins should be measured and recorded. Pinning until it looks right may work for one dress, but it does not produce a repeatable pattern correction.
Alter the Seam or Pattern
Taking in the side seam can work when the bodice is generally loose. It is less effective when the gap is caused by excess edge length or poor vertical balance.
- Bust comfort
- Underarm depth
- Waist position
- Side-seam angle
- Zip location
- Lining tension
- Left-to-right symmetry
A lined dress normally requires matching adjustments to both shell and lining. Styles with side zippers, boning, piping, cups, or waist seams may need partial reconstruction.
Localized excess may be better corrected with a small dart, princess-seam adjustment, or reshaped back edge. A 1 cm reduction distributed between two locations may produce a cleaner result than removing the full amount from one seam.
For production, every change should be transferred to the paper or digital pattern. Operators should not be expected to make individual visual adjustments during sewing.
Add Flexible or Internal Support
Elastic can help an open edge follow the body while allowing movement. It is especially useful in stretch styles or designs where a visible dart would interrupt the appearance.
- Clear elastic
- Fold-over elastic
- Narrow woven elastic
- Silicone-backed elastic
- Stay tape
- Power mesh
- Boning
- Underbust elastic
- Waist stays
The amount of elastic tension must be controlled. Too little tension will not prevent gaping. Too much will create rippling, curling, pressure, or an uneven edge.
- Elastic type
- Width
- Cut length
- Placement
- Joining method
- Tension distribution
- Size grading rule
Boning and waist stays are more appropriate for structured occasion, corset, and bustier styles. They transfer support away from the straps and toward the torso. These components should be designed into the garment early. Adding them after the sample is complete can change seam thickness, sewing order, comfort, cost, and appearance.
Problem | Most Likely Fix | Main Risk |
Slight upper-side looseness | Shorten or reposition the strap | Neck or shoulder pressure |
General bodice looseness | Reduce side seams gradually | Bust or armhole becoming too tight |
Local gap beside bust | Adjust dart or princess seam | Distorted bust shape |
Lower-back gap | Shorten back length or increase waist contour | Waistline lifting |
Stretch edge grows during wear | Add controlled elastic or stay tape | Puckering from excess tension |
Structured bodice collapses | Add boning or a waist stay | Visible channels or discomfort |
Gap appears only after walking | Increase hip ease or improve recovery | Treating the bodice instead of the cause |
Minor event-day gap | Use fashion tape | Adhesion failure or fabric damage |
Know When Temporary Fixes Are Enough
Fashion tape can hold a small opening against the skin for a short event. It is useful when the dress otherwise fits correctly and there is no time for alteration.
- Apply it to clean, dry skin.
- Avoid lotion around the area.
- Use several short pieces.
- Test skin sensitivity.
- Press the fabric into position without stretching it.
- Carry spare tape.
Tape should not be used to compensate for a serious pattern or support problem. Heat, perspiration, movement, and fabric weight can reduce adhesion.
When consumers repeatedly need tape, pins, or constant adjustment, the dress likely has a fit issue that should be corrected at pattern level. A single custom alteration may solve one garment. A commercial style requires a solution that works consistently across production quantities, sizes, and repeat orders.

How Do Manufacturers Prevent Gaping?
Manufacturers prevent side gaping by defining the intended fit, collecting accurate measurements, selecting compatible materials, controlling exposed edges, testing movement, validating multiple sizes, and locking the approved pattern and construction before bulk production. High-risk styles should receive first-piece or pilot-run approval so the production line can prove that it can reproduce the fitted sample consistently.
Build a Better Tech Pack
A backless-dress tech pack should include more than bust, waist, and hip measurements. Those dimensions describe overall size but not the position and tension of the open edge.
- Front shoulder-to-waist length
- Back shoulder-to-waist length
- Bust-point height
- Bust-point spacing
- Underbust circumference
- Underarm depth
- Side-seam length
- Back-opening depth
- Back-opening width
- Finished open-edge length
- Strap length
- Strap attachment position
- Waist-seam position
- Elastic or stay-tape length
- Cup and boning placement
Critical measurements may need tighter control than general measurements. Depending on the fabric and brand standard, sensitive points such as strap length, back-opening width, or side-seam length are often managed within approximately +/-0.5-1.0 cm. The exact tolerance should be confirmed by the brand because rigid woven fabrics and flexible knits do not behave the same way.
The tech pack should also describe the intended support level and wearing situation. A backless dinner dress, dance dress, and beach dress have different movement and security requirements.
Review the Sample in Motion
A fit sample should not be approved from a front-facing photograph. The garment must be reviewed from the front, side, and back, both standing and moving.
- Neutral standing
- Walking
- Turning
- Sitting
- Raising the arms
- Reaching forward
- Returning to a relaxed position
The reviewer should record whether the dress rides upward, the side seam rotates, the gap becomes larger, the edge returns to position, the strap length changes, the lining becomes visible, the bust remains supported, and the waistline stays level.
Movement testing often reveals that the real cause sits below the visible gap. If the skirt is too tight at the hips, the dress may rise and release tension at the bodice. If the fabric has weak recovery, the edge may remain stretched after the wearer sits.
Fit comments should be precise. “Make the back tighter” is not enough. A usable comment states the location, amount, direction, and effect of the correction.
Lock Materials and Construction
Once the fit is approved, the production materials and sewing method must remain consistent with the approved sample.
A replacement fabric with the same composition can still have a different weight, stretch, recovery, finish, or drape. A different lining can change support. A new elastic supplier can change edge tension.
Control Point | What Must Be Locked |
Main fabric | Weight, stretch, recovery, color, finish, and approved lot direction |
Lining | Weight, opacity, stretch, shrinkage, and surface behavior |
Pattern | Approved revision and grading version |
Straps | Material, width, finished length, and attachment position |
Open edge | Finished length and stabilization method |
Elastic | Type, width, cut length, and application tension |
Support | Cups, boning, power mesh, waist stay, and placement |
Sewing | Seam type, stitch density, understitching, and pressing method |
Fit reference | Sealed sample, approved images, and final comments |
Tolerances | Size-specific critical measurement limits |
A sealed sample should remain available to the sample room, production team, and quality department. All documents must refer to the same pattern and material revision. Many bulk fit failures begin with an uncontrolled change before sewing starts. Preventing those changes is more effective than trying to inspect the defect out of finished garments.
Use First-Piece and Inline Checks
Shape-sensitive styles benefit from a first-piece review before the full production quantity is released.
- Backless dresses
- Halter dresses
- Corset and bustier styles
- Bodycon dresses
- Bias-cut satin dresses
- Mesh-panel dresses
- Heavy embellished dresses
- Styles with narrow straps
The first-piece check confirms that the production line can reproduce the sample-room method. It should review both measurements and appearance.
- Strap length and symmetry
- Side-seam length
- Underarm opening
- Back-opening dimensions
- Waist placement
- Elastic cut length
- Boning position
- Shell and lining alignment
- Edge rippling or stretching
- Side-seam rotation
Inspection should happen before difficult areas are fully closed. A stretched back edge is easier to correct before lining, binding, or decorative trims are completed. Size-specific measurement charts are essential; a base-size standard should not be applied blindly to every size.
The strongest prevention system combines pattern accuracy, fabric control, clear sewing instructions, trained operators, first-piece approval, inline measurement, and final inspection. No single checkpoint can compensate for weaknesses in all the others.
CUSTOM DEVELOPMENT & QUOTATION: A successful backless dress must hold the bust, follow the torso, remain secure during movement, and reproduce the same approved fit across colors, sizes, and repeat orders. Duolan Apparel develops fashion, occasion, party, fitted, halter, backless, bodycon, and corset-inspired dresses for established fashion brands and product teams. Send your tech pack, reference sample, target fabric, size range, order quantity, delivery market, and launch date to duolan apparel for a technical review and quotation.
Share:
Our Services
Categories
Table of Contents
Here, developing fashion collections is more than manufacturing garments — it’s a collaborative process focused on transforming ideas into well-executed, market-ready products. From fabric sourcing and sample development to scalable production and delivery coordination, every stage is built to support quality, consistency, and efficient collection launches across global markets.

