Skip to content

What Are the Most Common Corset Dress Production Defects in Bulk Production?
Your trusted Women’s Apparel Development & Manufacturing Partner from China
- Jerry
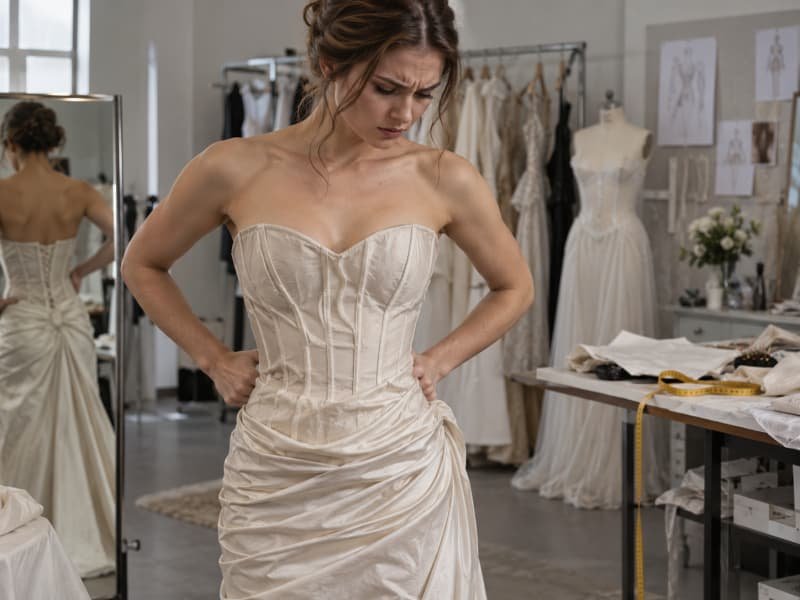
A corset dress can look deceptively simple from the outside: a fitted bodice, a defined waist, a clean neckline, and perhaps a concealed zipper at the back. Inside, however, it behaves more like a small structural system. The shell fabric, lining, cups, boning, seam positions, neckline, waist suppression, closure, and skirt all influence one another. A few millimeters of error in one area can shift the bust, twist a seam, change the waist balance, or make the entire garment sit differently once it is worn. That is why a corset dress that looks acceptable on a hanger can still fail during fitting, photography, movement, or bulk reproduction.
Common corset dress production defects include neckline gaping, uneven cups, weak bust support, waist buckling, twisted or visible boning, zipper rippling, seam puckering, lining distortion, panel asymmetry, and size-to-size fit inconsistency. Most are not isolated sewing errors. They usually result from interactions between pattern balance, fabric behavior, internal support, grading, workmanship, and production control, so prevention must begin before sewing starts.
For a fashion brand, the commercial risk is rarely limited to repairing one imperfect garment. A small sample-stage issue can become a repeated size-range problem, a photography problem, a return reason, or a delayed launch once the same construction is reproduced at scale. The dangerous defects are often not dramatic at first. One cup sits slightly high, the center-back zipper looks a little wavy, or the neckline opens only when the wearer raises her arms. The sample still seems usable. Then the same weakness appears across colors, sizes, or production lines. Understanding where these defects begin is what turns inspection from a final check into a real production-control system.
What Are the Most Common Corset Dress Defects?
The most common corset dress defects fall into connected groups: bust and neckline fit, waist shaping, boning and internal support, zipper and closure stability, seam and panel appearance, lining control, symmetry, grading, and bulk consistency. The important point is that the visible defect is only the symptom. Reliable correction starts by identifying which pattern, material, construction, or production decision created it.
Visible Defects and Hidden Causes
Corset dresses are less forgiving than looser silhouettes because the garment is expected to stay close to the body while controlling shape at the bust, underbust, waist, and upper torso. A relaxed dress can absorb several millimeters of variation without looking obviously wrong, while a fitted corset bodice may show the same variation as a shifted cup, uneven neckline, twisted center front, or distorted princess seam. The closer the garment sits to the body, the more clearly small differences become visible under tension.
The first mistake in defect diagnosis is often naming the symptom as though it were the cause. A wavy zipper does not automatically mean the zipper was sewn badly. The back bodice may be too tight, the shell may stretch more than the zipper tape, the waist seam may contain too much bulk, or the zipper area may have been stretched during installation. The same logic applies to neckline gaping: removing fabric from the edge may improve one sample while leaving the true cause – incorrect cup projection, bust position, torso length, or waist anchoring – untouched.
Experienced production teams therefore separate problems into at least four working categories: fit defects, structural defects, appearance defects, and repeatability defects. Fit defects change how the garment sits on the body. Structural defects involve cups, boning, lining, or closures. Appearance defects include puckering, ridging, pressing marks, and asymmetry. Repeatability defects appear when an approved result cannot be maintained through the size range, across colors, or from one production batch to another. That final category is often the most expensive because it turns a small technical weakness into a commercial consistency problem.
A Practical Defect Map
A useful corset inspection records more than the name of the defect. It should note where the problem appears, whether it is present before fitting, whether it becomes stronger under body tension, and whether several garments show the same pattern. Those observations quickly narrow the likely cause. A neckline that gaps only during movement suggests a different investigation from a neckline that already stands away from the body on a dress form, just as a zipper that ripples only when worn should not be diagnosed in the same way as one that is wavy while lying flat.
Defect | What the wearer or brand sees | Measurements or references to compare | First areas to investigate |
Neckline gaping | Edge stands away from body | CF neckline, upper bust, cup height, neckline edge length | Pattern balance, cup volume, edge stretch |
Uneven cups | One cup higher, fuller, or farther outward | Left/right apex height, apex-to-CF distance, underbust seam | Cutting, cup placement, panel symmetry |
Waist buckling | Horizontal folds above or below waist | CF length, side length, waist position, bone length | Torso balance, waist suppression, support |
Boning ridges | Internal structure visible through shell | Bone position against approved sample | Bone stiffness, fabric weight, channel construction |
Zipper rippling | Waves along center-back closure | Left/right zipper seam length, back waist width | Stretch, stabilization, sewing feed, fit tension |
Seam puckering | Small waves beside panel seams | Seam shape against pattern and approved sample | Fabric, stitch setting, seam curvature, pressing |
Lining distortion | Pulling, bubbling, or twisting inside bodice | Shell and lining seam lengths | Stretch mismatch, attachment tension |
Size inconsistency | Base size fits, other sizes do not | Graded bust, waist, torso, cup, and support positions | Grading logic, component scaling |
Side-to-side comparison is especially useful on a structured bodice. Instead of checking only finished bust and waist circumference, compare left and right bust-point positions, neckline heights, princess-seam intersections, side-seam lengths, and waistline levels. Small differences that are difficult to notice on the cutting table become much more obvious once the corset is under tension. If the asymmetry already exists in the cut components, sewing correction will not solve it. If cut parts are symmetrical but finished garments vary by operator, assembly control becomes a stronger suspect.
When Small Defects Become Bulk Problems
A single imperfect sample is usually repairable, but a systematic error repeated through a production order is far more serious. This is why the commercial risk of a corset defect depends less on how dramatic the first problem looks and more on whether the cause can repeat. A cup positioned slightly high may be hard to notice on one dark sample, yet if placement is controlled only by operator judgment, the difference can drift further through production and create obvious neckline imbalance, side spillage, or uneven seam lines.
Fast-fashion production adds another layer of variation because several colors and sizes may run at the same time. Fabric hand feel can change by lot, operators can rotate, cup suppliers can change production batches, and a style can move from an experienced sample maker to a larger sewing line. Every transition creates an opportunity for an uncontrolled detail to move. A good corrective action therefore removes the reason the defect can repeat, whether that means revising the pattern, adding a notch, defining cup position from fixed points, changing bone length, stabilizing a zipper seam, or clarifying a workmanship reference.
The most valuable defect record also identifies the stage at which the problem first appears. This prevents teams from spending time fixing the wrong department’s work. A left-right mismatch visible immediately after cutting points toward marker, cutting, or fabric-handling control. A bodice that is symmetrical before lining but twists after the lining is attached suggests a shell-to-lining balance issue. A garment that remains flat off-body but distorts only under fit tension points back toward pattern balance, stretch, support, or grading rather than simple visual workmanship.
Which Pattern and Fit Defects Affect Corset Shape?
Corset shape is controlled by the relationship between bust projection, neckline length, underbust position, torso length, waist suppression, and panel curvature. When these relationships are unbalanced, common results include gaping necklines, compressed or displaced cups, horizontal waist wrinkles, side-seam movement, and uneven support. These issues should be corrected in the pattern before stronger boning or sewing adjustments are used to hide them.

Neckline, Cup, and Bust Balance
A corset neckline can gape even when the finished edge measurement matches the specification because that edge cannot be judged independently from the three-dimensional shape below it. If the cup does not create enough forward projection, excess fabric may appear around the upper bust. If the cup is too large, the neckline may also stand away from the body. If the waist does not anchor the bodice securely, the whole upper section can rise or shift during movement and create intermittent gaping that disappears when the wearer stands perfectly still.
Bust-point position is equally important. A cup can have roughly the correct volume and still look wrong because its apex sits too high, too low, too close to center front, or too far toward the side. The wearer then receives support in the wrong place, and the visible result may be flattening, spilling, an uneven neckline, or a princess seam that looks as though it has been sewn incorrectly. A technical fit review should therefore compare apex-to-apex distance, apex-to-center-front distance, underbust position, cup height, neckline height, and the vertical distance from bust point to waist.
When cup issues appear, it is useful to separate three questions: Is the cup volume correct? Is the cup positioned correctly? Is the surrounding bodice holding it in the correct position? Changing cup size before answering those questions can create unnecessary sampling rounds. In structured dresses, a nominally larger cup can sometimes make gaping worse if the original issue was position rather than volume. Similarly, tightening the neckline can hide a low cup on one sample while creating pressure or rolling in another size.
Waist and Torso Balance
Waist wrinkles are among the most frequently misdiagnosed corset problems. Horizontal folds above the waist often suggest excess bodice length, but similar folds can be created by excessive waist compression, incorrect panel curvature, lining tension, or boning that cannot follow the body’s shape. The direction and location of the wrinkle provide useful clues. A fold that travels across several panels at the same level often points toward torso-length or waist-balance problems, while a localized ridge beside one boning channel deserves a closer look at the support structure itself.
Fit should also be tested in more than one body position. A corset intended for party, occasion, or going-out wear cannot be judged only while the fit model stands upright with arms relaxed. Sitting shortens and reshapes the torso, raising the arms changes the relationship between bust, underarm, and neckline, and turning creates diagonal tension. The goal is not to make a structured bodice behave like sportswear, but normal movement should not cause severe buckling, obvious shifting, sudden neckline opening, or painful pressure points.
Garment length must also be separated from body balance. Shortening the entire front bodice to remove one horizontal wrinkle can improve the waist while pulling the cup down or changing neckline coverage. The correction should target the section where excess or insufficient length actually exists. Pattern work is more reliable when front length, side length, back length, bust projection, and waist position are viewed as connected measurements rather than independent numbers copied from a specification sheet.
Fit Before Construction
Stronger construction cannot rescue a fundamentally incorrect pattern. This sounds obvious, yet it remains common to see extra boning, tighter elastic, heavier interfacing, or a more rigid cup added after a sample fails to hold the intended silhouette. Before changing the internal structure, the pattern should be assessed without asking support components to compensate for incorrect geometry. The bust should sit in the intended location, the underbust should follow the body, the waist should fall at the right level, and front, side, and back lengths should remain balanced.
A corset can technically match the bust and waist measurements while failing those tests because finished circumference tells the team how large the garment is, not where the volume is distributed. Two patterns can share the same bust circumference while creating very different bust projection and side-body shapes. That difference becomes obvious when the garment is worn. If projection is distributed too much toward the side, the front can look flat. If too much volume is concentrated at center front, the cups can look pointed or unstable even though the tape measure says the garment is within tolerance.
Fabric should be part of fit approval rather than treated as a later sourcing substitution. A pattern developed in a stable woven should not automatically be reused in a fabric with meaningful mechanical stretch, and a stretch satin may allow the waist to expand enough to change how the bust support sits. Conversely, a rigid satin can expose every error in panel shaping. Temporary fabrics are useful for early shape work, but the closer the sample gets to approval, the more important it becomes to test the intended shell, lining, cups, boning, and closure together.
How Do Boning, Cups, and Closures Fail?
Boning, cups, and closures fail when they are specified or installed as separate accessories rather than parts of one support system. Boning must stabilize the bodice without overpowering the shell, cups must hold bust volume in the correct position, and the closure must carry body tension without distortion. A problem in one component often appears visually in another, so diagnosis should follow the load path through the garment.

Boning Control
More boning does not automatically produce a better corset dress. The useful question is what each bone is expected to control. A vertical bone beside a princess seam may help prevent folding and maintain panel shape, boning beside a center-back zipper can stabilize the closure area, and a side bone may help keep the waist and underarm from collapsing. Those functions do not always require identical stiffness, width, or length, especially in fashion corsets where the objective is structured shape rather than heavy waist reduction.
Common fashion-corset boning widths are often found around 6-10 mm, although the correct choice depends on garment weight, shell opacity, channel construction, and the load the bone is expected to carry. Narrower support can work well in delicate occasionwear where visible ridging must be minimized, while wider or stiffer options may be needed when the garment carries more structural load. These figures are development starting points, not universal rules, and the actual fabric and sample should decide whether a chosen bone is sufficiently supportive without printing through the shell.
Bone length matters just as much as width. A bone should not be forced tightly against both ends of its finished channel because sitting and bending can drive the end into the seam. In many fashion constructions, development may start with roughly 6-12 mm of total clearance between bone and finished channel length, then be adjusted according to bone material, channel design, end finishing, and movement testing. The purpose is to prevent both excessive migration and direct pressure on the channel ends rather than applying one fixed clearance to every style.
Component | Practical development range or specification | Main risk if poorly matched |
Fashion boning width | Common starting widths around 6-10 mm | Too weak, too bulky, or visible through shell |
Bone-to-channel length | Often trialed with roughly 6-12 mm total clearance | Poking, buckling, excessive migration |
Invisible zipper | #3 coil is common for lighter fashion dresses; heavier structures may need a stronger closure system | Rippling, difficult operation, seam strain |
Fine satin stitch length | Often trialed around 2.0-2.5 mm | Puckering, seam marking, drawing-in |
Medium woven stitch length | Often around 2.5-3.0 mm | Weak seam or excessive perforation if poorly matched |
Cup positioning | Fixed from center front, bust apex, underbust, and seam notches | Uneven bust shape, neckline imbalance |
Cup Support
A bra cup is only one part of the bust-support system. Its molded shape provides volume, but the surrounding corset determines where that volume sits on the body and how stable it remains during movement. Four relationships deserve separate attention: cup volume, cup position, underbust support, and neckline integration. Cup volume determines whether the bust is contained without flattening or spilling, while positioning determines whether the apex aligns with the intended bust point and whether the surrounding seams support rather than fight the cup.
Commercial foam cups are not standardized in shape across suppliers. Two cups described with the same nominal size can differ in projection, width, height, foam density, and edge shape. When a supplier or cup mold changes, the corset pattern may need to be reviewed even if the purchasing description appears identical. This is particularly important when a brand approves the appearance of a sample and then assumes any component with the same size label will reproduce the result in bulk.
Cup placement also needs repeatable production references. An experienced sample maker can often position a cup by eye, but bulk sewing requires notches, seam intersections, center references, or measurable placement points. The operator should not have to decide where each cup looks right. When assessing support, inspect both the cup and the bodice around it. A cup that appears too loose may actually be correct while the upper bodice is too long, and a cup that appears too small may be sitting too low. Correcting the wrong variable can create several rounds of avoidable revision.
Zipper and Closure Stability
The center-back zipper is often blamed for problems that originate elsewhere because it sits directly on a high-tension area of the garment. A zipper that waves only when the dress is worn tells a different story from one that is already rippled on the hanger. When the zipper lies flat off-body but distorts under fit tension, back width, waist compression, seam stabilization, or fabric stretch should be reviewed. If the zipper is already wavy before fitting, sewing feed, seam handling, zipper tape, pressing, or reinforcement becomes more likely.
Before installation, the two center-back seam lengths should be compared so one side is not being eased into the zipper differently from the other. Stretch fabrics need particular care because zipper tape normally has much less stretch than the shell. If the garment edge is stretched during installation, the shell contracts afterward and produces characteristic rippling around the stable tape. A clean zipper application therefore depends on both sewing technique and the tension balance of the surrounding bodice.
Closure choice should reflect the load the finished garment will carry. A lightweight invisible zipper can provide the clean appearance wanted in occasionwear, but a heavily structured bodice should not transfer unrealistic tension directly to a delicate closure. Depending on the design, internal hooks, a waist stay, stabilizing tape, or another load-sharing method may reduce strain at the zipper. The visible closure should be treated as part of the fit system, not as an isolated trim that can simply be replaced with a stronger version after the surrounding structure has already failed.
Which Fabric and Sewing Defects Affect Appearance?
Fabric and sewing defects are especially visible on corset dresses because the shell is held under tension and divided into several shaped panels. Stretch, recovery, thickness, stiffness, drape, and opacity influence whether internal construction remains smooth. Sewing must then join curved, multi-layer sections without feeding, stretching, or pressing them unevenly, which makes material behavior and machine control inseparable from final appearance.

Fabric Changes the Pattern
A corset pattern is developed for a material behavior, not only a set of measurements. Change the material and the same paper pattern can produce a different garment. Stretch is the obvious example, but recovery is often more important in actual wear. A fabric may stretch enough to fit comfortably during the first fitting and then fail to return to its original dimensions after prolonged tension, allowing the neckline to open, the waist to relax, or the center-back closure to begin waving.
Weight and stiffness affect structure differently. A heavier satin can help disguise internal cup and boning edges but may create more seam bulk around the waist or princess seams. A lightweight satin can produce an elegant surface when handled well, yet it exposes pressing marks, boning ridges, and puckering easily. Mesh creates beautiful transparency but usually contributes much less structural resistance, so the lining or localized reinforcement may need to carry more of the support function than the visible shell suggests.
Opacity is also a production issue rather than a styling detail. A corset can fit correctly and still fail commercially because cup edges, seam allowances, boning channels, or interfacing become visible under studio lighting. Material assessment should therefore consider stretch, recovery, weight, drape, opacity, surface sensitivity, and support compatibility together. A substitute fabric that matches color and price but behaves differently in those areas may require a pattern or construction adjustment rather than a simple purchasing approval.
Seam Puckering and Surface Marks
Seam puckering is one of the most visible defects on satin corset dresses because reflected light magnifies small surface irregularities. The instinctive response is often to reduce thread tension, but puckering can come from several mechanisms. Uneven feeding can compress one curved panel against another, excessively short stitches can create a dense perforation line, an unsuitable needle can damage yarns or leave visible holes, and an aggressive pattern curve can force more easing than the material can absorb cleanly.
Practical machine settings should therefore be treated as controlled starting trials rather than fixed rules. Fine satin commonly benefits from smaller needles, such as approximately 65/9 to 70/10, with stitch lengths often trialed around 2.0-2.5 mm. Medium satin or crepe may start around 70/10 to 80/12 with approximately 2.5-3.0 mm stitch length. These ranges are not specifications for every fabric; thread type, fabric density, number of layers, machine feed, seam construction, and the brand’s visual standard can justify different settings.
Pressing deserves equal attention because corset seams are often pressed over curved forms to develop three-dimensional shape. Excessive pressure can flatten cup volume, create seam impressions, or produce shine on satin and velvet, while too little pressing leaves bulky seam allowances and weakens the clean sculpted appearance expected from structured dresses. When puckering appears consistently at the same pattern point, the team should inspect seam curvature and material compatibility before repeatedly changing machine tension. When the problem moves by operator or machine, sewing control becomes a stronger suspect.
Lining and Panel Distortion
The lining may be invisible in product photography, but it can determine whether the outside of the dress looks smooth. If the lining is shorter than the shell, it can pull the outer fabric inward. If it is too long, it may bunch around the waist, neckline, or cup area. When shell and lining have different stretch, recovery, or shrinkage behavior, twisting can appear after pressing or wear even though both layers looked acceptable before assembly.
Structured dresses make lining balance more important because the lining may be attached around cups, boning channels, zipper seams, neckline edges, and waist seams. Once those connections are closed, an error introduced in one area can affect several panels. The shell and lining should therefore be compared before final closure, especially at shaped seams and the neckline, rather than waiting for the fully finished garment to reveal that one layer has been controlling the other.
Panel distortion should be diagnosed from the cutting stage onward. Mirrored left and right pieces must remain true mirrors after cutting, grain direction should be controlled where it influences stretch or drape, and notches should identify where curved sections are intended to meet. During inspection, center front, bust seam position, and side seam provide three useful reference axes. If center front remains vertical but one princess seam moves, a local panel or assembly issue is likely. If the whole bodice rotates and both side seams shift, overall pattern or tension balance deserves investigation.
How Do Grading and Bulk Production Create Defects?
Grading and bulk production create defects when the relationships that work in the approved base size are enlarged mechanically or when the sample standard is not converted into repeatable production controls. Bust projection, neckline width, torso length, waist suppression, cup position, and boning location do not always need to increase at the same rate, so size consistency must preserve shape rather than only circumference.
Base Size Is Not the Size Range
Approving a medium-size sample does not prove that XS, XL, or other sizes will retain the same silhouette. It proves only that one combination of pattern, material, support, and body dimensions works. Corset grading is sensitive because bodies do not increase uniformly in every direction. A larger bust requires more than extra circumference; it may need additional projection, different cup width, altered apex positioning, and different underbust shaping to maintain the same visual and functional balance.
Neckline width is a good example of where mechanical grading can fail. If it increases too quickly with bust circumference, larger sizes may gape. If it increases too slowly, the neckline can become restrictive or pull inward. Torso length creates similar problems. Increasing circumference without reviewing front length, side length, and bust-to-waist distance can make the structure sit differently even when finished measurements remain within the brand’s stated tolerance.
A size-range review should therefore compare structural relationships in each key size, including bust point to center front, bust point to waist, underbust position, neckline width, front and side torso length, waist distribution, and boning position. Many brands choose to review more than one physical fit size when the range is broad or the garment is highly structured. The exact fit-sample breakpoints depend on the brand’s size architecture, but the principle remains the same: when body proportion changes materially, the structure should be revalidated on a body rather than assumed from the base-size grade.
Grading Structural Points
Not every line on a corset should be graded by the same increment. Cup volume and bust-point spacing are obvious examples because the cup must grow enough to provide volume while remaining correctly located relative to center front, side body, underbust, and neckline. Moving one structural point without reviewing the others can preserve the measurement chart while losing the shape that made the approved sample work.
Boning also needs to follow the graded pattern rather than simply retaining the base-size position. If a princess seam moves but the bone remains referenced from an old point, the support can end up pressing in the wrong location. The same applies to boning beside a center-back zipper; as back width and waist shaping change, the relationship between closure and structural support should still make sense. Grading should therefore preserve the intended load path through the bodice, not only the visual seam placement.
A robust graded-size review typically tracks at least seven data groups: cup volume, apex position, neckline coverage, underbust position, front torso length, side torso length, and waist shaping. Instead of asking only whether each finished measurement is within tolerance, the technician asks whether the intended silhouette still exists. This matters commercially because customers rarely describe a return as incorrect apex positioning; they say the bust looks strange, the top gaps, the dress slides down, or the waist feels wrong. Technical grading decisions eventually become consumer fit language.
Bulk Variation Accumulates
Bulk production changes the environment in which the garment is made. A development sample may be cut individually, handled by one experienced sample maker, and checked repeatedly during construction. A production order can involve complete fabric rolls, multiple bundles, different operators, and hundreds or thousands of repeated operations. Each operation introduces a small amount of normal variation, and the goal is not to pretend sewn garments can be produced with zero variation but to prevent several small differences from stacking together in one direction.
Consider a garment where the cup is positioned slightly high, the neckline seam is sewn slightly short, and the waist seam is slightly tight. Each difference might look minor in isolation, yet together they can pull the whole front bodice upward and create neckline compression. Another piece may combine the opposite variations and appear loose. The production line then seems inconsistent even though every operation is contributing only a small deviation. This is exactly why the approved sample needs to become a measurable production standard rather than remain a visual reference known only to the sample room.
Pattern version, grading version, fabric lot, lining, cups, boning, zipper, key measurements, workmanship, and visual references should be locked before the full run begins. Material consistency deserves special attention because development yardage and bulk fabric can differ in stretch, hand feel, weight, finishing, or recovery. If the fabric changes materially, the garment may need more than a shade or hand-feel approval. A quick construction or fit recheck can prevent the factory from reproducing an approved pattern in a material that no longer behaves like the one used for approval.
How Are Corset Dress Defects Prevented in Production?
Corset defects are best prevented through staged control: review structural risks before sampling, lock the approved pattern and materials before bulk, verify first-piece or pilot production, monitor critical operations during sewing, and inspect finished garments against measurable and visual references. Final inspection remains important, but it should confirm an already-controlled process rather than become the first place serious defects are discovered.

Lock the Style Before the Line Starts
A production-ready corset dress needs more than an approved photo or a sample with a signed tag. The factory must know exactly which pattern, grading version, material, component, measurement, and workmanship standard represents the approved product. Before bulk production, the shell fabric and lining should be confirmed, cups and boning should match the approved direction, zipper and other structural trims should be locked, and critical finished measurements should be clear enough that production and quality teams do not interpret them differently.
Workmanship details also need to be translated from the sample into instructions. If a specific neckline stabilization method was necessary to prevent gaping, that information should not remain only in the sample maker’s memory. If one boning channel needs a shorter bone to prevent underarm pressure, the production team needs that specification. If cup placement is especially sensitive, it should be controlled by notches or measurable references. This is the point where a good sample becomes a production standard rather than a one-off achievement.
For a complex corset, this preparation can feel slower than saying, “sample approved, start production.” In practice, it is usually faster than stopping a running line because several hundred garments reproduce the same unrecorded mistake. A strong pre-production review should also identify which details are most difficult to repair after assembly, because those are the details that deserve the earliest checks. Cups, boning channels, internal reinforcement, and lining balance are far cheaper to correct before the bodice is fully closed.
First-Piece and Inline Control
First-piece approval is one of the most effective checkpoints for shape-sensitive dresses because it tests whether the bulk process can reproduce the development result under real production conditions. The first garment should use the intended bulk materials and production method wherever possible, then be compared with the approved reference for cup position, bust shape, neckline, waist, boning, zipper, seam alignment, lining, critical measurements, and overall silhouette before the full quantity is released.
Inline inspection should then focus on operations that become difficult or expensive to correct later. Cup position should be checked before the bodice is fully closed, boning and channels should be inspected before lining hides them, zipper seams should be reviewed before final finishing, and critical measurements should be monitored during the run rather than only after the last garment has been completed. A repeated defect should be recorded by location and process, not simply labeled as general workmanship, because the pattern of recurrence often reveals whether the source is pattern, material, machine, method, or operator control.
For final lot inspection, many apparel brands use an AQL-based sampling plan, commonly with stricter treatment for critical defects than major or minor defects. A frequently encountered commercial starting structure is Critical 0, Major AQL 2.5, and Minor AQL 4.0, although every brand’s purchase agreement, quality manual, product risk, and inspection protocol must take precedence. AQL sampling should never be used to justify a known systematic problem; if inline checks show that every neckline has been assembled incorrectly, the process must be corrected rather than left for statistical final inspection.
QC stage | Typical control focus | Practical production approach |
Pre-production | Pattern, grading, fabric, cups, boning, zipper, workmanship | 100% approval of production-critical references |
First piece / pilot | Fit, structure, symmetry, measurements, appearance | Verify before full-line release |
Inline QC | Cups, bone channels, zipper, seam alignment, key measurements | Repeated checks through the production run |
Critical structured details | Support placement, wrong components, safety-sensitive points | 100% check where brand standard or risk level requires it |
Final sampled inspection | Overall workmanship and lot conformity | AQL plan defined by the customer |
Common commercial AQL example | Critical / Major / Minor | 0 / 2.5 / 4.0, subject to brand requirements |
Final Inspection and Root-Cause Feedback
Final inspection should answer two questions: can this garment be shipped, and what does the finished lot teach the development and production teams about the next order? For corset dresses, the finished review should include more than loose threads and general workmanship. The garment should be assessed from front, sides, and back for neckline shape, cup symmetry, center-front alignment, waistline balance, side-seam position, zipper smoothness, visible boning, seam puckering, lining distortion, pressing quality, and all critical finished measurements.
Closure function should be tested rather than judged visually. A zipper that looks clean but repeatedly catches at the waist seam is still a functional defect. Boning comfort should be considered where applicable, especially near the underarm, neckline, and waist. If the garment is designed to carry meaningful body tension, a fit-sensitive review on an appropriate form or model can reveal issues that a flat inspection cannot. Final comparison should refer back to the approved standard rather than rely on a vague instruction that the garment should simply “look good.”
When defects are found, the report should distinguish isolated workmanship from systematic production drift. One damaged zipper may justify individual repair, while twenty garments showing the same zipper wave suggest a shared cause in pattern tension, fabric handling, stabilization, or installation. That feedback should return to development. If cup position repeatedly drifts, the next pattern or operation needs a stronger reference. If one satin repeatedly puckers around curved seams, the next order may require revised machine settings, seam construction, or material selection. If one size consistently gaps, the grading logic should be reviewed before a repeat order reproduces the same weakness.
A reliable corset-dress quality system is therefore circular rather than linear. Sampling identifies risk, bulk preparation locks the solution, production control checks repeatability, final inspection confirms delivery, and the resulting information improves the next development cycle. For brands building corset, bustier, bodycon, or other shape-sensitive programs, the most useful manufacturing partner is not the one that promises every design will be easy. It is the team that can identify where a style is likely to fail, explain the cause in practical terms, and convert the approved sample into a production method that can be repeated across sizes, colors, and future orders.
For development teams evaluating a new corset program, an early technical review can save more time than a late repair plan. Reviewing the target silhouette, fabric behavior, bust support, boning layout, closure load, grading risk, and bulk checkpoints before production gives both the brand and the manufacturer a clearer basis for decisions. Duolan’s dress-development work is built around this kind of fit-sensitive, sample-to-bulk thinking, so brands with structured dress projects can use the development stage to test risk before it becomes a repeated production defect.
Frequently Asked Questions
What are the most common defects in corset dresses?
The defects seen most often are neckline gaping, uneven or misplaced cups, insufficient bust support, horizontal waist wrinkles, twisted or visible boning, zipper rippling, seam puckering, lining distortion, asymmetric panels, and inconsistent fit between sizes. These problems are connected more often than they first appear. A visible zipper wave can begin with pattern tension, while a neckline issue can come from cup volume, torso balance, or grading rather than the neckline seam itself.
How can neckline gaping be prevented in corset production?
Neckline gaping is best prevented by checking the complete upper-bodice balance instead of simply shortening the neckline edge. Cup projection, bust-point placement, front torso length, upper-bust contour, waist anchoring, fabric stretch, and edge stabilization all affect whether the neckline stays close to the body. The most reliable development method is to fit the actual or production-equivalent shell, lining, cup, and support structure together, then repeat the check during movement rather than relying only on a static fitting.
How do manufacturers stop boning from poking through a corset dress?
Preventing boning from poking through requires correct bone length, smooth end finishing, suitable channel strength, controlled clearance, and placement that does not concentrate pressure at a high-movement point. During development, the bone should be tested while the wearer sits, turns, and bends because a channel that appears secure on a mannequin may fail under repeated movement. Simply rounding the bone tip helps, but it will not solve a bone that is too long or a channel that is structurally weak.
What causes a zipper to ripple on a corset dress?
Zipper rippling can come from stretched fabric during installation, unequal center-back seam lengths, insufficient stabilization, excessive body tension, seam bulk around the waist, or a mismatch between flexible shell fabric and relatively stable zipper tape. The quickest diagnostic check is to compare the zipper off-body and on-body. If it is flat before fitting but waves under tension, pattern balance and fit load deserve attention; if it is already wavy, sewing, stabilization, or material handling is more likely.
How should corset dresses be graded across sizes?
Corset dresses should be graded by preserving structural relationships rather than enlarging every area at the same rate. Cup volume, bust-point spacing, neckline coverage, underbust position, front and side torso length, waist shaping, boning position, and closure support may need different increments across the size range. For broader ranges or very structured styles, physical fit checks at selected size breaks are often more reliable than assuming that a mathematically correct grade will automatically preserve the approved silhouette.
What should be checked before corset dress bulk production starts?
Before bulk production, the team should lock the approved pattern and grading version, shell fabric, lining, cups, boning, zipper, structural trims, critical measurements, tolerance priorities, workmanship references, and the visual standard represented by the approved sample. High-risk details should then be verified through a first-piece or pilot check before full release. This creates a clear bridge between sample approval and production, reducing the chance that information is lost when the style moves from development to the sewing line.
Is final inspection enough to control corset dress quality?
Final inspection is necessary, but it is not enough for a structured corset dress because many expensive defects become difficult to correct once the garment is complete. Cup placement, boning channels, lining balance, zipper stabilization, and internal reinforcement should be checked during production while they are still accessible. Final inspection works best as confirmation of an already-controlled process, supported by pre-production approval, first-piece verification, inline checks, and clear root-cause feedback whenever the same problem appears repeatedly.
Share:
Our Services
Categories
Table of Contents
Here, developing fashion collections is more than manufacturing garments — it’s a collaborative process focused on transforming ideas into well-executed, market-ready products. From fabric sourcing and sample development to scalable production and delivery coordination, every stage is built to support quality, consistency, and efficient collection launches across global markets.