 Skip to content
Corset Dress Construction Explained: How Structure, Fit, and Support Work
Your trusted Women’s Apparel Development & Manufacturing Partner from China
- Jerry
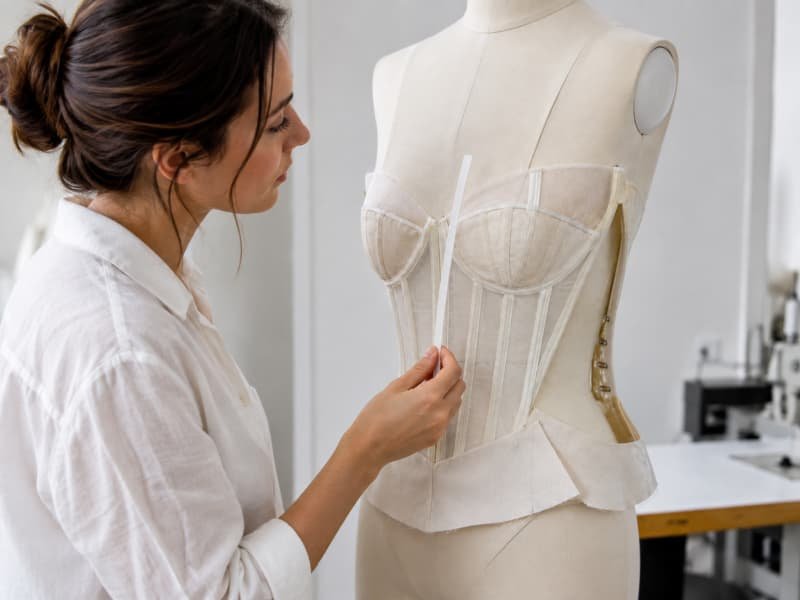
A corset dress can look effortless from the outside: a smooth neckline, a sculpted waist, a balanced bust, and a skirt that appears to fall naturally from the body. Inside, the garment is doing several demanding jobs at once. It must resist tension without feeling rigid, shape the bust without flattening it, hold the neckline close to the body, support the weight of the skirt, and remain comfortable while the wearer sits, walks, eats, and moves through an event. Those results do not come from decorative seam lines or visible boning alone. They come from a coordinated system of pattern geometry, stable fabrics, cups, underwires, boning channels, closures, lining, and carefully planned sewing operations.
A corset dress is built by combining contoured pattern panels, a stable strength layer, correctly placed boning, bust support, reinforced closures, and a controlled bodice-to-skirt connection. Together, these elements distribute pressure around the torso, stabilize the neckline, shape the waist and bust, and help the finished dress remain secure during movement and extended wear.
The difference becomes clear in a fitting room. Two dresses may look nearly identical on a hanger, yet one stays smooth and secure through an evening while the other begins to gape, twist, or slide downward within minutes. The problem is rarely one dramatic mistake. More often, it is a chain of small decisions: a cup that is slightly too shallow, a bone that is too rigid for a curved seam, a lining pulled too tightly, or a heavy skirt attached only to the outer satin. Understanding those decisions makes it easier to develop better samples, diagnose fit problems, and judge whether a corset dress is truly ready for production.
What Makes a Corset Dress Structurally Different?
A corset dress differs from an ordinary fitted dress because its bodice is engineered to manage tension, support the bust, stabilize the neckline, and maintain a defined silhouette. Its performance comes from coordinated pattern panels, structural fabric, boning, cups or underwires, reinforced closures, and a controlled connection between the bodice and skirt, rather than from decorative seams alone.
Functional Corset vs Corset Look
Many dresses are called corset dresses because they have curved seams, exposed channels, hook-and-eye details, or back lacing. Those features can create a convincing corset appearance, but they do not automatically provide meaningful support. A functional bodice must resist stretching, maintain its vertical form, and distribute pressure around the torso without depending entirely on the outer fabric or zipper. The distinction matters because a decorative corset-style mini dress and a strapless occasion dress carrying a full skirt have very different construction requirements, fitting risks, sewing sequences, and cost structures.
A lightly structured fashion dress may use four to six flexible bones mainly to keep the neckline and panel seams smooth. A more supportive strapless design may need a firm inner layer, shaped cups, reinforced closure edges, stronger boning beside the zipper or lacing, and a waist stay that anchors the garment around the torso. The correct structure should follow the product promise. A dress intended to create visual waist definition does not need to behave like a traditional waist-reducing corset, while a dress expected to support a larger bust or a heavy skirt cannot rely on surface styling alone.
The Internal Layer System
A well-made corset dress normally separates visual, structural, and comfort functions across several layers. The fashion fabric provides color, shine, texture, transparency, print, or embellishment. The strength layer receives tension and prevents the bodice from stretching away from the body. Cups, foam, wires, and boning manage shape and support, while the lining protects the skin and hides the internal construction. Problems arise when one material is expected to perform every function. A beautiful satin may be too soft to carry tension, and a strong canvas may be too bulky to sit invisibly beneath a delicate shell.
Layer or Component | Primary Role | Common Options | Typical Failure |
Fashion fabric | Creates the visible surface and brand expression | Satin, velvet, mesh, lace, crepe, jersey | Wrinkling, stretching, seam shadowing |
Underlining | Supports the shell and limits distortion | Organza, tricot, lightweight woven support | Bubbling, excess stiffness, visible ridges |
Strength layer | Carries tension and stabilizes the torso | Coutil, cotton twill, canvas, stable woven lining | Bodice collapse, growth, uneven support |
Cup structure | Controls bust volume and shape | Molded foam, cut-and-sew cups, selective padding | Empty cup, overflow, flattened projection |
Boning system | Maintains vertical form and resists folding | Spiral steel, flat steel, synthetic boning | Buckling, twisting, pressure points |
Waist support | Anchors the garment and shares skirt load | Petersham, grosgrain, woven stay tape | Slipping, seam strain, concentrated pressure |
Lining | Protects skin and conceals construction | Woven lining, stretch lining, soft tricot | Pulling, bubbling, discomfort |
Material compatibility is as important as individual material quality. Heavy canvas beneath lightweight satin can create visible panel ridges, while a stretch outer shell placed over a rigid inner structure may grow differently during wear. A lining attached with too much tension can pull the entire bodice inward and distort the neckline. For reliable development, the full material stack should be sewn and pressed as one test unit before the final sample is approved. A flat swatch cannot show how the layers will bend, recover, trap heat, or react at curved seams and channel intersections.
How Support Is Distributed
Boning is only one part of the support system. Pattern shape determines where the body volume sits, the strength layer resists expansion, and the bones stop the panels from folding vertically. Cups or underwires control the bust, while the waist area acts as an anchor against downward movement. When these parts work together, pressure is spread across several seams and zones. When they do not, one area carries too much force, causing the zipper to ripple, the neckline to gape, the cup to flatten, or a bone to press directly into the ribs.
Adding more boning is not always the answer. Too many rigid bones can make the dress feel armored without correcting poor bust projection or waist balance. Too few bones can allow the fabric to collapse between seams. Commercial corset dresses usually perform best when support is concentrated where the garment experiences real stress: beside closures, along major shaping seams, near the side body, and around areas that must stay upright. The practical goal is controlled support rather than maximum stiffness. The wearer should be able to breathe, sit, walk, and raise her arms without repeatedly pulling the dress back into place.
Bodice and Skirt Integration
A corset bodice may fit correctly during a fitting and still fail after the skirt is attached. The added weight can pull the neckline downward, distort the waist seam, bend the boning, or overload the zipper. This risk increases with gathered satin, layered mesh, dense sequins, beadwork, and full-length skirts. A fitted mini skirt adds relatively little load, while a lined maxi skirt can materially change the way the upper body performs. The finished dress therefore has to be evaluated as one system, not as a bodice and skirt that happen to share a waist seam.
The skirt should be connected to the internal structure rather than relying only on the outer fashion fabric. Depending on the silhouette, reinforcement may include stay tape at the waist seam, a separate waist stay, doubled structural layers, or direct attachment to the main strength layer. Pleats and gathers must be distributed evenly so that one panel does not carry more weight than another. Pointed, curved, dropped, and basque waistlines require extra care because seam allowances must be clipped and turned without weakening the shape. Closure planning also matters, especially when a lace-up bodice needs a separate skirt opening or a concealed zipper must pass through a thick waist intersection.
Which Materials Build the Corset Structure?
Corset structure is built from materials selected for strength, flexibility, recovery, comfort, and compatibility with the outer fabric. Stable woven layers resist tension, boning controls vertical form, cups shape the bust, and closures secure the fit. No single material is best for every dress; the combination must match the silhouette, size range, intended support, wear occasion, price level, and production method.

Strength Fabrics
A strength layer should hold its shape under tension without making the dress unnecessarily heavy or rigid. Traditional corsetry often uses coutil because its dense weave resists distortion in several directions. Commercial fashion dresses may use cotton twill, firm woven lining, lightweight canvas, non-stretch mesh, power mesh, or bonded structural fabrics. The correct choice depends on how much support the dress needs, how much weight the skirt adds, and how visible the internal layer will be through the outer shell. Fabric weight alone is not enough to judge performance because a heavy cloth can still move on the bias, while a lighter dense weave may remain stable.
Recovery is particularly important when stretch materials are involved. A fabric may stretch easily but fail to return to its original measurement after several hours of wear, causing the neckline or waist to loosen. Before approval, the strength layer should be checked for seam stability, dimensional recovery, pressing response, and compatibility with fusing or underlining. It should also be evaluated beneath the real outer fabric. A material can perform well mechanically yet create unacceptable ridges, thickness, heat, or stiffness. Testing the actual layered panel is the most reliable way to balance structure with the soft hand and visual finish expected from modern party and occasion dresses.
Boning Selection
Different boning types behave differently under body movement. Spiral steel bends in several directions and follows curved princess or side seams well. Flat steel offers stronger resistance in one principal direction and is often used beside lacing or other high-tension closures. Synthetic boning is lighter, easier to cut, and common in commercial fashion dresses, but its performance varies widely by formulation and thickness. The correct bone should support the seam without fighting the body curve, creating heat-sensitive distortion, or leaving a hard edge that can be felt through the lining.
Boning Type | Common Width Range | Flexibility | Typical Use | Main Concern |
Spiral steel | 5-10 mm | Multidirectional | Curved princess and side seams | Weight, rust protection, finished ends |
Flat steel | 5-12 mm | Strong vertical control | Center back, lacing, firm front support | Excess rigidity on curved areas |
Molded synthetic | 6-12 mm | Moderate | Fashion corset and bustier dresses | Heat distortion and permanent bending |
Sew-through boning | 6-12 mm | Flexible | Light structure and efficient assembly | Limited control under high tension |
Plastic strip | 5-10 mm | Light to moderate | Decorative or lightly supportive bodices | Kinking and concentrated edge pressure |
These dimensions are common development ranges rather than universal specifications. The bone is often tested at roughly 10-20 mm shorter than the fully closed channel so it does not press directly into the neckline or waist seam, but the final allowance depends on binding width, seam allowance, end caps, and fabric thickness. The channel should be wide enough for insertion yet narrow enough to prevent rotation. Every end must be rounded, tipped, capped, dipped, or otherwise protected. A bone that performs well in a straight center-back channel may be completely unsuitable for a sharply curved side-front seam, so selection should follow the actual panel geometry.
Cups, Foam, and Underwires
Cups create bust volume, while underwires create a stable lower boundary and help position that volume against the torso. Molded foam cups provide a smooth, predictable shape and are efficient for commercial production when the brand accepts a standardized bust profile. Cut-and-sew cups allow greater control over projection, neckline shape, and cup depth, but they require more precise pattern work and sewing. A dress can also use shaped fabric panels without a separate cup, provided the pattern, structural layer, neckline tension, and waist anchoring deliver enough support for the intended wearer.
Underwire selection must match the cup cradle and expected breast root rather than simply following a decorative seam. A wire that is too narrow can pinch or sit on breast tissue, while one that is too wide may shift downward and offer little lift. The channel must hold the wire securely while leaving protected clearance at both ends. Padding should be used selectively, not as a substitute for correct cup geometry. Thick padding can make a sample look fuller on a mannequin while creating pressure, heat, and inconsistent fit on real wearers. The entire cup system should be tested across the intended size range because support that works in one sample size may not scale naturally.
Closures and Reinforcement
Closures affect adjustment, dressing time, tension distribution, and the visual character of the dress. A concealed zipper creates a clean finish but offers almost no fit flexibility, so the pattern and measurement control must be accurate. Back lacing allows limited adjustment but requires stable back panels, reinforced eyelets, consistent spacing, and a modesty panel or other coverage solution. Hook-and-eye tape can work inside a separate corselet or beneath a decorative outer layer, while a front busk provides firm support but gives the garment a more traditional corset appearance.
The closure should not carry all of the garment tension. Zipper seams may need stabilizing tape, a waist hook, or additional boning beside the zipper. Eyelets require reinforcement because repeated tightening can tear weak material or distort the back edge. Closure placement must be decided before the final pattern is approved. Changing from a zipper to lacing affects back width, ease, seam position, modesty coverage, and the way the skirt opens. A late change therefore creates a chain of pattern and construction revisions rather than a simple trim substitution. The most reliable system is the one that matches the intended level of adjustment and can be reproduced consistently across the full size range.
How Is a Corset Dress Pattern Developed?
A corset dress pattern is developed by shaping multiple panels around the bust, rib cage, waist, and upper hip while accounting for material behavior and support components. Accurate development requires body measurements, bust projection, torso balance, controlled ease, stable grainlines, mock-up fittings, and size grading that preserves the original neckline, cup position, waist placement, and bone alignment.

Panel Geometry
Corset panels create shape through curved seams. The center front controls torso length and neckline position, princess seams create bust projection, side-front and side-back seams distribute waist suppression, and center-back panels stabilize the closure. More panels do not automatically mean better construction. Additional seams can provide finer contour control, but they also increase sewing time, pressing work, and the possibility of left-to-right variation. Fewer panels simplify assembly but may not provide enough control for a pronounced bust, sharp waist, or complex neckline. Every seam should therefore have a clear shaping or structural purpose rather than being added only for visual decoration.
Grain direction and balance marks are just as important as seam curvature. A panel cut slightly off-grain can twist after boning is inserted even when its seam measurements appear correct. Bust level, waistline, underbust position, apex reference, bone placement, and matching notches should be visible on the pattern and technical file. Seam placement must also support the intended body shape. A princess seam positioned too far toward the center can create an unnatural bust profile, while one placed too far toward the side may lose control over projection. A good pattern makes sewing easier because each panel naturally fits the next without being stretched or forced into position.
Bust and Waist Balance
Matching the total bust circumference does not guarantee a good fit. Bust volume must be positioned at the correct height, width, and depth, while the waist must remain level and stable. Apex position, cup projection, underbust contour, neckline tension, torso length, and side coverage all affect the way the bodice sits. A dress can measure correctly around the body and still flatten the bust, create an empty cup, rise at the front waist, or form an uneven back opening. Fit comments should therefore identify the cause and intended result instead of asking for an isolated measurement change without considering the surrounding structure.
Fit Symptom | Likely Pattern Issue | Practical Correction |
Center-front neckline gap | Excess upper-bust width or shallow projection | Remove edge excess and review cup depth |
Bust overflow | Insufficient cup volume or coverage | Increase capacity or raise the cup edge |
Empty cup at apex | Projection or apex position mismatch | Reduce or reposition cup volume |
Fold beneath bust | Shallow cup or excess front torso length | Add projection and rebalance front length |
Waist rises at center front | Insufficient length over the bust | Add front length without enlarging the waist |
Uneven V-shaped back opening | Bust-to-waist balance is incorrect | Reallocate circumference across panels |
Side seam moves forward | Front width or projection is insufficient | Add front volume and rebalance the back |
Corrections should address the reason for the symptom. Simply removing width from a gaping neckline may make the edge lie flat while compressing the bust if the real issue is insufficient cup projection. A comment such as ‘remove one centimeter’ gives the pattern maker less useful information than ‘close the upper neckline gap while maintaining bust volume and side coverage.’ Structured dresses are sensitive to small changes because one seam adjustment can affect the cup angle, waist alignment, bone position, and closure tension at the same time. Clear diagnostic fitting notes reduce unnecessary revision rounds and help preserve the original design intent.
Fabric-Driven Pattern Changes
The same pattern will not behave identically in satin, velvet, mesh, jersey, sequin fabric, and crepe. Stretch percentage is only one part of the picture. Recovery, thickness, drape, friction, weight, and bias movement can change the fit substantially. A stretch shell over a rigid inner layer may look smooth during a short fitting but grow differently after several hours. Soft satin can reveal every internal seam allowance, velvet can shift during sewing, mesh may need extra stabilization around cup seams and necklines, and dense sequins can add weight while preventing curved seams from pressing flat.
A material change may require adjustments to ease, seam shape, interfacing, channel width, cup coverage, and closure reinforcement. Even two fabrics sold under the same commercial name can behave differently because of weave density, yarn size, elastane content, or finishing. A replacement fabric should therefore be tested in a partial bodice or layered development panel before the final pattern is released. At minimum, that test should include a curved seam, a boning channel, the intended underlining or fusing, and a representative edge finish. This small exercise often reveals surface ridges, shrinkage, stiffness, or recovery problems that cannot be predicted from a flat swatch.
Grading and Fit Sizes
Corset grading requires more than adding equal amounts around every seam. Bust projection, underbust circumference, torso length, back width, waist measurement, and cup coverage do not increase at the same rate. A pattern may look excellent in the development size but fail at the smaller and larger ends of the range. Small sizes can become too flat through the cup, while larger sizes may gain width without enough projection or support. The neckline may spread, the bust may sit too low, or the bones may no longer align with the intended body curves.
Important relationships to protect include the bust apex to center front, apex to waist, cup edge to side seam, bone position, neckline height, back opening, and waist point. For broader size ranges, one fit block may not be enough. A practical commercial approach is to fit the base size, then review at least one smaller and one larger size before full production, with an additional upper-range fitting when the size span is extended. Grading should be verified in the real material stack because foam thickness, boning stiffness, lining tension, and cup construction can change the fit even when the paper measurements remain within specification.
How Is a Corset Dress Constructed Step by Step?
Corset dress construction moves from material inspection and stabilized cutting to panel sewing, boning-channel installation, cup assembly, closure preparation, skirt attachment, lining, and final finishing. The sequence matters because each stage affects symmetry, fit, seam thickness, and the ability to reproduce the approved structure consistently during bulk production without relying on individual operator corrections.

Cutting and Stabilizing
Construction begins before the first seam is sewn. Outer fabric, strength fabric, lining, interfacing, foam, mesh, and trims should be checked for width, shade, defects, shrinkage, surface direction, and stretch behavior. Satin can show shade differences when panels are turned in opposite directions, velvet has a visible nap, and mesh may stretch differently along the cross grain and bias. Structural panels must be cut accurately because the same small error is repeated through the outer shell, inner support, lining, and boning placement. Paired pieces should remain matched, while similar side-front and side-back panels should be numbered clearly.
Underlining may be attached to the fashion fabric before panel assembly so the two layers behave as one. This must be done without bubbling or pulling. Fusing requires controlled temperature, pressure, and time because excessive heat can change shine, shrink the panel, or damage stretch recovery. A practical cutting check includes panel count, grain direction, notch position, waist references, left-right pairing, cup orientation, and closure allowances. The complete set should be compared with the approved pattern before sewing begins. Accurate cutting prevents operators from stretching one panel to fit another, a correction that may look acceptable on the table but cause twisting when the dress is worn.
Panel and Channel Assembly
Panels are normally sewn in a controlled sequence from center front toward the back, or in smaller front and back units that are later joined. Curved seams should be matched by notches rather than aligned only at the raw edges. After stitching, seam allowances may be pressed open, pressed to one side, trimmed, clipped, or graded according to the boning-channel method. Bust curves require shaped pressing because flattening them on a standard ironing board can reduce projection and create hard ridges under satin. Each pressing step should preserve the three-dimensional form created by the pattern rather than treating the pieces as flat fabric.
Boning channels may be formed from seam allowances, separate tapes, internal structural layers, or visible applied strips. The finished channel should allow smooth insertion without giving the bone enough space to rotate. Before the bones are inserted, the team should compare left and right halves, verify waistline alignment, measure center-front and closure lengths, review cup seam shape, and confirm the neckline measurement. If two panels differ significantly, trimming them to match is not a reliable solution. Cutting accuracy, notch matching, feeding tension, and panel identification should be checked first, because correcting the cause is essential for consistency across a production order.
Cups, Boning, and Closures
Cup components should be marked by side and orientation because reversing a molded cup or foam piece can alter the neckline angle and bust projection even when the component appears almost symmetrical. Cut-and-sew cup seams need careful trimming and pressing to avoid bulk, and foam should retain its shape where several seams meet. When underwires are used, the channel must follow the intended breast root and provide protected clearance at both ends. Cup symmetry, apex height, underbust transition, and center-front stability should be reviewed before the unit is permanently closed into the bodice.
Boning should be inserted only after its type, width, length, and position have been checked against the approved specification. Every end needs a smooth protective finish, and the top and bottom of the channel must be secured without creating hard lumps against the body. Closures are then installed with suitable reinforcement. Concealed zippers require stable seam allowances and clean alignment across the waist, while back lacing needs even eyelet spacing and firm support beneath each eyelet. Before the lining is closed, the internal structure should be inspected. Missing bones, twisted channels, unsecured wire ends, and uneven cups become much harder to correct once the interior is concealed.
Skirt Attachment and Finishing
The completed bodice waist should be measured before the skirt is attached because small sewing differences across several panels can change the total circumference enough to disturb pleats, seam alignment, or zipper operation. Skirt balance points should match the intended bodice references, and gathers or pleats should be distributed according to the pattern rather than adjusted casually to absorb a measurement error. Heavy skirts may need a waist stay, seam tape, doubled reinforcement, or direct connection to the strength layer so that the weight does not pull only on the outer satin or closure seam.
After the skirt is joined, the complete dress should be checked while hanging and while worn. Gravity can reveal a dropped back waist, uneven hem balance, downward neckline movement, or distortion that was not visible when the bodice was tested alone. The lining should cover boning, cups, channels, and seam allowances without pulling the shell. Neckline stabilization may use stay tape, narrow elastic, understitching, or carefully controlled silicone grip, but none of these should compensate for an incorrectly fitted bodice. Final checks should cover closure operation, cup symmetry, neckline security, lining tension, bone visibility, seam smoothness, measurement accuracy, thread trimming, pressing quality, and comfort against the skin.
How Do Brands Evaluate Corset Dress Quality?
Brands should evaluate corset dress quality through fit, structural stability, comfort, workmanship, material consistency, and production repeatability. A sample that looks attractive in photographs is not enough. It must remain secure during movement, protect the wearer from hard components, match approved measurements, and be capable of consistent reproduction across sizes, colors, production lines, deliveries, and repeat orders.

Fit and Movement Tests
A fitting should show how the dress behaves in real use rather than only how it looks while the wearer stands still. The wearer should sit, walk, raise her arms, rotate her torso, take a deep breath, and lean forward. Party and event dresses should also be observed during more active movement because a bodice that appears stable for a photograph may slip or rotate after several minutes. The team should watch for neckline gaping, downward movement, cup overflow, empty cup space, zipper strain, bone buckling, side-seam movement, and the weight of the skirt pulling on the upper body.
The wearer should report pressure at the underarm, ribs, waist, wire ends, zipper, and bone tips. A structured dress naturally feels firmer than a soft jersey style, but the pressure should remain evenly distributed. Sharp pressure, restricted breathing, numbness, skin irritation, or repeated adjustment indicate that the support is poorly balanced. A human fit model is essential because a mannequin cannot report discomfort, change posture, perspire, or reveal how the garment behaves during breathing. For high-risk strapless, underwired, or heavy-skirt designs, an extended wear trial of one to several hours can reveal growth, slipping, heat, and pressure that a short fitting misses.
Structural Inspection
Inspection should focus on the points that affect safety, fit, and durability. The technical specification should identify bone type and length, channel construction, cup orientation, underwire reference, waist-stay placement, closure reinforcement, lining method, and critical measurements. Decorative workmanship matters, but a perfectly sewn outer seam cannot compensate for an unprotected steel end or a cup positioned differently on each side. Critical bodice measurements normally deserve tighter attention than loose skirt areas because a small change at the upper bust, underbust, waist, or center-front length can alter security and support.
Inspection Point | Acceptance Focus | Typical Risk |
Boning channels | Straight, secure, correctly positioned | Twisting, migration, visible ridges |
Bone ends | Smooth, protected, clear of seam edges | Puncture, pressure, fabric damage |
Cups | Symmetrical shape and equal placement | Uneven bust line, overflow, empty space |
Underwires | Correct orientation and secure ends | Pinching, breakthrough, shifting |
Waist stay | Correct length and firm attachment | Slipping or concentrated pressure |
Zipper | Smooth operation and aligned waist seam | Rippling, jamming, seam strain |
Eyelets and lacing | Reinforced and evenly spaced | Tearing, distortion, uneven opening |
Lining | Smooth without pulling the outer shell | Bubbling, twisting, discomfort |
Neckline | Stable and close to the body | Gaping, rolling, downward movement |
Skirt junction | Even weight distribution | Waist distortion and bodice collapse |
Inspection should compare the garment with both the approved sample and the written construction record. A dress can remain within basic measurements while using a different foam density, boning stiffness, or lining tension that changes the wearing result. Internal checks are most effective before the lining is closed, when bone count, channel placement, cup orientation, wire security, and waist-stay attachment are still visible. Finished-garment inspection then confirms symmetry, appearance, measurements, closure operation, and comfort. This two-stage approach catches structural errors earlier and reduces the risk of opening completed garments for repair.
Sample-to-Bulk Control
An approved sample must be converted into measurable production standards. A physical garment alone leaves too much room for interpretation, especially when several operators or production locations are involved. The final package should include the approved pattern, measurement chart, bill of materials, construction details, bone map, cup and wire references, trim codes, color standards, workmanship requirements, and clear images of the interior. A first-piece garment made from bulk materials should be reviewed before the full line proceeds, confirming that actual fabric lots, machines, pressing methods, and operators can reproduce the approved result.
Inline inspection should check structural elements before they are hidden by the lining, while mid-production and final reviews confirm that quality has not drifted as output increases. Repeat orders should be compared with retained standards from the original production. Material behavior can change even when a supplier uses the same item name, because foam density, elastic recovery, fabric finishing, boning stiffness, and lining stretch may vary between lots. Reconfirming critical components protects the fit and hand feel that the customer approved. The objective is not simply to make one excellent sample, but to create a stable method that produces the same silhouette and support across sizes, colors, batches, and repeat deliveries.
Production Readiness
A successful sample is not automatically ready for scale. A highly skilled sample maker may shape a cup by hand, manipulate a difficult seam, or correct a sharp waist point through repeated pressing. Those methods may be too dependent on individual judgment for a larger order. Before bulk approval, each operation should be documented, measured, teachable, and inspectable. Machine capability, operator skill, cycle time, material consistency, repairability, and packing behavior all matter. High-risk combinations include lightweight satin over thick internal seams, rigid cups beneath sheer mesh, dense embellishment near channels, very sharp waist points, and exposed boning that must remain perfectly symmetrical.
Production engineering does not always mean simplifying the design. A difficult detail can often be rebuilt more intelligently. Seam bulk may be redistributed, functional bones can be separated from decorative channels, cup edges can be stabilized internally, or skirt weight can be transferred to a hidden waist structure. The best solution preserves the intended appearance while reducing variation and discomfort. A reliable corset dress should not depend on constant manual correction. The real quality test is whether the approved silhouette, fit, and support remain consistent across the full order and can be reproduced again when the style returns for a new color, season, or repeat production run.
Ready to develop a custom corset or bustier dress? Duolan Apparel supports established fashion brands and professional product teams with fabric and trim sourcing, pattern development, fit correction, sample revision, grading, production preparation, and coordinated bulk manufacturing for corset, fitted, party, and occasion dresses. Send your tech pack, reference image, original sample, fabric direction, target size range, quantity, and delivery plan to duolan apparel for a structured project review and quotation.
Share:
Our Services
Categories
Table of Contents
Here, developing fashion collections is more than manufacturing garments — it’s a collaborative process focused on transforming ideas into well-executed, market-ready products. From fabric sourcing and sample development to scalable production and delivery coordination, every stage is built to support quality, consistency, and efficient collection launches across global markets.

