 Skip to content
How to Prevent Halter Necklines from Gaping?
Your trusted Women’s Apparel Development & Manufacturing Partner from China
- Jerry
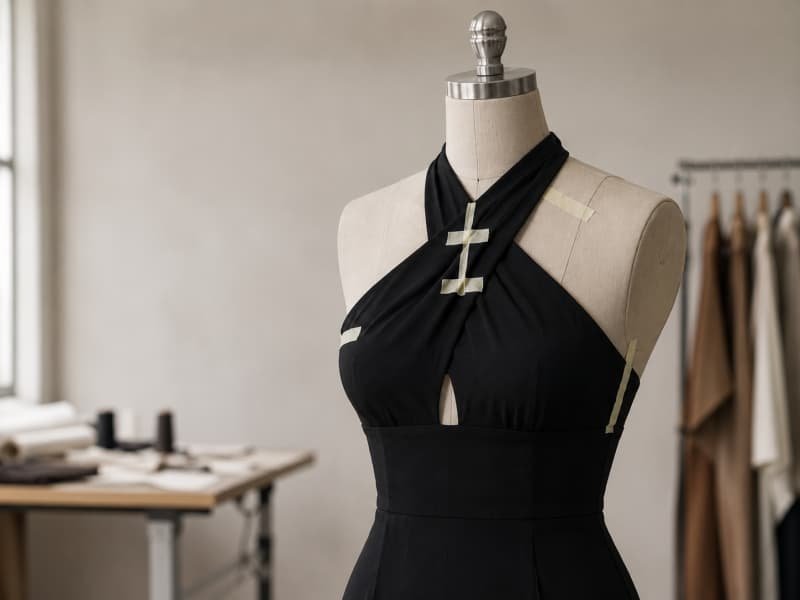
A halter neckline can look perfectly smooth on a hanger and still pull away from the body as soon as the wearer turns, sits, or reaches forward. That is what makes gaping difficult: the visible opening is often only the final symptom. The real cause may sit lower in the bodice, at the bust, armhole, side seam, strap angle, back anchor point, fabric grain, lining, or pressing stage. Simply shortening the neck strap may hide the problem during a static fitting while creating pressure, distorted armholes, or a raised waistline.
To prevent a halter neckline from gaping, control the entire upper-bodice fit system: select the correct upper-bust and bust volume, remove excess neckline length, shape the bust with darts or seams, position the straps toward the neck, stabilize vulnerable fabric edges, and test the approved pattern during movement before bulk production. A secure neckline is created by balanced pattern geometry and repeatable construction, not by tightening one isolated component.
Imagine a fitting room ten days before a campaign shoot. The sample looks strong from the front, but the neckline opens when the model turns sideways. Someone pulls the strap tighter, and the opening closes, yet the bust seam rises and the neck becomes uncomfortable. The problem was never the strap alone. It was the balance of the whole bodice. The following guide shows how experienced dress-development teams find that imbalance, correct it in the pattern, and keep the solution stable from revised sample to finished production.
Why Do Halter Necklines Gape?
Halter necklines gape when the neckline edge is longer than the body area it must follow or when the bodice lacks enough shaping and support to keep that edge close to the chest. Common causes include insufficient bust capacity, excess upper-chest width, incorrect strap direction, an oversized armhole, unstable fabric, weak back anchoring, or construction that stretches the neckline after cutting.
Excess Neckline Length
A gaping neckline is often described as a loose neck, but the underlying problem is usually excess seam-line length. The neckline may have been drafted too long, selected from the wrong base size, or stretched during cutting and sewing. Because many halter necklines run diagonally across the fabric, sections of the edge may sit close to the bias grain and can grow more easily than a straight horizontal seam. Lightweight satin, chiffon, viscose, soft crepe, and loose mesh are particularly sensitive when components are lifted, handled, turned, understiched, and pressed.
A reliable check compares the paper-pattern seam line, the cut component before sewing, and the finished neckline after pressing. Measure along the stitching line rather than the raw edge, and mark several control points so growth can be located. In a close-fitting halter, an unexplained increase of only a few millimeters may become visible because the edge is expected to sit directly against the upper chest. The same difference might disappear in a softly draped blouse, which is why acceptable change must be judged against the intended silhouette rather than a universal tolerance.
Bust Shape and Bodice Volume
A halter bodice must travel over the fullest part of the bust and then return toward the upper chest. That three-dimensional route requires enough length and volume through the bust, followed by controlled reduction above it. When the pattern does not provide this shape, the body pushes the front outward and the neckline loses contact. Two wearers can have the same full-bust measurement but different upper-bust widths, cup projection, bust spacing, bust height, shoulder slope, and torso length, so selecting a pattern by full bust alone can create too much width above the bust while leaving too little room at the fullest point.
Look for a waist seam that rises at center front, side seams pulling forward, tension lines pointing toward the bust apex, or a neckline that opens while the bust area feels tight. In that situation, reducing the neckline may make the garment smaller without improving the fit. The pattern may need more front length, a full-bust adjustment, a deeper dart, or a revised princess seam. If the bust is comfortable and a small temporary wedge removes the gap without creating new tension, the problem is more likely excess contour length rather than missing cup capacity.
Strap Angle and Tension
The halter strap is part of the support structure, not merely a decorative tie. It controls both height and the direction in which the upper bodice is pulled. A correct strap line guides the bodice inward and upward toward the neck. An attachment positioned too far outward can pull the neckline toward the shoulders and open the edge. A strap that is too long may let the whole front sit low, while a strap that is too short can raise the bust seam, distort the armhole, pull the back upward, and create neck pressure.
Test fixed or tied straps in small increments, usually 3-5 mm at a time during evaluation, and examine the entire garment after each change. A successful correction brings the neckline closer without moving the bust apex, tightening the armhole, tilting the waistline, or increasing neck pressure. For wide halter bands, the inner and outer edges may require different shaping because they travel different distances around the neck. Self-tie samples also need a defined tie position during fitting; otherwise one sample may be judged with a loose bow and another with the straps pulled much tighter.
Armhole and Back Balance
The neckline, side bust, armhole, and back opening often form one connected fit system. Excess length at the armhole can travel toward the neckline, while weak back support allows the front bodice to fall away. Side-bust gaping is frequently mistaken for a neckline defect even though the real cause is an armhole that is too long, excessive front width, insufficient bust dart intake, or a side seam that does not follow the body. Taking fabric only from the neckline can simply move the excess to another location.
During fitting, pin the excess at the neckline, then release it and pin at the side bust, armhole, or upper side seam. The cleanest correction usually indicates where the pattern should absorb the volume. The back must also resist the upward pull of the halter strap. Very low or open backs may need support from a fitted back band, concealed elastic, internal waist stay, side boning, cups, or structured lining. A secure halter shares the load between front shaping, strap direction, and back anchoring instead of relying on painful tension at the neck.
Visible Condition | Likely Cause | Useful First Check |
Center neckline lifts away | Excess edge length or weak contouring | Pin a temporary wedge at the gap |
Neckline grows after sewing | Stretching during handling or feeding | Compare cut and sewn seam lengths |
One side is longer | Cutting, sewing, or pressing asymmetry | Compare left and right control points |
Edge rolls outward | Facing, lining, or understitch problem | Check shell and lining seam lengths |
Gap appears after hanging | Fabric weight or bias growth | Re-measure after 12-24 hours |
How Do You Diagnose the Fit Problem?
Diagnose the problem by locating exactly where the garment loses contact and observing what changes when the strap, neckline, side bust, armhole, or back is temporarily adjusted. The correct solution depends on whether the excess comes from pattern shape, missing bust volume, unsuitable sizing, fabric growth, lining imbalance, or sewing distortion. Avoid changing the paper pattern until the source has been isolated.

Locate the Excess
The position and shape of the gap provide the first useful evidence. A center-front opening usually suggests excess neckline length, insufficient upper-chest contouring, or inadequate tension through the halter structure. A gap nearer the side bust often points to the armhole, bust dart, front width, or side seam. Replace general comments such as neckline loose with a precise record of the location, direction, and amount. Photograph the sample from the front, side, back, and three-quarter angles, then place pins or removable tape at the beginning and end of the affected area.
Observe whether the fabric forms a smooth outward pocket, diagonal tension lines toward the bust, vertical folds from the neckline, ripples near the strap attachment, a loose armhole edge, or a twisted center front. Each shape suggests a different imbalance. A smooth pocket often indicates excess length, while diagonal lines may indicate that the bust is pushing against insufficient volume. The sample should be fitted on the intended model with the approved undergarment or internal support, because a padded bra or different cup shape can alter bust height, projection, and neckline tension enough to change the diagnosis.
Test the Strap Carefully
Shortening the strap is a useful diagnostic step because it reveals whether the bodice is simply sitting too low, but it should not be treated as the automatic final correction. Ask the wearer to stand naturally without pulling the shoulders back or lifting the chest. Pin the strap in small increments and allow the bodice to settle after each change. Check neckline contact, bust-apex alignment, armhole depth, waistline position, back stability, and comfort together rather than focusing only on the visible opening.
When a small reduction improves all areas, strap length may be the main issue. When the neckline closes but the bust seam rises, the underarm tightens, or pressure increases at the neck, the strap is compensating for another problem. For wide bands, assess both the inner and outer edges because equal lengths can cause twisting. Moving an attachment inward by a few millimeters may improve the direction of pull more effectively than shortening the entire strap, but the change must be rechecked for bust coverage, proportion, and symmetry.
Separate Pattern and Sewing Faults
A pattern fault usually repeats in the same position on multiple correctly made samples. A sewing fault may vary between garments, between the left and right sides, or between operators. Begin by measuring the paper-pattern seam line and confirming that the facing, lining, binding, and interfacing components match. Compare the cut shell and lining before sewing. If the fabric component is already longer than the paper seam line, the distortion happened during spreading, cutting, relaxation, or handling rather than in the pattern itself.
Inspect whether the edge was staystitched, whether one layer fed faster than another, whether seam allowances remained consistent, and whether pressing stretched the curve. A controlled second sample is often the fastest way to separate the causes. Use the same pattern but apply measured stabilization, controlled feeding, and a defined pressing method. If the second sample fits correctly, the first problem was probably construction-related. If both show the same gap in the same place, revise the pattern. This prevents a common mistake: changing the paper to compensate for poor sewing and then creating an overly tight neckline once production is controlled.
Confirm Size and Fit Reference
The sample size must match the brand’s fit block and intended customer. Upper bust is often a better starting point for selecting the base bodice size because it reflects the frame above the bust; cup volume can then be added through darts, panel seams, or internal structure. Selecting solely by full bust can create too much width across the upper chest while still leaving the bodice too shallow over the bust. The result is a garment that looks loose at the neckline and tight at the fullest point at the same time.
Before altering the pattern, confirm upper bust, full bust, bust-point height and spacing, waist-to-bust length, shoulder slope, torso length, neck or tie position, intended wearing ease, and actual fabric stretch. Keep the same fit model through major sample rounds whenever possible. Changing bodies halfway through development can make a stable pattern appear inconsistent. Fit comments should also distinguish between the commercial target block and individual asymmetry, because most people are not perfectly symmetrical even though a production pattern normally needs a balanced left and right shape.
Fit Symptom | Area to Investigate | Temporary Test |
Gap at center front | Neckline contour and front balance | Pin a small neckline wedge |
Gap beside bust | Dart volume and armhole length | Pin excess toward side seam |
Whole bodice sits low | Strap length or back support | Shorten strap gradually |
Waist rises at front | Bust capacity or front length | Release side tension and add length |
Gap appears when bending | Support and movement balance | Test back anchor and internal structure |
One side only | Construction or body asymmetry | Compare paired components and seam lengths |
How Do You Correct the Pattern?
Correct the pattern where the excess originates, then transfer the removed volume into a dart, seam, gather, pleat, or another shaping feature that suits the design. Every change should be made at the seam line, trued into a smooth curve, and repeated in the facing, lining, binding, interfacing, and graded sizes. Approve the correction only after a revised sample has passed fit and movement checks.

Remove the Neckline Excess
Fit the sample on the body and pinch the neckline until it lies smoothly without compressing the bust or pulling another seam out of position. Mark the wedge with both the amount and direction. A 6 mm wedge near center front is not equivalent to 6 mm removed near the strap because the pivot point and resulting curve are different. Transfer the correction at the stitching line, draw a slash toward the bust apex or another logical pivot, leave a small paper hinge, close the measured wedge, and retrace the new neckline smoothly.
Minor gaping may require only a few millimeters on each side. A larger reduction should trigger another check of bust capacity, sample size, and armhole balance before paper is removed. After closing the wedge, verify that the center front remains on the correct grain, the strap attachment retains enough width, bust coverage is not reduced unintentionally, and the armhole still follows the body. Do not simply trim the neckline edge. Trimming shortens the outline but may fail to remove the three-dimensional volume that caused the fabric to stand away.
Rotate the Shaping
A temporary neckline dart often shows exactly how much excess needs to be controlled, but it may not suit the final design. Dart rotation moves the same shaping into a side-bust dart, waist dart, princess seam, under-bust seam, gather, pleat, or controlled drape. Mark the bust apex, draw a line from the new location to the apex, close the temporary neckline wedge, and allow the new opening to spread. The volume is not removed; it is redirected to a position that supports the intended silhouette and construction.
A fitted woven halter may use a side-bust dart, a structured style may distribute shape through princess panels, and a soft chiffon neckline may hide it inside gathers. Stretch bodycon styles often use contour seams and negative ease instead of a visible dart. The dart point should end before the bust apex, with the exact distance influenced by cup shape, fabric stiffness, and the desired finish. Rotation controls existing volume, so it must not be confused with adding missing bust capacity. If the sample is tight at the fullest point, width and front length may need to be added before the neckline contour is reduced.
Adjust Strap and Armhole Balance
Redraw the strap according to the actual line of tension seen during fitting. The strap should pull toward the neck without dragging the neckline outward. Move the attachment point in small, measurable increments and check each change on the body. For fixed straps, record finished length between seam points, finished width, attachment coordinates, reinforcement, seam allowance, and whether the component contains elastic or interfacing. For self-tie halters, define the intended tie length and knot position so fit and production teams work from the same reference.
Armhole corrections should remain local and controlled. If pinning the side bust removes the neckline gap, rotate that excess into a dart or seam rather than cutting away the entire armhole. Raise the underarm only when coverage is genuinely insufficient and recheck mobility afterward. Watch the side seam as a balance indicator: a seam pulled forward often signals missing front bust volume, while a seam falling backward can indicate excess front width or insufficient back width. A neckline correction that leaves the side seam twisted may look acceptable in one photograph but will not remain stable during wear.
True and Match Every Component
Once the shell pattern is corrected, every related component must be updated. A revised sample may still gape when the shell changes but the lining, facing, binding, or interfacing remains based on an earlier version. Walk all matching seam lines together and confirm shell-to-facing length, shell-to-lining length, notches, strap positions, center-front alignment, turn-of-cloth, seam allowances, and binding ratios. The purpose is to make sure no secondary component pushes or pulls the approved neckline out of shape.
For a symmetrical design, overlay or fold the pattern and measure from fixed landmarks such as center front, bust apex reference, side seam, and strap attachment. Small differences become noticeable because a halter frames the center of the upper body. Date and identify each pattern revision, then keep the technical package, digital pattern, physical pattern, sample comments, and graded files on the same version. Pattern control may sound administrative, but it prevents an obsolete neckline or strap specification from returning during grading, marker making, or bulk cutting.
Fitting Result | Pattern Response | Risk to Recheck |
Pinning side bust removes neckline gap | Add or increase bust shaping | Bust apex and side-seam balance |
Raising underarm improves coverage only | Reshape armhole locally | Mobility and underarm pressure |
Removing upper-front width closes gap | Reduce upper chest, not full bust | Cup capacity and front length |
Adding front length levels waist | Apply full-bust or length adjustment | Center-front hem and waist seam |
Tightening back band stabilizes front | Revise back anchor or elastic | Comfort and closure stress |
Which Materials and Sewing Methods Prevent Gaping?
Choose materials according to stretch, recovery, drape, weight, bias stability, and compatibility with the intended support structure. Stabilize vulnerable neckline edges before they grow, then sew with controlled feeding, accurate matching, suitable reinforcement, and careful pressing. Stay tape, interfacing, clear elastic, lining, and facings can preserve a correct pattern, but they cannot compensate for missing bust shaping or an incorrect neckline curve.

Match Fabric to Structure
The same paper pattern rarely behaves identically in satin, chiffon, jersey, mesh, crepe, or sequined fabric. Each material changes the way the bodice hangs, stretches, returns, and transfers weight through the neckline. Lightweight satin can grow along diagonal edges and show every ripple. Chiffon distorts easily and often needs a stable lining. Jersey may stretch comfortably but lose recovery after repeated wear. Mesh can have different stretch in the horizontal, vertical, and diagonal directions, while embellished fabric may pull the neckline downward under its own weight.
Evaluate the material in the actual pattern direction rather than relying on a straight-grain swatch. Cut and sew a neckline test with the proposed shell, lining, reinforcement, thread, stitch, and pressing method. Leave the test flat and hanging, then compare the seam-line measurement and edge shape. A fiber-content label and fabric weight are useful, but they do not predict bias growth, seam response, or recovery on their own. The test should reproduce the actual neckline geometry because the risk is created by the combination of material, direction, construction, and garment weight.
Check Stretch and Recovery
Stretch percentage shows how far a fabric extends, while recovery shows how closely it returns. A halter neckline may fit correctly during the first fitting and then loosen after repeated movement when the material has weak recovery. Test the length and width directions separately, and include the diagonal direction when the neckline crosses the bias. Mark a measured section, stretch it to the intended level, hold briefly, release, and measure any remaining extension. Repeat the cycle several times to reveal progressive relaxation rather than relying on one quick hand pull.
Record stretch, recovery, fabric weight, thickness, pattern direction, pressing response, approved care method, and lot variation. A material with high stretch but poor recovery may need stronger internal support, a shorter neckline, or a different pattern. A powerful fabric can hold the body securely but create excessive pressure if too much negative ease is used. The goal is not to make the edge as tight as possible. A successful neckline remains close during wear while allowing the wearer to turn the head, breathe, sit, and move without constant adjustment.
Choose the Right Stabilization
Stabilization should preserve the approved pattern length while allowing the edge to follow the body. Common choices include narrow fusible stay tape for stable wovens, lightweight tricot tape for stretch materials, silk-organza strips for delicate fabrics, clear elastic for selected jersey or mesh styles, and twill tape for structured internal support. A stable lining or shaped facing may also carry part of the load. The lightest method that performs reliably is usually preferable because excessive reinforcement can create a ridge, a stiff edge, or a visible change in drape.
Apply reinforcement before the neckline has been stretched through repeated handling. Matching tape to an already elongated edge simply locks the distortion into the garment. Test adhesive temperature, pressure, and dwell time on the exact fabric, especially with glossy satin, open mesh, or heat-sensitive finishes. Clear elastic also needs a measurable specification: width, finished applied length, attachment method, and application tension. Instructions such as stretch slightly are too subjective for repeatable production. Reinforcement should protect a correct pattern, not pull an oversized edge into place.
Control Sewing, Pressing, and Repair
A curved or diagonal neckline can grow during sewing when the operator stretches the fabric, the upper and lower layers feed at different rates, or the seam is pressed with a sliding motion. Staystitch vulnerable woven edges soon after cutting, use notches and intermediate control points, sew without pulling either layer, and press the neckline into shape rather than dragging the iron along the edge. For bound knit necklines, determine the binding ratio through testing because recovery, thickness, and curve shape change the amount of reduction required.
Finished garments can often be improved, but the repair must match the cause. Shortening the strap is appropriate when the whole bodice sits low. A localized opening may be better corrected by moving the strap attachment, adding a concealed dart, increasing an existing bust dart, taking in the upper side seam, resetting the facing, or adding controlled elastic inside a knit neckline. Fashion tape can help during a single event or photo shoot, but it is not a manufacturing correction. When an alteration works, measure it, photograph it, update the pattern and related components, and verify the next sample before production.
Material | Main Neckline Risk | Common Development Control |
Lightweight satin | Bias growth and seam rippling | Stay tape, low handling, gentle pressing |
Chiffon | Distortion and weak support | Fine stabilization and stable lining |
Stretch jersey | Edge rolling and weak recovery | Tested binding or clear elastic |
Mesh | Directional stretch and low coverage | Layer control and elastic support |
Soft crepe | Variable drape and growth | Grain checks and selective interfacing |
Sequined fabric | Weight and bulky seams | Reinforced base and trimmed allowances |
Bias-cut fabric | Progressive lengthening | Hanging test before final trimming |
Structured woven | Edge stiffness or poor contour | Shaped facing and careful clipping |
How Do You Validate Fit Before Bulk Production?
Validate the style through a complete fit sample, movement testing, graded-size review, material confirmation, pre-production approval, and measurable quality checkpoints. The neckline should remain close without excessive neck pressure, maintain bust and armhole coverage, and return to position after normal movement. Lock all critical dimensions, support materials, strap details, construction methods, and tolerances before bulk cutting begins.

Approve the Full Fit
The fitting should evaluate the complete upper bodice, not only the visible neckline edge. Review the sample from the front, side, back, and three-quarter views, then allow the wearer to settle and move naturally before comments are recorded. Confirm continuous neckline contact, bust-apex position, cup capacity, side coverage, armhole shape, strap pressure, back anchoring, waist and hem balance, left-right symmetry, lining behavior, and the intended level of cleavage or modesty. Cups, boning, closures, elastic, and approved undergarments must be present when they influence support.
Comments should be measurable and tied to the pattern. Replace make neckline tighter with an instruction such as remove 4 mm at the seam line near the side neckline and rotate the reduction into the existing bust dart. State whether the amount applies per side or across the total garment, attach annotated photographs, and identify the exact pattern revision. The garment should also be judged against its intended use. A dance-oriented party dress needs secure movement, a vacation halter may prioritize lighter comfort, and a glossy satin occasion style needs especially smooth edge control because minor distortion is highly visible.
Test Real Movement
Static fitting is not enough. A neckline may look secure while the wearer is standing and then open during reaching, sitting, turning, or bending. Use a repeatable sequence that includes turning the head, rotating the torso, raising both arms to shoulder height, reaching forward, sitting and standing, bending slightly, walking, and simulating dancing when relevant. After each movement, check whether the neckline returns to the approved position and whether the wearer needs to pull the garment back into place.
Observe side exposure, strap migration, bust shifting, armhole pressure, back movement, and increasing neck discomfort. The wearer should keep the garment on for several minutes because pressure and twisting may not appear immediately. Structured styles must be tested with the final internal construction, not as an unsupported shell. Record the movement sequence and result so revised samples and production pieces are judged against the same actions. A garment that looks perfect only when the wearer stands still is not ready for a commercial launch.
Verify Grading and Specifications
A base size can fit well while smaller or larger sizes gape because neckline length, bust projection, upper-chest width, armhole depth, and strap position do not increase at identical rates. Review the smallest intended size, the base size, the largest size, and at least one intermediate size when the range is broad. Extended size ranges may require additional physical samples or separate fit blocks. Nest graded patterns to confirm that curves progress smoothly and that strap attachments do not jump suddenly between sizes.
Check neckline seam length, bust width and projection, bust-point position, armhole depth, side coverage, strap length, back-band length, cup or internal support size, torso length, and intended ease. Do not enlarge strap length automatically at the same rate as bust circumference. A larger size may need more front volume without a comparable increase around the neck. Critical specifications should use clearly defined measurement methods, preferably at the seam line where practical, because finished-edge readings can be affected by turn-of-cloth, binding thickness, and pressing.
Lock Production Controls
Before bulk cutting, approve the exact shell fabric, lining, elastic, interfacing, cups, boning, trims, closures, and pressing method. A correct pre-production sample can still fail if the elastic power, lining stretch, strap length, seam allowance, or reinforcement changes later. Lock the pattern version, neckline seam-line length, strap dimensions and coordinates, applied elastic length, interfacing reference, dart positions, cup placement, seam construction, understitching, measurement tolerances, and approved sample. A revision log should show which changes led from the first prototype to final approval.
Inline checks should begin at cutting and continue through stabilization, strap preparation, neckline sewing, pressing, first-piece fitting, and final inspection. Fit-sensitive locations often need tighter control than loose areas of the garment, but the tolerance must be proven achievable during development rather than copied from a generic chart. Compare production not only with measurements but also with the approved physical sample. A garment can sit within individual dimensions and still show poor tension, asymmetry, or edge roll. Visual proportion and movement are part of quality, not optional styling opinions.
A halter neckline stays close to the body when pattern shape, bust capacity, strap direction, armhole balance, back anchoring, fabric behavior, support construction, and production control all work together. Treating gaping as a single loose-edge problem usually creates a temporary correction. Treating it as a connected fit system leads to a neckline that remains secure, comfortable, and repeatable across samples, sizes, colorways, and bulk production. The most reliable workflow is to diagnose the exact location, test a controlled correction, update every related pattern component, and verify movement before approval.
For fashion brands developing halter dresses, fitted partywear, vacation styles, backless dresses, satin occasionwear, mesh designs, or structured event collections, Duolan Apparel can review tech packs, reference samples, fit comments, target fabrics, size specifications, quantities, and launch calendars. The development team can support fabric-to-structure assessment, pattern correction, fit sampling, grading review, pre-production verification, and scalable manufacturing. Send the project information to begin a technical review and receive a custom quotation based on the actual design, material, construction, and production requirements.
Share:
Our Services
Categories
Table of Contents
Here, developing fashion collections is more than manufacturing garments — it’s a collaborative process focused on transforming ideas into well-executed, market-ready products. From fabric sourcing and sample development to scalable production and delivery coordination, every stage is built to support quality, consistency, and efficient collection launches across global markets.

