 Skip to content
How to Set Halter Strap Length for Dresses:A Practical Fit and Production Guide
Your trusted Women’s Apparel Development & Manufacturing Partner from China
- Jerry
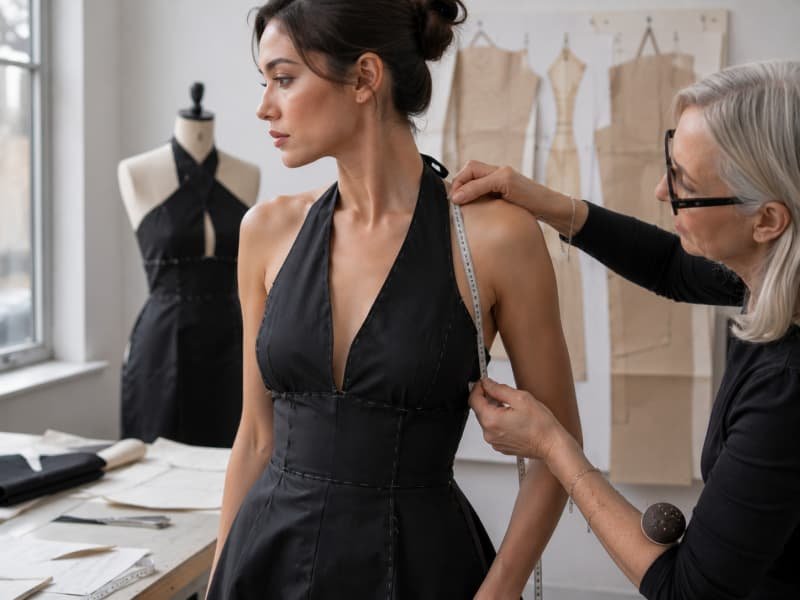
A halter strap can look like one of the least complicated parts of a dress, yet it often controls the most sensitive areas of the upper body. A change of only 10-20 mm can raise or lower the neckline, alter side-bust coverage, move the underbust seam, and decide whether the wearer feels secure or spends the evening pulling at the garment. The challenge is that strap length cannot be separated from fabric stretch, bust support, back construction, attachment angle, and the way the dress is expected to move.
The correct halter strap length follows the real path between the bodice attachment points and the back neck, then accounts for the closure, material behavior, comfort ease, and internal support. It should hold the neckline and bust in their intended positions without forcing the neck to carry excessive garment weight. Final approval must come from a fit model and a clearly defined finished measurement, not a generic chart.
A development team once shortened a halter tie because the neckline looked slightly low on a mannequin. The alteration improved the front photograph immediately, but the live fitting revealed a more serious problem: the dress was now hanging from the model’s neck because the back and underbust were not supporting it. That small incident captures the central lesson of halter development. The strap is not an isolated trim; it is one working part of the entire bodice system.
What Is the Right Halter Strap Length?
The right halter strap length holds the neckline, bust, armholes, and upper bodice in their intended positions without creating concentrated neck pressure. It depends on attachment points, closure type, fabric behavior, strap width, garment weight, and internal support. There is no universal finished number; the measurement must be fitted, approved, and documented for the specific dress.
No Universal Length
Halter straps are sometimes copied from an existing style or taken from a generic size chart, but that shortcut ignores the geometry of the new garment. A strap attached near the center front follows a shorter and more vertical route than one attached close to the armhole. A high-neck halter, a plunging front, and a crossover neckline can all fit the same body while requiring different paths around the neck. Even within one silhouette, changing the bust cup, neckline depth, or back height can move the correct attachment point and alter the final length.
The lower bodice must also be positioned before the strap is judged. A loose waist, weak underbust seam, or unstable back allows the dress to drop, making the strap appear too long. Shortening it may restore the neckline temporarily but transfer the garment’s weight to the neck. The practical standard is therefore a method rather than a number: establish the intended bodice position, measure the real strap route, add only the necessary closure or comfort allowance, produce the sample, and verify the result on a live fit model.
Strap Type Matters
A fixed neck loop needs close control because the wearer cannot alter the length. Two separate ties provide flexibility but require enough material for the knot, bow, and visible tails. Adjustable straps require a useful minimum and maximum range, while a wide shaped neckband may need different inner-edge and outer-edge lengths so it lies flat. These constructions should not share one measurement definition.
The closure can also change how the strap behaves. A buttoned loop has a controlled circumference and overlap. A soft tie lets the wearer choose tension, but that freedom can hide an unstable base pattern during sampling. A slider can extend the fit range, yet it consumes strap length and may slip when paired with smooth satin or a thin self-fabric tube. Product teams should therefore decide the strap system early. Changing from a tie to a hook, or from a narrow strap to a padded band, can require a new fitting rather than a simple component substitution.
Strap configuration | Primary finished measurement | Extra control | Typical fit risk |
Fixed neck loop | Seam-to-seam path or full closed loop | Closure overlap and placement | Neck pressure or low neckline |
Two tie straps | Each bodice seam to finished tip | Knot consumption and tail length | Uneven tying or bulky knot |
Adjustable strap | Minimum and maximum wearable path | Slider threading and secure tail | Range too short or hardware slippage |
Wide shaped band | Center line plus edge balance | Curved pattern and stabilization | Rolling, twisting, or standing away |
Elastic halter | Relaxed and controlled extended length | Stretch, recovery, and joining method | Permanent growth after wear |
Ease and Support
Ease should provide comfort without allowing the neckline to drop. Stable woven straps normally follow the measured path with a small amount of wearing ease, while stretch straps may use controlled negative ease. The reduction should come from a tested stretch-and-recovery result, not a familiar percentage applied to every fabric. A material can stretch easily yet recover poorly, producing a strap that fits the first time and grows longer during wear.
Support distribution is equally important. In a structured halter dress, the cups, underbust seam, side seams, back closure, lining, and possibly boning should share the load. The strap should refine neckline position, not suspend the full dress. During fitting, support the garment at the underbust or waist and observe whether neck pressure decreases. If the neckline remains stable when the torso is supported, the lower structure needs improvement. If it collapses despite a secure bodice, the strap length or attachment angle deserves closer attention.
Finished and Cut Length
Finished length describes the wearable strap after sewing, while cut length includes fabric consumed by insertion, seams, turnbacks, hardware, and validated process allowance. A tie that must measure 60 cm from the bodice seam to the finished tip may need 1 cm enclosed in the neckline and 2 cm for a turned end, giving a preliminary cut length of 63 cm before any tested processing change. Adjustable straps can require several additional centimeters for threading around rings and sliders.
The technical file should keep these values separate. The finished measurement belongs in the garment specification, while the cut dimension and allowance breakdown belong in the pattern or component sheet. This distinction also exposes manufacturing variation. If one operator inserts 8 mm into the bodice and another inserts 15 mm, the visible strap lengths will differ even when the components were cut equally. Marked seam guides, physical templates, and first-piece approval help keep the intended finished value consistent.
How Do You Measure Halter Straps?
Measure halter straps only after the bodice sits at the approved bust, underbust, waist, armhole, and back positions. Follow the intended neck path with a flexible tape or temporary strap without pulling tightly. Add the allowance required by the closure and construction, then confirm the measurement on a fit model through normal head, shoulder, and torso movement.

Tie Straps
Tie straps should be tested in the intended production fabric because knot consumption changes with width, thickness, stiffness, and surface friction. A narrow jersey tie forms a compact knot, while a lined satin sash or padded band can require noticeably more length. Begin with the bodice temporarily supported at the back and waist so the ties are not compensating for an unstable garment. Attach trial straps at the approved front positions, form the intended knot or bow, and mark the finished tail length.
Measure each side from the finished bodice seam to the final tip. Keeping both ties equal is normally appropriate for symmetrical designs, but the first fitting should still check each side separately because inaccurate attachment or sample construction can create an apparent imbalance. Leave extra length in the first prototype and trim after fitting rather than cutting to a guessed final value. The wearer should be able to tie the straps securely without assistance, and the tails should remain proportionate to the dress rather than becoming an accidental focal point.
Fixed Straps
Fixed straps demand greater precision because the wearer cannot correct the fit. Place the complete bodice on the model and stabilize the waist, underbust, side seams, and back closure before measuring. Run a flexible tape or temporary woven strip from one defined attachment point, around the back neck, to the opposite point. It should follow the finished route and make comfortable contact without compressing the skin.
Ask the model to turn the head, look down, lift the chin, and relax the shoulders. A loop that feels acceptable only in a rigid pose is not ready for approval. Buttoned, hooked, or snapped styles should separate wearable circumference from closure construction. Record the closed path as one value, then document button position, buttonhole position, or hook overlap independently. Bias-cut satin and other soft woven straps should rest after sewing and pressing before final measurement because handling tension can produce growth that is not visible during the first fitting.
Strap type | Start and end points | Required additional values | Approval check |
Separate ties | Finished bodice seam to each finished tip | Knot position and visible tail | Wearer can tie securely at intended neckline |
Fixed loop | One neckline seam around neck to opposite seam | Fastening overlap and placement | Comfort during head movement |
Adjustable strap | Bodice attachment to attachment at minimum and maximum | Total component and secure tail | Useful range remains in smaller and larger sizes |
Wide neckband | Defined center line or shaped seam path | Inner and outer edge control | Band lies flat without rolling |
Elasticated strap | Relaxed finished path and specified extension | Test load or stretch method | Returns close to approved relaxed length |
Adjustable Straps
An adjustable strap should be measured as a finished system. Record the shortest wearable path, the longest safe path, and the total component length used to create that range. Thread the strap through the exact production ring and slider because hardware width, internal clearance, and strap thickness affect how much material is consumed. A self-fabric tube may require more turning length than elastic tape, and a smooth surface may need additional securing to prevent slippage.
The base-size fit should not sit at an extreme. If the sample model needs the shortest setting, smaller wearers may have no adjustment left. If the model needs full extension, the larger graded sizes may fail. A practical target is to place the preferred setting within the central portion of the available range, while still checking the brand’s size chart and intended customer. Confirm that the loose tail remains secure, the slider is reachable, and the hardware does not press against the back neck.
Form and Live Fitting
A dress form is useful for establishing the initial route, checking strap angle, and spotting twisting, but it cannot confirm comfort or soft-tissue movement. Position the bodice using the center front, bust apex, underbust seam, waistline, armhole depth, side seam, and back height. Pin temporary straps at the exact attachment points and mark a provisional length without stretching the tape.
The live fitting should then verify the result. Ask the model to wear the dress for several minutes because the garment may settle after the first photographs. Compare the dress-form value with the approved model value and record the difference. Over several styles developed from the same block, this information becomes useful internal evidence. It can reveal whether the form consistently underestimates bust projection, whether a particular backless block tends to drop, or whether a fabric family needs extra resting time before the strap is finalized.
Which Factors Change Strap Length?
Halter strap length changes with fabric stretch and recovery, neckline depth, attachment position, bust structure, strap width, garment weight, and back support. The same measurement can behave differently in satin, jersey, mesh, or rigid woven fabric because each factor changes the strap during wear or the support the bodice needs.

Fabric Behavior
Stretch percentage alone is not enough. Recovery, long-term extension, grain direction, thickness, and pressing response determine whether the approved length survives real wear. A jersey can stretch considerably and return almost completely, while another knit can retain part of the extension and lower the neckline over time. Bias-cut satin may grow during sewing or hanging even though the base fabric is not described as stretch. Mesh can behave differently when combined with lining, elastic, or binding.
Test the actual strap construction rather than relying only on a small swatch. Mark a known length, apply a repeatable load, hold it for a defined period, release it, and measure immediate and delayed recovery. For a 50 cm test strip, 2% permanent extension equals 1 cm, which can noticeably change side-bust coverage. Repeat after pressing, steaming, or washing when those processes are relevant. Fabric substitutions should also be retested because two satins of similar weight may differ in bias growth, surface friction, and ability to hold a knot.
Neckline and Attachment
Neckline depth changes the physical route and the tension direction. A low front generally places the attachment points farther from the neck, but a lower neckline does not automatically mean the strap is simply longer. The bodice may sit too low because the front length is excessive, bust shaping is insufficient, the back is loose, or the fabric has grown. Shortening the strap can hide these causes while creating pressure elsewhere.
Attachment position is equally influential. Points close to the center front create a more vertical pull, while points near the armholes create a diagonal inward force. That inward force can improve upper-bust control, but too much tension may distort the armhole or reduce side coverage. Mark the intended neckline directly on the fit model or fitting undergarment, position the bodice first, and then bring the straps into place. Check left-to-right symmetry relative to the center front and bust apex because a few millimeters of placement error can make one side feel shorter.
Material or construction | Likely behavior | What to measure | Development concern |
Stable woven | Low mechanical stretch | Finished path and comfort ease | Pressure if length is reduced too far |
Bias-cut satin | Growth from handling, hanging, or wear | Length before and after resting | Approved neckline may drop later |
Jersey knit | Directional stretch with variable recovery | Stretch percentage and residual extension | Generic negative ease may be inaccurate |
Power mesh with lining | Layer interaction changes extension | Completed multilayer strap | Shell-only test can mislead |
Elastic tape | Performance depends on tension and batch | Relaxed length and length under defined load | Inconsistent feeding changes finished length |
Embellished or padded strap | Added stiffness and weight | Completed construction and pressure area | Localized discomfort despite correct center line |
Internal Support
Cups, underbust seams, boning, firm lining, waist stays, and fitted back panels distribute support around the torso. In a structured halter dress, these components should carry a meaningful share of the garment’s load. If the bodice drops because the back or waist is loose, the sample team may shorten the strap until the front view appears correct. The result can be a dress that photographs well but becomes painful after several minutes.
Check the underbust seam, cup contact, back closure tension, and waist anchoring before approving the strap. Lightly support the garment at the underbust or side seam during fitting. If neck pressure decreases while the neckline remains stable, the lower structure needs improvement. Fuller-bust sizes may require changes to cup depth, front length, and underbust support rather than a simple strap increment. The strap should be graded as part of the upper-bodice system, especially in corset-inspired, bodycon, and open-back designs.
Width, Weight, and Back
Strap width changes pressure distribution. A 6 mm cord concentrates force in a small area, while a 40 mm band spreads it more broadly. Wider does not automatically mean comfortable; a poorly shaped band can fold, roll, or press against the sides of the neck. Seams, piping, beadwork, sequins, and bulky knots can also create localized pressure even when the center-line length is technically correct.
The back design determines how strongly the torso anchors the dress. A fitted high back usually supports more weight than a deeply open back. In backless styles, the underbust, waist, side panels, and stabilized back edge become critical. Garment weight should be reconsidered whenever the design changes. A lightweight mini dress and a fully lined embellished maxi may use similar-looking straps but impose very different loads. If the skirt, lining, or decoration becomes heavier during development, repeat the comfort and movement test instead of assuming the original strap specification remains suitable.
How Do You Check Halter Strap Fit?
Check halter strap fit by reviewing neck comfort, neckline height, bust support, armhole coverage, waist balance, and movement together. A correct strap stays flat and secure without carrying excessive garment weight. Test the dress while standing, turning, raising the arms, sitting, and bending, then transfer every approved correction to the pattern and measurement chart.

Too Short or Too Long
A short strap can create more than neck tightness. It may lift the bust apex, raise the underbust seam, pull the armhole upward, tilt the side seam, and raise the back waist. A long strap can lower the neckline, open the side bust, deepen the armhole, and allow the bodice to rotate. These symptoms should be read as a group rather than corrected one by one.
Work in small increments. For sensitive fixed loops, 5 mm can produce a visible change; a 10 mm release or reduction is often enough to confirm the direction of correction without losing the original balance. These are fitting increments, not universal standards. If shortening the strap improves the neckline but raises the waist, the issue is not only strap length. Review front length, bust shaping, back support, and fabric growth. For tie styles, test more than one realistic knot tension because a design that works only when tied extremely tightly is structurally unstable.
Bust and Neck Support
Bust support and neckline height are related but not identical. A strap can hold the neckline high while the bust remains poorly supported, creating a dress that looks acceptable in a still photograph yet feels insecure. Check the bust apex, underbust contact, cup edge, center-front stability, side-bust containment, waist anchoring, and back tension. Ask the model where the garment’s weight is felt; concentrated pressure at the neck is a strong warning.
A common informal check is whether one or two fingers can slide beneath the strap without force, but this is not a universal rule because strap width and material vary. A more useful test combines comfort with garment position over time. Observe the skin for concentrated indentation, especially with narrow cords, thick seams, beading, or piping. If lifting the bodice at the underbust immediately reduces neck pressure, the torso structure should be improved before the strap is lengthened or shortened again.
Movement Test
Static fitting misses problems that appear during ordinary wear. Use a repeatable sequence: turn the head fully in both directions, look down, lift the chin, raise the arms to shoulder level and overhead, sit, stand, bend slightly forward, walk, and turn. After the sequence, compare the neckline, side bust, waist, and strap position with their starting points. The strap should return to place rather than remaining twisted or displaced.
Allow the model to wear the sample for at least five to ten minutes when the schedule permits, particularly for occasion dresses or heavier styles. A simple 0-10 pressure rating at the beginning and end provides a consistent language for discussing comfort, even though the number remains subjective. Take front, side, and back photographs before and after movement. Gradual drop or rotation is easier to identify by comparison, and the images create useful evidence for pattern revisions and later production approvals.
Pattern Correction
Once the correct adjustment is identified, transfer it to the paper or digital pattern immediately. A pin on the sample or a note saying ‘make strap tighter’ is not enough. Record the exact amount added or removed, the location, whether the change applies to one or both sides, the revised finished measurement, the affected sizes, and the sample revision number. Link the comment to fitting photographs so the reason remains clear.
Wide and curved straps may require shaped corrections rather than a straight tuck. Removing the same amount across the full width can shorten the inner edge too much and cause twisting. Walk the pattern seams after adjustment and confirm that the strap still joins the neckline smoothly. Refit the revised sample and repeat the movement test. Only after the garment holds the intended neckline, bust, armhole, waist, and back positions should the new length be treated as approved.
How Do You Set Strap Length for Production?
Set production strap length by defining one clear finished point of measure, separating it from the cut length, approving it in the final material, and controlling it through patterns, templates, first-piece checks, and inspection. The tech pack, sealed sample, component specification, grade rule, and sewing method must all describe the same strap system before bulk cutting begins.

Tech Pack Measurement
The tech pack should identify exactly where the measurement begins and ends, how the strap is positioned, whether hardware is included, and whether the component is measured relaxed or under a defined extension. A point-of-measure code, sample-size value, grade rule, tolerance, method, and sketch should all refer to the same finished condition. Curved neckbands and adjustable systems are particularly difficult to control without a diagram.
For two tie straps, state whether each side is measured separately and whether a tassel or decorative end is included. For a fixed loop, define whether the closure overlap forms part of the closed circumference. For elastic, avoid instructions such as ‘stretch to measure’ because inspectors will apply different force. Record the relaxed value and, when necessary, the length under a specified load or extension method. The purpose is not to make the file look technical; it is to let the design team, pattern room, sewing line, and final inspector reproduce the same measurement.
Allowances and Construction
Construction allowance belongs in the pattern and component specification, while the approved finished length belongs in the garment measurement chart. The cut value should account for seam insertion, end finishing, hardware threading, folding, binding, and validated processing change. Do not add an assumed shrinkage percentage to every strap. A folded, fused, or lined component can behave differently from the flat shell fabric, so the final allowance should come from a sewn trial.
Hardware consumption should be measured using the exact production ring, slider, hook, or buckle. Thread one complete sample, mark the strap before assembly, and calculate the hidden or turned length. Attachment depth also needs control. If sampling inserts 10 mm into the neckline but bulk sewing inserts 15 mm, the visible strap becomes 5 mm shorter at that end. A notched pattern, seam guide, or physical template helps operators repeat the approved method and reduces the temptation to correct length by trimming finished components.
POM example | Base-size example | Illustrative tolerance | Measurement method |
Tie strap, bodice seam to tip | 62.0 cm each | +/- 1.0 cm | Lay flat and measure along defined center line |
Fixed neck loop | 43.5 cm | +/- 0.5 cm | Measure seam to seam around closed finished loop |
Adjustable minimum | 38.0 cm | +/- 0.5 cm | Slider at shortest usable position |
Adjustable maximum | 49.0 cm | +/- 0.5 cm | Slider at longest secure position |
Finished strap width | 2.0 cm | +/- 0.2 cm | Measure without stretching or flattening seam bulk |
Left-right tie difference | Pair comparison | Maximum 0.5 cm | Compare completed straps using the same method |
The values above are examples of a specification format, not universal halter-dress standards. Final measurements and tolerances should be approved for the actual design, material, size range, and inspection method.
Sampling and Grading
Strap approval should progress through the first prototype, fit sample, revised sample, size set, pre-production sample, and first production piece. Each stage answers a different question. The first prototype checks route and proportion; the fit sample checks balance and comfort; the pre-production sample confirms bulk fabric, hardware, and sewing method; the first piece proves that the line can repeat the approval. Comments should record exact values rather than broad statements such as ‘strap approved.’
Grading should follow body growth, attachment-point movement, cup projection, front body length, high bust, back width, and neckline position. Some high-neck halters need little length change, while lower fitted styles may require more as bust depth increases. Check at least a smaller size, base size, and larger size when the range allows. Extended sizes or separate cup groups may need additional specifications because support requirements do not always change in a simple linear pattern. Consistent neckline position is the goal, not identical increments.
Bulk Control
Bulk control begins before the sewing line starts. Verify the pattern measurement, inspect first-cut components, confirm hardware and elastic, approve the machine setup, and measure the first completed piece. Continue with inline checks, end-line comparison against the sealed sample, and final inspection. Fixed loops often need tighter control than long decorative ties because small errors directly change neckline height, but the tolerance should still reflect material stability and the design’s sensitivity.
Templates work well for stable fixed straps, while elastic and soft curved straps require a defined laying and measuring method. Inspectors should not pull one strap firmly and measure another in a relaxed curve. When measurements drift, identify the source instead of repeatedly trimming finished garments. Common causes include unequal cutting, seam-width variation, inconsistent insertion depth, stretching during turning, excessive pressing tension, material growth while hanging, incorrect slider threading, and operator handling. Correcting the process preserves fit more reliably than late rework.
A halter strap is a small pattern component with an unusually large influence on the finished dress. It controls neckline height, bust balance, armhole coverage, back stability, and comfort, while also interacting with fabric stretch, internal support, grading, and production consistency. The reliable approach is to measure the real garment path, confirm the bodice independently, fit the complete construction on a person, test normal movement, and convert the approval into one unambiguous finished specification.
For fashion teams developing halter dresses, backless styles, bodycon silhouettes, satin and mesh pieces, or structured occasion collections, Duolan Apparel can review the project from a tech pack, reference image, original sample, or collection concept. The development process can cover fabric matching, pattern engineering, strap construction, fitting, sample revision, grading, and production control.
Share:
Our Services
Categories
Table of Contents
Here, developing fashion collections is more than manufacturing garments — it’s a collaborative process focused on transforming ideas into well-executed, market-ready products. From fabric sourcing and sample development to scalable production and delivery coordination, every stage is built to support quality, consistency, and efficient collection launches across global markets.

