 Skip to content
Why Do Halter Dresses Pull at the Neck?
Your trusted Women’s Apparel Development & Manufacturing Partner from China
- Jerry
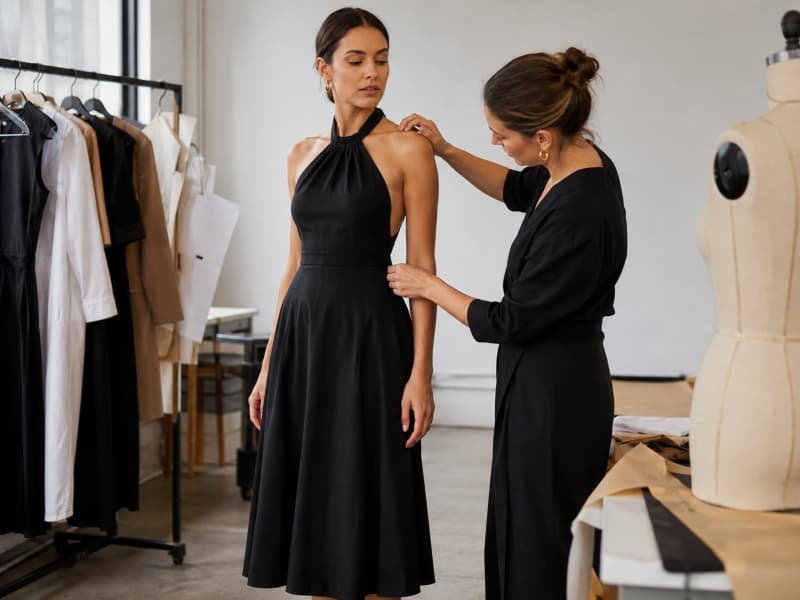
A halter dress can look beautifully balanced on a hanger and still become uncomfortable within minutes of being worn. The neckline begins to creep backward, the knot presses into the skin, the bust feels lower than it did in the fitting room, and the wearer responds by tightening the tie. That quick adjustment may improve the mirror image for a moment, but it often increases the pressure instead of correcting the cause. The discomfort is usually not a mysterious flaw in the wearer’s body. It is a signal that the dress is sending too much of its load through one narrow support point.
Halter dresses pull at the neck when the bust, bodice, or skirt is not adequately supported by the underbust, back, waist, lining, or internal structure. A short strap can create direct pressure, but loose torso fit, heavy materials, weak fabric recovery, armhole gape, and poor front-to-back balance are equally common causes. The lasting solution is to redistribute the load rather than simply changing the knot.
Picture a customer preparing for a wedding, party, or vacation dinner. The dress photographs well, but every ten minutes she reaches behind her neck to retie it. By the end of the evening, a red line remains on her skin and the dress has shifted out of position. That experience can become a return, a negative review, or a style that never earns a repeat order. Understanding the pressure path helps wearers choose a sensible fix and helps product teams prevent the problem before production begins.
Why Do Halter Dresses Pull at the Neck?
Halter dresses pull at the neck when the garment relies too heavily on the neck strap to support the bust, bodice, or skirt. Common causes include an overly short strap, weak underbust support, a loose back, heavy fabric, poor stretch recovery, or an unbalanced pattern. The strap should stabilize the neckline, not carry most of the dress’s weight.
How the Load Reaches the Neck
A halter neckline changes the route through which a dress is supported. Conventional shoulder straps spread part of the garment’s weight across two shoulders, while a halter strap directs tension toward a smaller area behind the neck. The design can still be comfortable, but the bodice, underbust, back, and waist must participate. When those areas fail to anchor the garment, gravity pulls the bust and skirt downward until the neck strap becomes the final point stopping further movement.
Several small factors often combine. A low back removes horizontal stability, a full skirt increases downward load, a soft knit lengthens during wear, and an underbust area without elastic or shaping allows the front to settle. The wearer then tightens the neck tie to raise the neckline. That action treats the visible symptom, yet it directs even more force into the same sensitive area. A balanced halter dress uses the strap for final positioning while the torso structure carries most of the continuous load.
Normal Contact or Excessive Pressure
A halter strap must touch the body, so light contact is expected. The wearer may remain aware of the strap without experiencing a fit failure. Excessive pressure is different: it becomes stronger with time, creates a deep groove or burning sensation, restricts comfortable head movement, or makes the wearer repeatedly lift and retie the dress. These signs indicate that the strap is functioning as a load-bearing suspension point rather than a neckline control.
Comfort should be checked during movement, not only in a static mirror pose. Turning the head, walking, sitting, raising the arms, leaning forward, and wearing the sample for at least 20 to 30 minutes can reveal progressive tension. Body heat may soften elastic, stretch fabrics may relax, and a long skirt may settle lower. A design that feels acceptable for two minutes can become uncomfortable later, which is exactly when real customers begin adjusting the tie or deciding that the dress is not wearable.
Reading the Fit Symptoms
Neck discomfort rarely appears alone. The front neckline may rise while the back drops, the armholes may gape when the strap is loosened, or the waist seam may climb upward over the bust. Side seams can rotate, the bust point can sit too low, and the skirt may feel as though it is hanging directly from the neck. These connected clues help identify whether the main issue begins at the strap, bust, back, waist, or fabric.
The table below is a practical diagnosis guide rather than a universal alteration formula. The same visible symptom can have more than one cause, so the garment should be observed on the body and tested after each correction. Tightening the strap can temporarily hide several problems at once, which is why the most useful fitting question is what happens elsewhere when the neck tension is reduced.
Fit symptom | Likely cause | First check | Common response |
Strap digs in while waist stays stable | Strap is short or neckline is too high | Finished strap and front torso length | Lengthen strap or rebalance neckline |
Bust drops when strap is loosened | Weak underbust or cup support | Underbust fit, cup position, back tension | Add or strengthen internal support |
Entire dress slides downward | Waist and back do not anchor the garment | Waist fit and back circumference | Reshape waist or add a waist stay |
Armholes gape | Excess front width or weak bust shaping | Dart, princess seam, and armhole contour | Remove excess or redistribute shaping |
Front waist rises | Insufficient front length over the bust | Bust projection and neck-to-waist length | Add front length and rebalance pattern |
Strap tightens during wear | Fabric or elastic is relaxing | Recovery, hanging growth, neckline length | Stabilize edges or revise material |
Back neckline drops | Back is too loose or too low | Back width and fastening position | Reduce width or add hidden support |
Neckline twists to one side | Asymmetric construction or attachment | Strap placement and bodice symmetry | Correct sewing and attachment points |
Why the Problem Appears Later
A dress may look stable during the first fitting and become less comfortable after an hour because fabrics and components respond to gravity, body heat, humidity, and movement. Bias-cut satin can lengthen while hanging, stretch jersey can relax around the torso, and soft elastic can lose part of its initial tension. Layered mesh may look light on the roll but become considerably heavier after lining, cups, trims, and embellishment are added.
The sewing process can also stretch curved neckline and armhole edges. Repeated handling, pressing, turning, and lining attachment may add several millimeters to an edge that was correct on the paper pattern. The sample then gapes, and the strap is shortened to pull it flat. Proper development separates the cause from the correction: the edge should be stabilized, the fabric should be allowed to settle, and the sample should be measured again after realistic wear rather than forcing the neckline into place with extra neck tension.
Is Neck Pulling a Size or Fit Problem?
Neck pulling can be caused by the wrong size, but it is more often a proportional fit problem. Bust volume, torso length, back width, underbust fit, armhole shape, and strap length must work together. Moving up or down one standard size may improve one area while creating looseness or pressure elsewhere.

Strap Length and Torso Balance
A visibly tight neck strap may genuinely be too short, but it may also have been shortened to compensate for a long or loose bodice. This distinction matters because adding strap length only works when the rest of the garment already stays in position. Loosen the strap gradually and watch the bust, armholes, waist, and back. A stable bodice with immediate comfort improvement points to strap length; a dropping bust or opening armhole points to a deeper fit issue.
Torso length is especially important in fixed-strap halters. Two women can share the same bust and waist measurements while having different distances from the neck to the bust and from the bust to the waist. A strap developed on a shorter torso can become painful on a longer torso even though the dress is technically the correct size. Adjustable ties provide flexibility, but they should fine-tune a balanced pattern rather than rescue incorrect bust height or waist placement.
Bust Shape and Support Needs
Bust circumference alone does not predict halter comfort. Projection, upper-bust fullness, underbust circumference, root width, and bust height all change how the front bodice carries load. A fuller bust can create greater forward and downward force, but a smaller-busted wearer can experience identical neck pressure when the bodice is too long, the back is loose, or the fabric lacks recovery. The fit system must shape the bust and hold the rib cage, not simply compress the full circumference.
The relationship between full bust and underbust is often more revealing than the full-bust number by itself. A dress can match the full bust while remaining too loose around the rib cage, allowing the whole front to slide. Moving down a size may tighten the underbust but crush the bust and distort the neckline. Cups, princess seams, darts, shelf linings, or underbust elastic should therefore be selected according to the intended size range and support level, not added as generic components after the outer shell is finished.
Back Fit and Armhole Gape
A loose or very low back can shift more weight toward the front. The front bodice rotates downward, and the halter strap resists that movement. The wearer feels the failure at the neck even though the root cause may be at the back. A secure back acts as a counterbalance, maintaining underbust position and reducing the amount of lift demanded from the neck tie.
Armhole gape is often part of the same imbalance. Tightening the strap pulls the front upward and may temporarily flatten the armhole, but the excess returns when the strap is relaxed. The pattern may need more bust shaping, less upper-bodice width, a revised dart, or a corrected cup position. A back can also be tight at its top edge yet loose at the underbust, creating discomfort without stability. Good support follows the torso shape instead of relying on one tight horizontal line.
Measurement or check | What it controls | Practical fitting note |
Neck point to bust point | Bust height and strap path | Compare body and garment without lifting the chest |
Neck point to front waist | Front bodice length | Check whether the waist rises after movement |
Upper bust | Upper-bodice width | Useful for diagnosing armhole and neckline excess |
Full bust | Total circumference | Do not use alone for support decisions |
Underbust | Rib-cage anchoring | Critical for fitted and cup-supported styles |
Bust point spacing | Cup and dart placement | Incorrect spacing can open the armhole |
Back width | Horizontal stability | Excess can transfer load toward the neck |
Side seam length | Front-to-back balance | Side seam should stay close to vertical |
Waist position | Where skirt weight is carried | Recheck after sitting and walking |
Finished strap length | Neckline height and pressure | Measure with final knot, hook, or button method |
When a Size Change Helps
Moving up a size can reduce pressure when the entire dress is too tight, but it may also make the back, waist, and armholes looser. Moving down a size may create more torso grip, yet it can compress the bust and increase neck tension. A size change works best when several areas are consistently too tight or too loose, not when one body proportion differs from the brand’s base fit.
An exchange is sensible when the bust, waist, and back are uniformly tight, the whole bodice is visibly short, or the garment restricts breathing and normal movement. Alteration is usually more effective when the waist fits but the strap is short, the bust fits but the back is loose, only the armholes gape, or the front waist rises over a fuller bust. Product teams should also review more than one body shape during size-set fitting, because uniform grading does not automatically preserve bust balance, strap angle, and back stability across the range.
Which Materials and Details Increase Pressure?
Heavy fabrics, narrow straps, weak stretch recovery, bulky seams, and poorly matched linings can all increase neck pressure. The risk depends on the complete garment, not one material in isolation. A lightweight fabric can become heavy when layered or embellished, while a dense fabric can remain comfortable if the waist and bodice carry the load properly.
Fabric Weight and Skirt Construction
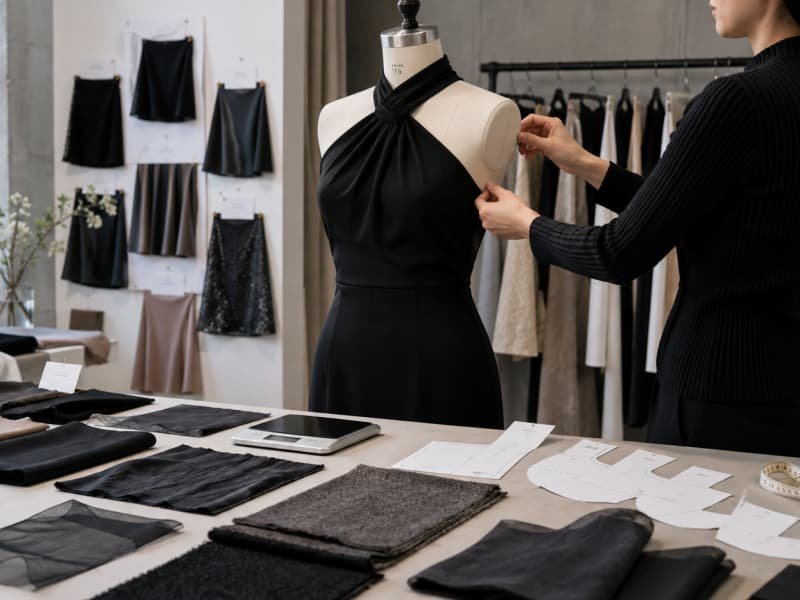
The weight felt at the neck is influenced by the complete dress below it. A short fitted mini dress made from a medium-weight fabric may create little downward pull, while a maxi dress in the same fabric can become demanding after gathers, lining, ruffles, or embellishment are added. Dense satin, velvet, sequin fabric, multiple mesh layers, and heavy jersey are not unsuitable for halter styles, but they require a clear plan for carrying the skirt through the waist and torso.
Fabric weight in grams per square meter is useful, yet it does not explain drape, bias growth, stretch direction, friction, or the accumulated mass of multiple layers. A light mesh can become heavy after beads, lining, cups, and decorative trims are applied. A moderate satin can lengthen significantly on the bias. Development teams should therefore evaluate the assembled sample and consider an internal waist stay, stable lining, fitted waistband, or structured torso whenever the skirt produces sustained downward load.
Stretch, Recovery, and Growth
Stretch describes how far a material extends; recovery describes how well it returns. A fabric can feel supportive at the first fitting and gradually lengthen through wear, causing the bust and neckline to drop while the neck strap becomes tighter. Jersey, stretch satin, power mesh, and elastic components can behave very differently even when their fiber compositions look similar, because knit structure, yarn, finishing, and density influence recovery.
Practical development checks include widthwise and lengthwise stretch, repeated extension, hanging growth, dimensional change after pressing or washing, seam extension, elastic relaxation, and neckline length before and after assembly. A wear test adds information that laboratory numbers cannot show alone. The sample should be worn for at least 20 to 30 minutes, moved through normal positions, and remeasured. Long or bias-cut dresses may also need several hours of hanging before final approval because gravity can alter both hem and bodice balance.
Material or detail | Main risk | Useful check | Practical response |
Bias satin | Lengthening under gravity | Hang and remeasure the complete sample | Stabilize bodice and carry weight at waist |
Stretch jersey | Progressive growth during wear | Recheck after a 20-30 minute wear test | Use controlled ease and stable lining |
Power mesh | High tension at seams | Test extension, recovery, and seam comfort | Balance compression with movement |
Layered mesh or tulle | Accumulated weight | Weigh assembled layers and trims | Anchor skirt independently of neck |
Sequins or stones | Added mass and stiff handling | Check neckline and seam distortion | Reinforce load-bearing seams |
Soft elastic | Loss of tension over time | Repeat extension cycles | Specify stronger recovery or revise length |
Narrow cord tie | Localized neck pressure | Extended-wear comfort test | Use only with self-supporting bodice |
Thick facing | Bulk behind the neck | Feel seam profile on body | Reduce layers or soften construction |
Stretch lining | Bodice continues to drop | Compare shell and lining recovery | Match layer behavior |
Rigid lining | Outer fabric cannot move naturally | Test sitting, reaching, and breathing | Use compatible stretch and drape |
Strap Width and Neckline Construction
Narrow straps concentrate force over a smaller area. They can work on very light dresses with secure torso support, but they become uncomfortable when expected to lift a fuller bust or suspend a long skirt. As a practical starting point, straps below 10 millimeters suit decorative use with independent bodice support; 10 to 25 millimeters works for moderate adjustable ties; 25 to 50 millimeters spreads pressure more broadly; and wider scarf-style bands can carry load more comfortably when properly shaped.
Width is not the only variable. A wide strap made from stiff fabric may feel harsher than a narrower strap with a soft skin-facing layer. Seam placement, folded bulk, edge finishes, and closure hardware matter as well. Thick knots can press into the neck against a chair, and sliders or hooks can irritate the skin if positioned poorly. Curved neckline edges must also be protected from growth during sewing, because a stretched edge encourages fitters to shorten the strap instead of correcting the construction.
Lining, Cups, and Internal Structure
Lining can stabilize the bodice, improve opacity, and create a smoother interior, but it can also add weight or restrict movement when its properties conflict with the shell. A rigid woven lining inside a stretch shell may pull against the outer layer, while an overly soft lining may allow the bodice to grow. The shell and lining should be tested together because the wearer experiences the combined behavior, not the specification of either fabric alone.
Cups shape the bust, underbust elastic limits downward movement, boning prevents collapse, a stable back band provides horizontal resistance, and a waist stay transfers skirt weight to the waist. These components work best as a coordinated system. More structure is not automatically better: strong elastic can create bulging, thick cups can distort a low neckline, and excessive boning can make a soft resort dress feel rigid. The correct support level depends on the target body range, fabric, neckline depth, intended wearing time, and visual character of the dress.
How Can Neck Pulling Be Fixed?
Neck pulling should be fixed by identifying where support is being lost. A slightly short strap may need lengthening, but persistent pulling often requires stronger underbust, back, or waist support. Tightening the strap is rarely the best long-term answer because it can hide the original problem while increasing discomfort.

Start With a Fit Test
Before changing the dress, loosen the strap slightly and observe what moves. This simple test separates a true strap-length issue from a structural problem. If the neckline remains stable and the pressure disappears, the strap may be short. If the bust drops, the underbust or cup support is weak. If the armhole opens, the front pattern contains excess or the bust shaping is misplaced. If the whole garment slides, the waist or back is not carrying its share.
A useful test continues by manually supporting different areas. Hold the dress at the underbust, then at the waist, then draw the back gently inward. The support point that immediately improves comfort often reveals the missing structure. Repeat the test after walking, sitting, raising the arms, and wearing the dress for 20 to 30 minutes. The objective is to discover the load path, not to make the neckline look flat for one photograph.
Adjustments and Undergarments
A strap adjustment can solve the problem when the bodice already fits and the strap is objectively short. Adjustable ties, sliders, several button positions, or multiple hook settings accommodate differences in torso length and personal comfort. The strap should not be lengthened so far that the bust drops or the neckline opens. When that happens, the missing support is elsewhere and needs to be addressed directly.
The right undergarment can reduce the load carried by the dress. A well-fitted strapless or longline bra transfers bust weight through the rib cage, while a halter bra can work with a higher back. Adhesive cups and body tape may improve shaping or control smaller areas of movement, but they do not offer equal support for every body and cannot carry the weight of a heavy skirt. A bra-friendly neckline and side panel often provide a more practical solution than expecting customers to rely on strong skin adhesives.
Alterations That Reduce Pressure
The correct alteration depends on the symptom. Lengthening the strap suits a stable bodice with direct neck pressure. Reducing the back restores horizontal support when the front slides downward. Underbust elastic can anchor the bust, cups or shelf lining can improve placement, boning can stop the bodice collapsing, and an internal waist stay can carry the skirt independently of the neckline. Widening or softly padding the strap spreads pressure when the design permits.
Many successful repairs combine two modest changes rather than one dramatic alteration. A slightly longer strap plus a firmer underbust may preserve the original neckline better than greatly lowering the front. Every structural change should be retested because reducing the back affects the armhole, cups change the bust position, and boning alters the waist. The garment must be evaluated again as a complete system through movement and extended wear, not only checked flat on a worktable.
Repair, Exchange, or Return
An exchange makes sense when the bust, waist, and back are uniformly too tight or too loose, the whole bodice is visibly short, or the neckline remains tight at the maximum strap length. Alteration is more suitable when the dress fits in most areas but has one proportional issue, such as a short strap, loose back, gaping armhole, or insufficient front length over the bust. The value of the garment and the complexity of the reconstruction should also guide the decision.
A return is often more practical when the dress depends entirely on the neck to remain in position, the bust cannot be supported within the design, the fabric continues growing during a short fitting, or the required work would substantially change the style. The wearer should stop using the garment if it causes numbness, tingling, significant pain, or restricted movement. For retailers, repeated comments such as ‘too heavy,’ ‘keeps sliding,’ and ‘must tie too tightly’ should be grouped as related fit evidence rather than treated as unrelated complaints.
How Do Manufacturers Prevent Neck Pulling?
Manufacturers prevent neck pulling by developing the dress as a complete support system. The pattern, fabric, cups, lining, underbust, back, waist, and strap must be tested together. Accurate measurements, movement-based fittings, fabric recovery checks, size-set reviews, and first-piece control are more reliable than correcting the strap after production begins.

Pattern and Measurement Control
A reliable halter pattern is not created by simply removing the shoulders from a standard bodice and extending the neckline into a tie. The neckline, armhole, bust shaping, back, and waist must be rebalanced for a different support direction. Important measurements include neck point to bust point, neck point to front waist, upper bust, full bust, underbust, bust-point spacing, front and back width, side-seam length, waist position, strap path, and finished strap length.
Finished garment measurements are as important as body measurements because they define where negative ease is intentional and where tightness is accidental. Bust shaping may be controlled through darts, princess seams, gathers, or structured cups, depending on the design. The back should be fitted while the front is observed because a small change in back width can significantly alter front stability. The aim is not maximum tightness; it is a balanced structure that holds position while allowing breathing, head movement, and normal activity.
Fabric-Specific Development
A pattern approved in one material should not automatically be released in another. Fabric substitutions can change weight, stretch, recovery, drape, thickness, seam behavior, and friction against the body. Woven satin may need shaped seams and bias control, stretch satin may require controlled negative ease and stabilized edges, jersey may need stronger internal support, and sequin fabric may need reinforcement and reduced seam bulk.
The development team should check fabric weight, stretch in both directions, recovery after repeated extension, hanging growth, dimensional change after pressing or care, seam extension, elastic performance, and shell-to-lining compatibility. The pattern may need revised neckline length, armhole contour, bust suppression, side-seam position, or strap dimensions when the material changes. Different colorways can also behave differently after dyeing and finishing, so the production fabric should be reviewed rather than assuming every color will perform exactly like the approved sample.
Sample and Wear Testing
A halter dress should move through several controlled sample stages. The first prototype establishes neckline position, strap path, bust level, and obvious gape. The fit sample adds movement, sitting, head rotation, and underbust security. A revised sample confirms that corrections reduced neck load rather than merely changing appearance. Size-set review checks whether the relationship among strap, bust, back, and waist remains balanced across the planned range.
Fit comments should describe what happens and when it happens. ‘Neck uncomfortable’ is too general to guide a pattern correction. A stronger note might record that the front bodice drops about 10 millimeters after ten minutes, the armhole opens, and the neck tie becomes tighter. That observation directs attention toward recovery, back support, and bodice length. The fit model should walk, sit, turn the head, reach, lean forward, and wear the sample for at least 20 to 30 minutes before final comfort approval.
Development stage | Main neck-pull checks | Useful evidence |
First prototype | Neckline position, strap path, bust level, armhole gape | Front, side, and back photos with initial measurements |
Fit sample | Movement, head rotation, sitting, and underbust stability | Fit comments, pinned corrections, and pattern notes |
Revised sample | Confirmation that pressure and compensating tension are reduced | Before-and-after measurements and wearer feedback |
Size-set sample | Strap, bust, back, and waist relationships across sizes | Size-by-size fit matrix and grading comments |
Pre-production sample | Final shell, lining, cups, elastic, boning, and trims | Approved construction sheet and sealed sample |
First production piece | Actual sewing method and component placement | First-piece inspection and operator confirmation |
Inline production | Neckline growth, strap length, cup and elastic placement | Measurement records and defect trend review |
Final inspection | Balance, symmetry, finished measurements, and workmanship | Audit against approved sample and specification |
Bulk Production Control
A fit problem can return during bulk production even after the sample is approved. Material lots may vary, curved edges may stretch during handling, pressing can change dimensions, and cups, elastic, or straps can be placed inconsistently. Critical controls include verifying the approved pattern version, checking stretch and recovery by lot, controlling grain direction, measuring neckline pieces before assembly, using templates for cup and strap placement, confirming elastic tension, and comparing the first finished piece with the sealed sample.
Small deviations can combine into a visible comfort problem. A five-millimeter difference may look minor on a specification sheet, but if it occurs on both neckline sides and is accompanied by elastic or fabric variation, the final strap tension can change noticeably. Fit-sensitive measurements such as strap length, neckline length, cup position, underbust, and back width deserve agreed tolerances appropriate to the fabric and construction. Process control is more dependable than trying to sort every problem during final inspection after thousands of garments have already been completed.
A successful halter dress should attract attention because of its neckline, not because the wearer must keep adjusting it. For a fashion brand, neck pulling can become a return-rate issue, a campaign-sample problem, or a sign that the style will not earn repeat orders. The strongest prevention is early technical work: matching the fabric to the silhouette, balancing the front and back pattern, defining how the bust and skirt are supported, and verifying the result through movement and production controls.
Duolan Apparel develops halter, backless, corset, bodycon, occasion, and other fashion-driven dresses from technical packages, reference images, original samples, and collection concepts. The development process can include fabric and trim selection, pattern engineering, fit correction, sample revision, support-component planning, pre-production confirmation, and scalable manufacturing. Brands preparing a custom halter program can send the design direction, size specification, target fabric, expected volume, and launch schedule for a technical review and quotation.
Share:
Our Services
Categories
Table of Contents
Here, developing fashion collections is more than manufacturing garments — it’s a collaborative process focused on transforming ideas into well-executed, market-ready products. From fabric sourcing and sample development to scalable production and delivery coordination, every stage is built to support quality, consistency, and efficient collection launches across global markets.

