Skip to content

A Basque waist is one of those dress details that can look almost effortless in a campaign image and become surprisingly technical as soon as the style reaches a pattern table. The eye sees a fitted bodice flowing into a low V- or curved waistline. The development team sees diagonal seam sections, a highly visible center-front point, changing grain directions, skirt fullness, lining behavior, and a fit relationship that must remain balanced across several sizes. If any one of those elements moves, the waistline can look twisted, bulky, too low, or simply unlike the original design.
A Basque waist dress is constructed by extending a fitted bodice below the natural waist, shaping the lower edge into a controlled V or curve, drafting the skirt to match that seam, and stabilizing the angled sections before assembly. Clean results depend on accurate seam-line matching, fabric support, controlled V-point sewing, balanced skirt volume, fit testing, grading, and production checkpoints that can reproduce the approved sample consistently.
That distinction matters because a good sample is not the same thing as a good production method. A skilled sample machinist can sometimes coax an unstable satin point into place with extra basting, careful pressing, and small adjustments that never appear in the tech pack. The real test comes later: can the same shape survive a fabric reorder, a different size, another operator, or a repeat production run without losing its character? The following guide looks at the Basque waist from that practical development perspective, from pattern geometry through final inspection.
What Is a Basque Waist and How Is It Constructed?
A Basque waist is a shaped waistline in which the bodice extends below the natural waist and usually drops farther at the center front than at the side seam. It is constructed by coordinating the fitted bodice, the shaped waist seam, the skirt opening, and any support layers so the point stays centered, the side waist remains balanced, and the skirt falls cleanly from the body.
Basque Waist Geometry
The Basque effect starts with proportion rather than sewing. The center-front point changes where the eye reads the waist, where the skirt begins, and how long the torso appears. A shallow version can add definition without dramatically changing body proportion, while a deeper V can create a strong corset-inspired silhouette and move the visual skirt start toward the upper hip. That is why the point should be positioned against real body landmarks instead of being drawn as a decorative V after the rest of the dress is finished.
For development, it is safer to record the center-front drop numerically from a stable waist reference rather than describe the style only as “shallow,” “deep,” or “dramatic.” The ranges below are useful prototype references, not universal sizing standards. They help a product team communicate depth consistently from sketch to pattern to sample, especially when several people are reviewing the same style and need a common measurement rather than a visual impression.
| Basque depth | Approx. center-front drop | Typical visual effect | Main development concern |
| Shallow | 30-50 mm | Subtle shaping below the waist | Point may disappear in very soft fabrics |
| Medium | 50-80 mm | Clear elongated waist | Balance between torso length and skirt start |
| Deep | 80-120 mm | Strong corset-like silhouette | Upper-hip clearance and point stability |
| Dramatic | 120 mm+ | Statement or editorial effect | Mobility, proportion, and bias stretch |
Depth is only one part of the geometry. The V angle, side-waist height, princess-seam positions, and back waistline all influence the final look. A narrow V can feel sharper and more structured, while a wider V normally reads softer and often gives the sewing operator more room to manage the inward skirt corner. During fitting, the line should also be viewed from the side. A center point can look attractive from the front while the side waist sits too low, making the dress feel heavy and shortening the leg line.
Bodice and Skirt Relationship
The bodice and skirt should be engineered as one system because the lower bodice edge and the upper skirt edge are two sides of the same seam. The bodice usually creates the outward point, while the skirt contains the matching inward angle or shaped opening. Those seam lines have to agree after darts, princess seams, seam allowances, gathers, pleats, and intended ease are accounted for. A mismatch that seems insignificant on paper can become a puckered point or a skirt that must be stretched to fit during sewing.
Skirt type changes the difficulty. A smooth A-line skirt gives the waistline a clean transition because there is little added bulk. A gathered skirt creates a softer, fuller look but introduces extra fabric around a technically sensitive point. Circle and bias-influenced skirts can move beautifully, yet their upper edges are more likely to lengthen while being handled. A fitted skirt sends more body tension directly into the waist seam, so the V can be pulled downward if the upper-hip area is too tight. The intended skirt should therefore be selected before the Basque seam is finalized.
Gather distribution deserves its own specification. If the design needs a clear center point, it is often useful to keep a short zone near the apex relatively controlled and allow more fullness to build toward the front-side sections. The exact distance depends on fabric and styling, but a 20-40 mm low-bulk zone on each side of the point is a practical sample-room starting point for many gathered woven dresses. Lightweight chiffon may tolerate more center fullness, while velvet, compact cotton, and heavy satin usually need more restraint to avoid a bulky ridge.
Basque Waist vs Drop Waist
A Basque waist and a conventional drop waist can both sit below the natural waist, but they are not the same construction. A drop waist generally lowers the waist seam more consistently around the body. A Basque waist creates a shaped descent, usually with a more pronounced center-front low point and a higher side waist. That difference changes the visual proportion, the grain direction of the seam, and the way the garment responds to movement.
A mostly horizontal drop-waist seam is comparatively straightforward to match because less of the seam approaches the bias. The Basque line creates more diagonal sections, especially near the front point. Those sections can grow during cutting, fusing, gathering, pressing, bundling, or transportation between operations. The deeper the point, the more carefully the team needs to monitor side-waist level and upper-hip clearance, because a style can look correct at the side seam while pulling uncomfortably at the center front.
On the fit model, check more than whether the V is visually sharp. The point should stay on the body rather than floating away, the left and right side waists should sit at comparable heights, and the skirt should fall vertically instead of climbing toward the apex. If the point shifts to one side or the skirt forms horizontal drag lines, the source may be body balance, asymmetrical tension, or insufficient hip room rather than the sewing of the V itself.
How Do You Draft a Basque Waist Pattern?
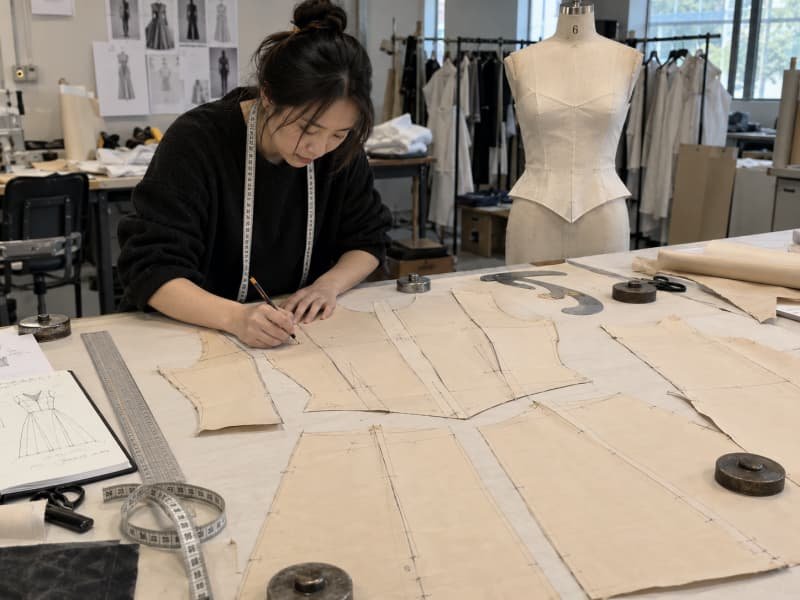
A reliable Basque waist pattern starts from a fitted bodice block that already has the correct bust, torso, and side-waist balance. The lower bodice is then extended and shaped into the Basque line, the V is trued on the stitching line, and the skirt is drafted to match that confirmed seam. Every panel intersection, notch, and graded seam length should be checked before seam allowances are finalized.
Start With a Stable Block
The safest way to develop a Basque waist is to solve the ordinary bodice first. If the bust is too small, the front waist length is wrong, or a princess seam is sitting in the wrong place, drawing a deep point below it only makes the fitting problem more difficult to diagnose. Start with the block that matches the intended fabric category and fit level. A close-fitting woven occasion dress should not automatically use the same base as a stretch jersey dress because the ease and support strategy are fundamentally different.
Before extending the waistline, confirm the bust apex, underbust level where relevant, front and back waist lengths, side-waist height, side-seam position, and upper-hip measurement if the Basque line is deep. On a princess-seamed bodice, distribute the lower shaping through the actual front panels rather than forcing the entire curve into one center-front piece. This gives the lower bodice a more natural contour and makes it easier to correct local fit without distorting the whole waist seam.
A first prototype can use the numerical depth already defined in the design brief, for example 60 mm below the side-waist reference for a medium Basque. That number is only a starting point. The sample still needs to be judged on the intended fit body because identical center-front drops can look very different on short, long, straight, or curvier torsos. Pattern development becomes much more efficient when the team treats depth as a body-proportion decision rather than a decorative measurement copied from an inspiration image.
True the V-Point
The V should be trued on the stitching line, not on the cut edge. A CAD outline can look perfectly symmetrical while the actual seam becomes awkward after seam allowances are added, especially when princess seams or panel joins intersect close to the lower bodice. Mark the exact apex, walk each side of the seam, and confirm that the corresponding skirt seam reaches every notch without stretching. This is where a few millimeters of error can turn into a visible bump after several pieces are assembled.
Notches should identify the center front, princess or panel intersections, side-front balance points, and side seams. For gathered skirts, extra notches can divide the seam into gathering zones so fullness is placed intentionally rather than distributed differently by every operator. Around sharply shaped joins, many woven dress programs start with seam allowances in the 10-12 mm range, but that figure is a construction choice rather than a universal rule. Fabric thickness, overlocking, lining method, binding, and factory equipment all affect the final allowance.
The same caution applies to point shape. An extremely sharp V can look striking but becomes less forgiving when the fabric is thick, loosely woven, heavily embellished, or combined with several internal layers. A slightly softened apex may deliver a cleaner production result without changing the visual impression from normal viewing distance. The pattern room should therefore judge the point in relation to the whole construction package rather than assuming the sharpest possible geometry is automatically the most premium.
Manage Grain and Seam Growth
A Basque waist automatically creates diagonal seam sections even when every main panel is placed on the correct grain. Those diagonal areas behave differently from a normal horizontal waist seam because they can stretch under their own weight and under the mechanical handling of sewing. Soft satin, viscose, lightweight crepe, chiffon, loosely woven fabrics, and some stretch wovens are especially sensitive. The growth may not be obvious immediately after cutting; it can appear after the pieces have been fused, moved, stacked, or left hanging over a trolley.
For unstable materials, the team can consider staystitching soon after cutting, lightweight fusible reinforcement, woven stay tape, organza support, or more controlled bundling. The solution should be selective. A corset-inspired woven dress can tolerate a stronger internal structure, while a fluid satin dress may need reinforcement only along the critical waist seam so the handfeel remains soft. If a replacement fabric is introduced later, the seam should be rechecked because the same pattern can behave very differently when drape, stretch, or recovery changes.
One practical way to catch growth is to compare the actual cut or prepared seam against the approved pattern seam before skirt attachment. If the lower front has lengthened by several millimeters on both sides, the operator will have to ease or manipulate the seam to make it fit, and the point may no longer sit where the pattern intended. Detecting that change before assembly is much cheaper than treating puckering as a finishing defect after the skirt is already attached.
Draft the Skirt From the Seam Line
The skirt should be drafted from the confirmed bodice stitching line rather than from a visual approximation of the V. For a smooth skirt, walk the top seam against the bodice and confirm that the lengths match after any deliberate ease is included. For a gathered skirt, calculate fullness instead of adding an undefined amount of extra width. A 1.5:1 ratio, 2:1 ratio, and 2.5:1 ratio can all finish to the same waist measurement but produce very different visual density and seam bulk.
For example, if the finished front waist seam measures 400 mm, a 1.5:1 gathering ratio requires about 600 mm of skirt edge before gathering, a 2:1 ratio requires about 800 mm, and a 2.5:1 ratio requires about 1,000 mm. Those are simple geometric relationships rather than recommendations for every fabric. A lightweight chiffon can carry more fullness with relatively little bulk, while a heavy satin or velvet can look crowded at a much lower ratio.
After the upper skirt seam is confirmed, review grain direction and hem balance. A skirt can match the Basque seam perfectly and still hang badly if one section contains much more bias than another. This is particularly relevant to circle, handkerchief, or asymmetrical skirts. Where bias is significant, allow the sample to relax before final hem approval so the development team is judging the settled silhouette rather than the shape immediately after sewing.
Which Fabrics and Support Layers Work Best?
The best fabric is the one that delivers the intended drape while allowing the shaped waist seam to remain stable. Structured crepes, compact wovens, and firmer satins usually hold a Basque point more easily, while fluid satin, chiffon, mesh, and soft jersey require more careful stabilization. Lining, interfacing, underlining, boning, and skirt weight should be selected as one construction system rather than as separate decisions.

Match Fabric to the Silhouette
Fabric selection should begin with the visual result the dress needs to achieve. A crisp Basque mini and a liquid satin occasion midi can use similar waist geometry yet require very different internal support. The key questions are whether the material can hold a clean point, whether it grows on the bias, whether the waist seam will show pressing marks, and whether the skirt weight will drag the lower bodice out of shape after several hours of wear.
The relative comparison below is a practical development guide rather than a textile standard. It is useful during early sourcing because it makes clear that “soft” and “structured” are not merely handfeel descriptions; they influence pattern stability, seam handling, pressing behavior, and the amount of internal support a style is likely to need. It also gives design, sourcing, and technical teams a shared way to discuss why one fabric may demand more development work than another.
| Fabric direction | Relative structure | Relative drape | Typical support need | Basque-point behavior |
| Crisp poplin | High | Low | Low | Usually stable and easy to define |
| Medium crepe | Medium-high | Medium | Low-medium | Generally controlled with light support |
| Duchess satin | High | Medium | Medium | Holds shape but can become bulky |
| Fluid satin | Low | High | Medium-high | Prone to ripple and handling stretch |
| Chiffon/georgette | Very low | Very high | High | Needs support from lining or understructure |
| Stretch woven | Medium | Medium | Medium | Depends heavily on stretch and recovery |
| Soft jersey | Low | High | Pattern-dependent | Point can collapse without engineered tension |
Cost should be considered at garment level, not only by the meter. A lower-priced fabric that needs additional fusing, slower handling, repeated pressing, extra basting, or more rejection may be less economical than a more stable fabric that runs smoothly. The most useful sourcing conversation therefore connects appearance, performance, labor, and risk instead of treating fabric selection as a separate purchasing decision.
Use Support Selectively
More support is not automatically better. The purpose of interfacing and internal structure is to control the garment without changing the intended character. A crisp Basque mini may benefit from broader support through the lower bodice, while a fluid satin midi may need reinforcement only at the waist seam, zipper, or selected panel edges. Fully fusing a soft style can solve one ripple and create a new problem by making the bodice look flat, board-like, or visibly different from the skirt.
Common options include lightweight fusible interfacing, woven fusible, organza underlining, narrow stay tape, power mesh for some stretch constructions, structured cups, and boning in corset-inspired versions. Where boning is used, it should support the torso rather than end in a bulky seam. Many dress constructions keep a bone end roughly 10-15 mm clear of a heavy seam intersection or enclosed edge, although the correct distance depends on channel design, seam allowance, finishing, and the type of boning.
Symmetry matters inside the garment as much as outside. If reinforcement stops at different positions on the left and right sides of a satin front, the fabric can press and reflect light differently across the V. Internal support should therefore be part of the pattern and workmanship specification, not an improvised sample-room fix that disappears when the style moves to production.
Treat Lining as Part of Fit
Lining does more than hide seam allowances. It can distribute stress, support opacity, protect internal construction, and influence how the outer fabric sits on the body. If the lining is too short vertically, it can pull the shell upward and make the Basque point look shallower or buckled. If it is too loose, it can bag at the waist or creep below the seam. In stretch styles, a lining with very different stretch or recovery from the shell can change the entire fit after a short period of wear.
The lining should therefore be evaluated during the fit sample rather than added only after the shell pattern has been approved. This is especially important for strapless, low-back, deep-neck, corset-inspired, and highly fitted dresses where internal structure carries a large part of the support. Pale or semi-sheer fabrics also need an opacity check because multiple seam allowances around the Basque line can create visible shadows through the front of the garment.
For mesh and chiffon styles, the construction may be intentionally visible. In that case, boning channels, cup edges, seam allowances, and reinforcement become part of the visual design language. A clean result comes from deciding what should be seen and engineering it consistently, not from assuming a transparent shell will hide the same internal methods used under an opaque fabric.
Test Before the Full Sample
A small construction test can answer several questions before a complete sample is cut. A useful trial piece is often 200-300 mm wide and includes the center-front point, actual shell fabric, lining, support layer, seam allowance, and the intended skirt fabric. Sew it with the proposed machine settings and pressing method, then inspect whether the V remains sharp, whether the seam ripples, whether fusible shows through, and whether the fabric changes after cooling or hanging.
The test should also include any fabric checks relevant to the project, such as shrinkage, stretch and recovery, seam slippage, transparency, colorfastness, heat sensitivity, and fusible compatibility. A material can look ideal on a hanger and still be a poor production choice if the shaped waist seam becomes unstable after pressing or if the skirt weight stretches the lower bodice. Testing early is especially valuable for satin, viscose, delicate crepe, chiffon, and any style with a deep center-front drop.
For brand teams developing structure-sensitive dresses, this is also a sensible point to involve the pattern and sourcing functions together. The most effective correction may be a material change, a support change, or a pattern change rather than a sewing adjustment. Treating those decisions as connected usually reduces sample rounds and makes it easier to preserve the original design when the style moves from prototype to a production-ready version.
How Do You Sew the V-Point and Attach the Skirt?
A clean Basque V-point is made by stabilizing the angled edges, marking the exact apex on the stitching line, matching the skirt and bodice through their notches, and controlling the inward skirt corner without stretching it. Near the point, stitch accurately to the marked apex, clip only as far as necessary, reduce bulk carefully, and press in stages before judging the finished shape.

Prepare the Seam Before Sewing
The most consistent V-points are usually prepared well before the final joining operation. After cutting, bias-sensitive waist edges should be handled as little as possible and staystitched early if they tend to grow. A line of staystitching placed approximately 1-2 mm inside the final seam line can help control the edge without showing after assembly. The exact position depends on seam allowance and finishing, but the aim is to stop the fabric moving before it reaches the operator who attaches the skirt.
Transfer the center-front apex, every balance notch, and the stitching reference accurately. For light-to-medium dress fabrics, a general stitch length around 2.0-2.5 mm is a common starting point. Near a sharp V, some sample rooms shorten to roughly 1.5-2.0 mm for the final 10-15 mm before the point to gain control. These are development ranges, not mandatory settings. Very delicate fabrics can be damaged by excessively short stitches, so the machine setup should always be tested on the actual fabric combination.
If the shell is slippery, hand basting or machine basting around the point may save time overall. Repeatedly unpicking satin can leave needle marks, disturb the weave, and create shine during re-pressing. A controlled preparation method is often faster than expecting the operator to correct an unstable point after the seam has already shifted. It also creates a clearer sewing sequence that can be tested in sampling and repeated later during production rather than depending on individual operator judgment.
Sew the Apex Accurately
Two common sewing methods can produce a clean V. One is to sew continuously down one side, stop exactly at the apex with the needle inserted, pivot, and continue up the opposite side. The other is to sew each side separately and finish both stitch lines at the same marked point. Neither is universally superior. The best method is the one that the fabric and production setup can repeat consistently without stretching or chewing the inward corner.
The skirt side of the seam normally contains the inward corner and may need to be clipped so it can open around the bodice point. Staystitch first, then clip toward the seam line without cutting through it. Leaving roughly 1-2 mm before the stitching line is a practical visual starting point in many woven fabrics, although heavy, loosely woven, or delicate materials may require a different approach. The clip should release only as much tension as necessary; a deeper cut is not automatically cleaner.
After stitching, inspect the seam before aggressively trimming or grading the allowances. Confirm that both sides reach the same apex and that one side has not been stretched longer than the other. Once the shape is correct, reduce bulk according to the fabric and internal layers. Press from the seam outward instead of dragging the iron along the bias. With satin, velvet, and heat-sensitive surfaces, pressing temperature and protection are part of the quality standard because a sharp V with shine or crushed pile is still a failed front panel.
Control Gather Distribution
When the skirt is gathered, total fullness and placement need to be specified separately. A 2:1 ratio can look refined or bulky depending on where the extra fabric is concentrated. If the approved design needs a visible center point, keep the closest area relatively controlled and move more of the fullness toward the front-side and side sections. If the design intentionally calls for gathers radiating from the apex, the point can carry more fullness, but the distribution should still be marked rather than left to operator preference.
Dividing the seam into gathering zones is a simple production tool. Notches can identify a center control zone, a fuller center-front section, a side-front transition, and the side-seam balance area. This makes the approved sample easier to reproduce because each operator is working toward the same density pattern. Very lightweight chiffon can usually accommodate more fabric near the V without excessive bulk, while heavy satin, velvet, compact cotton, and lined materials require tighter control because several layers become compressed at one visible point.
The skirt should be joined without using the bodice as the stretching component. If the operator pulls the shaped lower bodice to fit a gathered or bias-sensitive skirt, the V can lengthen and the side waist can move. Match the fixed landmarks first, distribute fullness between them, and allow the gathering process to absorb the extra skirt length rather than sacrificing the geometry of the bodice.
Check the Finished Skirt
The dress needs a vertical check after the skirt is attached. The center point should sit against the body, the side seams should remain close to vertical, and the skirt should fall downward rather than pulling toward the V. If the front skirt rises or forms horizontal drag lines, the problem may come from insufficient upper-hip room, a too-tight skirt, incorrect gather tension, a bodice that is riding upward, or seam growth that changed the original waist shape.
Bias and circular skirts should be allowed to settle before the hem is permanently confirmed. The appropriate rest period depends on fiber, weave, skirt length, and the amount of bias in the pattern, so a fixed number of hours should not be treated as a universal rule. The practical aim is to give the most extensible sections enough time to relax so the team can level the hem on the settled garment rather than on a skirt that is still changing.
Finally, judge the V and skirt together from normal viewing distance. A perfect close-up of the seam is not enough if the point sits too low on the body or the skirt volume makes the waist look heavier than the design intended. The finished silhouette should read as one continuous line from bodice through waist to hem. Review front, side, and three-quarter views because a Basque line that appears balanced straight on can still reveal uneven side-waist height or skirt pull from another angle.
How Do You Control Fit and Grading Across Sizes?
Basque waist fit should be controlled from the upper body downward. First stabilize the bust, underbust, torso length, side waist, and upper-hip relationship; then confirm center-front depth and skirt balance. During grading, the V should not simply become larger in every direction. Bust position, side-waist height, torso length, seam intersections, and skirt attachment must be reviewed together so the silhouette remains recognizable across sizes.
Fit From the Top Down
A visible problem at the point does not always begin at the point. If the bust is too tight, the bodice can ride upward and make the Basque line appear shallower. If the front torso is too long, the point may collapse or form a horizontal fold. If the side waist is loose, the lower bodice can fall toward the center. If the skirt is too tight through the upper hip, it can pull the entire Basque seam downward even when the bodice pattern itself is correct.
A practical fitting order is neckline and upper bodice, bust volume, underbust contour, front and back torso length, side-waist position, center-front depth, upper-hip clearance, and finally skirt fall. This order helps the technician correct the source of the problem rather than repeatedly changing the V. When several comments arrive from a fitting, separating them into body-balance issues and local waistline issues also makes the next sample easier to evaluate.
Fit should be reviewed in movement, not only in a standing front photograph. Ask the wearer to sit, walk, lift the arms, and rotate the torso. A deep point can look perfect while standing and then fold into the abdomen when seated. A close-fitting skirt can climb during walking and distort the waistline. Occasion and going-out dresses need to survive the movements people actually make during several hours of wear, so static appearance should be treated as only one part of fit approval.
Grade Key Landmarks
Basque grading needs both numerical control and visual judgment. Track the bust apex, underbust level, natural waist, side-waist intersection, center-front point, princess-seam intersections, upper-hip level, and skirt notches through the graded nest. The center-front drop should not be treated as an isolated measurement because its visual depth changes when bust height, torso length, and hip width change at the same time.
Some brands maintain a relatively stable visual V depth across the size range, while others allow the point to deepen slightly as body scale increases. Either approach can work if it follows the brand block and is validated on representative sizes. What usually fails is applying a mechanical increment without checking the resulting silhouette. The largest size should still look like the same dress as the base size, not a different interpretation with a much deeper or much flatter waistline.
After grading, walk the bodice-to-skirt seam in every size. Even a small mismatch matters because production operators will naturally ease, stretch, or trim one component to compensate, and those corrections can shift the apex. If the style contains gathered sections, the finished seam length and gathering ratio should also remain controlled through grading so fullness does not accidentally become denser or flatter in different sizes.
Respect Fabric Stretch and Recovery
A pattern approved in one material should not automatically be released in another. Stretch percentage is only part of the story; recovery and resistance to stretch are equally important. Two fabrics can both extend by 20% and produce very different fits if one snaps back immediately while the other remains relaxed after wear. A Basque waist is particularly sensitive because poor recovery can allow the lower bodice to grow, making the point look deeper and the side waist looser over time.
For stretch versions, evaluate width stretch, length stretch, recovery after extension, fabric weight, resistance to stretch, and shrinkage after the intended care process. Negative ease should be established through an actual fitting rather than copied from another style. A soft jersey may need more reduction than a firm stretch woven to achieve the same contour, but too much reduction can pull the V upward or create horizontal tension lines above the skirt seam.
If a brand changes from a stable crepe to a stretch satin, the safest approach is to treat it as a fit review rather than a simple color or fabric update. The original silhouette may still be achievable, but pattern measurements, internal support, and seam stabilization may all need adjustment to keep the waistline in the same visual position. A short validation fitting is usually more useful than assuming the approved block will behave identically simply because the nominal garment measurements have not changed.
Validate Representative Sizes
A single-size approval is rarely enough for a shape-sensitive Basque waist. The exact fit protocol depends on the brand’s range, but a useful approach is to check the base size plus representative sizes from the lower and upper parts of the range when the style has a broad size offer. This exposes changes in bust balance, torso length, hip clearance, and V depth before the entire graded set enters production.
Photograph each validation size from the front, side, and back using a consistent stance and camera height. Compare where the point sits relative to the natural waist and upper hip, not just whether the dress looks attractive. Side-waist level, skirt fall, and back balance should be reviewed at the same time because a front correction can unintentionally move another part of the garment.
A useful final question is simple: does every checked size still read as the same design? If the smaller size looks like a subtle Basque while the larger size looks like a dramatic drop waist, the grading may meet isolated measurements but fail the design intent. Preserving the silhouette is the reason to combine measurements, nested pattern review, and physical fit validation rather than relying on numbers alone.
What Production Defects Should Brands Check Before Bulk?
Before bulk production, inspect V-point symmetry, seam puckering, waist balance, skirt fall, gather distribution, lining behavior, and size-to-size proportion. The approved sample should be converted into measurable and photographic checkpoints before production starts. First-piece and inline checks are especially important because small sample-room corrections can become repeated defects when the same Basque seam is sewn across multiple operators, colors, and sizes.

Watch the High-Risk Defects
Basque waist defects are easy to notice because the eye is naturally drawn to the center front. Common problems include a rounded point, a point that sits off center, one side of the V appearing longer than the other, puckering along the angled seam, excessive bulk at the apex, uneven gathers, mismatched side-waist heights, a skirt pulling upward, lining dragging the shell, or a visible difference in point depth between sizes. Reflective fabrics can add pressing shine and make even small seam irregularities more obvious.
Each defect should be linked to a likely cause rather than treated as one generic “V problem.” Puckering can come from stitch tension, unstable bias sections, differential feeding, excessive seam compression, or incorrect pressing. An off-center point can originate in cutting, notch matching, asymmetrical fit, or sewing direction. A heavy ridge can come from gather placement or too many support layers. Finding the source matters because asking QC to re-press or restitch the same symptom does not make the production method more stable.
The best defect list is style-specific. A fluid satin dress needs stronger attention to seam growth and pressing, while a corset-inspired woven dress may need more focus on boning position, layer bulk, and contour. A gathered chiffon version may be visually forgiving at the seam but more sensitive to lining balance and hem settling. The inspection plan should follow the actual construction rather than using the same checklist for every Basque-waist design.
Set Measurable Checkpoints
Style-specific tolerances should come from the approved sample, technical specification, and brand quality standard. The values below are useful internal starting references for discussion rather than universal acceptance limits. They are most helpful when a team currently relies on phrases such as “keep the V even” or “make the point sharp,” because measurable references reduce subjective interpretation between sample room, production, and final inspection.
| Checkpoint | Practical starting reference | Inspection focus |
| Center-front point position | About +/-3 mm from approved reference | Symmetry and visual alignment |
| Left/right side-waist level | About +/-5 mm | Body balance |
| Point shape | Match approved sample | No unintended rounding or flattening |
| Gather distribution | Match approved zones and density | Symmetry and bulk control |
| Seam puckering | No obvious ripple at normal viewing distance | Fabric and sewing interaction |
| Skirt balance | Match approved front, side, and back fall | Overall silhouette |
| Lining behavior | No pulling, twisting, or show-through | Inside and outside appearance |
| Graded V depth | Follow approved size rule | Size-set consistency |
The appropriate tolerance can become tighter or more flexible depending on fabric, design intent, price level, and customer specification. A sharp V in structured satin may justify tighter visual control than a washed viscose dress with a softly gathered waist. What matters is that the production team has an approved target and knows which dimensions and visual characteristics are critical before large quantities have already been completed.
Use First-Piece and Pilot Checks
A first-piece check is valuable because sample-room workmanship can hide manufacturing weaknesses. An experienced sample machinist may hand-baste the point, manipulate the fabric during sewing, press between operations, and make small corrections automatically. A bulk operator works within a more standardized operation and may not have the same time or freedom. If the pattern can only look correct when one expert continually compensates for it, the method is not yet ready for stable production.
Before releasing the full line, inspect early pieces for seam matching, point repeatability, stitch quality, gathering, pressing, lining alignment, waist measurement, side-waist balance, and skirt hang. If a short pilot already produces several noticeably different V shapes, the answer is not to continue and hope the operators improve. Recheck the pattern, reinforcement, notch system, sewing direction, machine settings, or work instruction before the defect is multiplied across the order.
This approach is particularly important for fitted, corset-inspired, satin, mesh-layered, and other structure-sensitive fashion dresses. The cost of stopping and correcting a pilot is usually far lower than reworking a completed run where the waist seam is already enclosed by lining, zipper, or finishing operations. It also gives the technical team a chance to confirm that the approved sample method is realistic for normal production speed, rather than relying on extra manipulation that was possible only in the sample room.
Lock Sample-to-Bulk Consistency
Sample approval should lock the construction system, not just the external appearance. Before production starts, confirm the final pattern version, shell fabric, lining, interfacing or underlining, boning and cups where used, seam allowance, gathering ratio, gather zones, V-point method, stitch direction, pressing method, measurements, notches, and the approved visual reference. A later substitution in any of these areas can change how the point sits even when the overall style number remains the same.
Repeat orders need the same discipline. A successful first production run does not guarantee the second one will look identical if the factory treats the style as a fresh start. Keep approved pattern files, material references, workmanship notes, measurement standards, and point photographs available so the repeat order can be compared with a known benchmark. This is particularly useful when production moves to another line or when a fabric lot has a different handfeel from the original order.
For teams developing Basque-waist occasion, party, fitted, or fashion dresses, the most efficient development process connects pattern, fabric, sampling, and production readiness before bulk begins. If a tech pack, reference garment, or design image contains an aggressive point, unusual skirt volume, or an unstable fabric direction, a dress-focused development team can review those risks early and propose a construction route before they become repeated sample comments or bulk-quality problems.
Conclusion
A Basque waist succeeds when the design, pattern, material, fit, sewing method, and production controls all describe the same silhouette. The visible V may be the feature that attracts attention, but the quality of the dress is determined by less obvious decisions: where the side waist sits, how much the seam approaches the bias, how the skirt volume is distributed, whether the lining supports rather than pulls, and whether the point can be repeated across several sizes without operator improvisation.
For a development team, the most useful question is not simply, “Can this V be sewn?” It is, “Can this waistline stay balanced from first sample through grading, first-piece approval, bulk production, and repeat orders?” When that question is answered early, the style is easier to fit, easier to cost, and easier to scale. For brands working on a Basque-waist dress from a tech pack, reference garment, or visual concept, Duolan can review the pattern, fabric direction, construction risks, and sample-to-production path as part of the development discussion.
Frequently Asked Questions
What is the difference between a Basque waist and a V waist dress?
A V waist dress describes the visible shape of the waistline, while Basque waist usually refers to a more specific construction in which the fitted bodice extends below the natural waist and drops farther at the center front. In everyday fashion naming, the two terms can overlap. From a pattern perspective, the important point is not the label but whether the lower bodice, side-waist height, center-front depth, and skirt seam are engineered as one shaped construction rather than a simple decorative V.
How deep should a Basque waist be?
There is no universal depth because the correct point depends on torso length, skirt type, fabric, size range, and the intended visual effect. As a prototype reference, a shallow drop may be around 30-50 mm below the side-waist level, a medium drop around 50-80 mm, and a deeper fashion version around 80-120 mm. These figures should be treated as starting points only. The final depth should be approved on the intended fit body and checked again during grading.
Why does a Basque waist point pucker?
Puckering usually comes from a combination of fabric instability and sewing control rather than one single error. Common causes include stretched bias sections, mismatched seam lengths, incorrect clipping at the inward skirt corner, excessive stitch tension, uneven feeding, bulky gathers, or pressing that distorts the shaped edge. The most effective correction is to identify whether the fabric grew before sewing or whether the distortion was created during assembly. Stabilization, better notch control, machine adjustment, and selective reduction of bulk can then address the real cause.
Can a Basque waist be used with a gathered skirt?
Yes. Gathered skirts are commonly paired with Basque-waist bodices, but the gather ratio and distribution should be specified rather than left to the sewing operator. A ratio of 1.5:1 creates much less fullness than 2:1 or 2.5:1, and heavy fabrics become bulky faster than chiffon or other lightweight materials. If the design needs a clear center point, keeping a small area near the apex relatively controlled can help the V remain visible while allowing fullness to build farther toward the side front.
Does a Basque waist need boning?
Not every Basque waist requires boning. A stable woven fabric with moderate shaping may hold the waistline through pattern fit, lining, and light interfacing alone. Boning becomes more useful when the dress has a corset-inspired bodice, strapless or low-back construction, strong bust support requirements, or a very close torso fit. Even then, more boning is not automatically better. The support should be positioned where it controls the body and silhouette without creating rigid ends or excess bulk at the shaped waist seam.
How should a Basque waist be graded across sizes?
The V should be graded together with the bust, torso, side waist, upper hip, princess seams, and skirt attachment rather than enlarged as an isolated shape. Track the center-front point, side-waist level, bust apex, upper-hip relationship, and seam notches through the graded nest, then check representative sizes physically. The goal is for each size to retain the same design character. A grading rule that satisfies measurements but makes the V dramatically deeper or flatter in different sizes should be reconsidered.
What should be checked before a Basque waist dress enters bulk production?
Before bulk production, confirm the final pattern, fabric, lining, support layers, seam allowances, V-point method, gathering ratio, notch positions, measurements, pressing method, and approved visual reference. Then inspect first pieces for center-point symmetry, seam puckering, side-waist balance, gather placement, lining behavior, and skirt fall. If early units show different point shapes, correct the method before the line continues. A repeatable first-piece result is a much stronger sign of production readiness than one highly polished sample made under exceptional sample-room conditions.