Skip to content


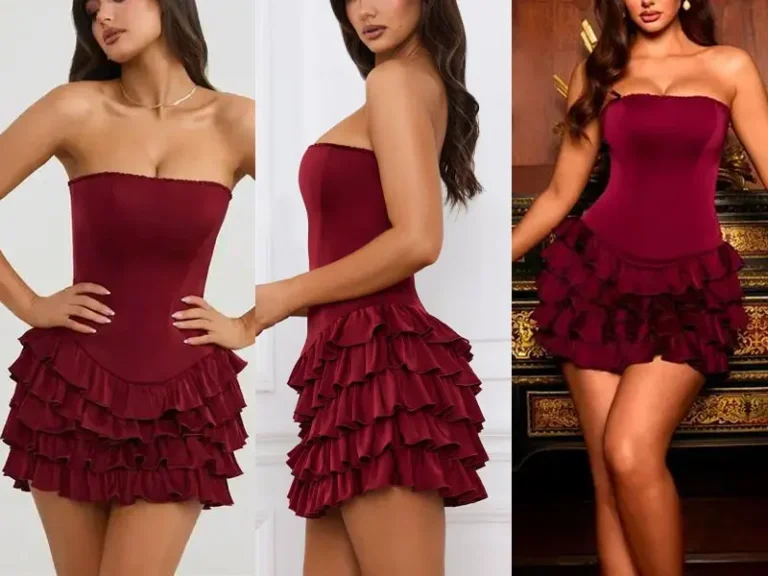
A corset mini dress can look surprisingly simple in a campaign photograph: a sculpted bust, a defined waist, a short skirt, and perhaps a concealed zipper or lace-up back. Once the garment moves from an image into development, however, that clean appearance depends on many decisions working together. Bust volume, panel shaping, boning, cups, lining, fabric stretch, waist tension, skirt movement, and closure construction can all affect whether the finished dress looks polished or feels awkward on the body.
A well-developed corset mini dress begins with a clear silhouette and support target, then moves through fabric selection, internal construction, pattern development, fitting, sampling, grading, and production validation. The aim is not simply to make the bodice tight. It is to control bust and waist shaping while maintaining neckline stability, comfort, movement, proportion, and construction that can be repeated consistently across sizes and production quantities.
This is where many promising designs separate into two very different outcomes. One becomes a dress that photographs well, fits naturally, and can return season after season in new colors or fabrics. The other looks convincing on the first mannequin but begins to gape, twist, ripple, ride up, or change shape once real people wear it. The difference is rarely one dramatic mistake. More often, it comes from small technical decisions made—or missed—throughout development.
What Defines a Well-Developed Corset Mini Dress?
A well-developed corset mini dress holds its intended silhouette on the body, supports the bust without obvious strain, defines the waist without excessive compression, remains stable during normal movement, and can be repeated consistently in different sizes. Before patternmaking begins, the team should confirm the neckline, support level, waist position, skirt shape, fabric behavior, closure, target fit, and purpose of the first sample.
What Should Be Confirmed Before Patternmaking?
Pattern development should not begin with a reference image alone. A photograph communicates visual intent, but it rarely explains how the dress produces that shape. Before a patternmaker starts drafting, the design needs to be translated into practical decisions: whether the bodice is intended to compress the waist, gently contour the body, or simply create a corset-inspired appearance; whether the bust is supported through seamed panels, molded cups, underwire, boning, or a combination of these elements; and how much coverage the wearer should have when standing and moving.
The development brief should also define the relationship between the bodice and skirt. A fitted mini skirt behaves very differently from an A-line or gathered skirt because it continues the tension of the bodice through the hip and thigh. The closure matters for the same reason. An invisible zipper gives a cleaner appearance, while a lace-up back provides more adjustment but adds additional components and construction. Before cutting the first sample, it is useful to confirm at least the target size, neckline, bust shape, waistline, bodice length, skirt silhouette, finished length, main fabric, lining concept, internal support, closure, and sample purpose.
A visual prototype and a fit-approval sample are not identical development stages. A visual sample may prioritize silhouette and styling, while a fit sample has to provide more reliable information about balance, measurements, comfort, and movement. Duolan’s documented sampling process follows this principle by clarifying silhouette, drape, support, coverage, fit, fabric handfeel, development basis, and sample purpose before moving further into development.
Which Corset Silhouette Fits the Design?
Corset silhouettes should be considered as complete proportions rather than collections of attractive details. A straight waistline, for example, is relatively easy to balance through fitting and grading. A basque or V-shaped waist visually lengthens the torso and creates a stronger hourglass impression, but the point position, center-front length, panel seams, and skirt attachment all require tighter control. A drop waist creates a contemporary fashion look, although relatively small variations in torso length become more obvious because the seam approaches the high hip.
The skirt silhouette changes the engineering just as much as the bodice. A fitted mini skirt continues the tension generated by the corset and may pull upward if the hip or thigh is too restrictive. A softly flared or A-line skirt releases more tension and normally gives the wearer greater movement. Strapless designs depend heavily on internal support, while shoulder straps can share part of the vertical load. A lace-up back offers adjustment but changes back-panel proportions, modesty requirements, trim selection, and labor compared with an invisible zipper.
The best silhouette is therefore not automatically the most dramatic version. It is the design that creates the intended fashion image while remaining proportionate on the target body, comfortable enough for the intended occasion, suitable for the selected fabric, practical to grade, and stable enough for repeat production. A strong development team asks whether each visible feature still works once it becomes part of a complete garment rather than judging individual details in isolation.
How Does Design Intent Affect Construction?
Two dresses can look nearly identical in an online image while requiring very different internal construction. One may use stretch satin, lightweight boning, foam cups, and an invisible zipper to create a soft fashion-corset effect. Another may require a stable woven shell, several vertical panels, firmer reinforcement, structured lining, stronger boning, and a lace-up closure to create a more sculpted silhouette. The visible style can be similar, but the mechanical demands are not.
This is why the useful question is not simply whether a corset dress needs boning, cups, or interfacing. The better question is what each component is expected to control. Boning may stabilize the neckline and stop panels collapsing, or it may be part of a more substantial waist-support system. Cups may provide shape and coverage, but they cannot correct an underbust seam positioned incorrectly. A firm lining may improve stability, yet it cannot compensate for inadequate front length over the bust.
Every internal component should contribute to fit, support, comfort, appearance, or repeatable manufacturing. Adding layers merely because they are associated with corsetry can make the dress thick, expensive, and difficult to sew without improving performance. Experienced development is often about removing unnecessary complexity while retaining the visual result. When the pattern, material, and support system are already doing their jobs, the finished garment usually feels cleaner because fewer parts are fighting each other.
Which Fabrics and Support Materials Work Best?
Corset mini dresses perform best when the outer fabric, lining, reinforcement, boning, cups, and closure are selected as one system. The shell provides the visible surface, while internal materials manage support, stretch, opacity, seam stability, and body tension. Changing to a fabric that looks similar but behaves differently can affect neckline stability, waist fit, zipper appearance, and overall silhouette enough to require pattern adjustments.
Which Fabrics Hold a Corset Shape?
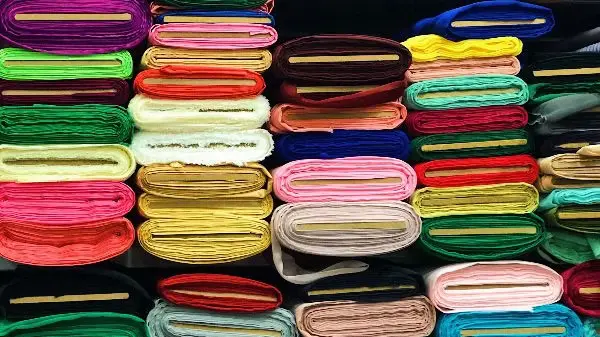
Stable woven fabrics are often the easiest starting point for sharply structured bodices because they change less under body tension. Medium-weight satin, duchess-style satin, jacquard, brocade, twill, structured crepe, and similar fabrics can support curved seams and vertical panel lines without relying entirely on internal reinforcement. Softer materials can still produce excellent results, but the supporting structure usually needs to come from lining, interfacing, seam construction, or other hidden components rather than from the shell itself.
Stretch fabrics need a different approach. Stretch satin or compact stretch woven fabrics can create a smooth body-conscious look, but stretch percentage alone does not tell the full story. Recovery matters equally. A fabric that stretches comfortably and then remains slightly longer after release can gradually loosen around the waist or neckline. Before pattern development is finalized, a simple test can provide useful information: mark a relaxed 10 cm section across the direction being evaluated, stretch it comfortably, record the stretched length, then release it and check how closely it returns to the original measurement.
| 10 cm Test Length | Stretched Length | Approx. Stretch | Development Implication |
| 10 cm | 10.5 cm | 5% | Essentially stable; rely mainly on pattern shaping |
| 10 cm | 11 cm | 10% | Low stretch; useful for controlled comfort |
| 10 cm | 12 cm | 20% | Moderate stretch; ease and lining need closer review |
| 10 cm | 13 cm | 30% | High stretch; recovery and support become critical |
These values describe fabric behavior rather than a rule for reducing a pattern. A material with 20% stretch should not automatically produce a pattern with 20% negative ease. The lining, seam type, garment length, wearer comfort, desired compression, and recovery all need to be considered. A lightweight satin may also reveal cup edges, seam allowances, boning channels, or fusible areas once stretched across the body, so appearance testing should be done on an assembled sample rather than on a flat swatch alone.
How Should Lining and Interfacing Be Chosen?
The lining of a corset mini dress is part of the engineering. It affects skin comfort, opacity, bust support, neckline stability, boning channels, zipper behavior, and the way the outer shell responds to movement. For this reason, a corset bodice should not be fully developed in one shell fabric and then receive an arbitrary lining at the end. The shell and lining need to be tested together because their stretch, stiffness, thickness, and recovery can either complement or fight each other.
A highly stable lining under a stretch shell may prevent the outer fabric from following the body as intended. A very stretchy lining beneath a rigid shell may allow the internal layer to shift, reducing support. Excessive layering can cause another problem: shell fabric, fusible interfacing, foam cups, seam allowances, boning channels, and lining may each seem reasonable individually, but their combined thickness can become obvious around curved bust seams or neckline edges.
Interfacing should therefore be applied according to function. Some designs benefit from full-bodice stabilization, while others need reinforcement only at the neckline, zipper, center front, waist seam, or cup sections. During development, it is useful to compare the shell alone, shell with the proposed reinforcement, and the complete shell-lining package. Press these combinations as they will be pressed in production and inspect them for bubbling, shine, seam impressions, excessive hardness, color change, or poor turning at edges.
Duolan’s internal development criteria similarly treat drape, support, stretch, recovery, opacity, weight, lining, zipper, boning, and cup choice as interconnected rather than separate purchasing decisions.
Do Corset Mini Dresses Need Boning or Cups?
Boning, cups, and underwire solve different problems. Boning helps prevent vertical collapse and controls the shape of long bodice panels. Cups add bust volume, shape, and coverage. Underwire, when suitable for the design, defines and supports the lower bust boundary. Depending on the style, a corset mini dress may use all three, only one or two, or very little internal hardware if the design is mainly corset-inspired rather than genuinely structural.
Many panelled fashion corsets use several vertical support channels distributed around the front, side, and sometimes back bodice. A practical sampling range of roughly six to twelve support channels is common in many fashion constructions, although the final number should follow the pattern, garment length, neckline, fabric, and desired support. Adding more bones does not automatically create a better corset. Poorly placed support can make the garment uncomfortable or create visible ridges without improving the fit.
The channel should hold the bone securely without squeezing it so tightly that the fabric puckers. During sampling, a channel may be constructed approximately 1–2 mm wider internally than the bone, then adjusted according to material thickness and sewing method. Boning often finishes around 10–15 mm short of a fully enclosed seam edge so that hard ends do not interfere with stitching or create obvious pressure points, although the final distance must be tested on the actual garment.
Cup position requires similar precision. A cup placed only 10 mm too high can change the neckline, create fullness below the cup, or make the wearer feel that the bust is being pushed into the wrong position. Cup choice should therefore follow bust point, underbust level, neckline depth, and front-body shape rather than simply matching a generic component size.
How Do You Build the Corset Pattern?
A corset pattern is developed by balancing bust projection, waist suppression, neckline contour, torso length, panel distribution, closure tension, and the connection to the mini skirt. Shaping should be distributed across several controlled seams rather than concentrated in one area. Cup position, boning channels, fabric behavior, grain direction, seam allowances, and skirt tension should all be considered before the first pattern is treated as complete.

How Is Bust Volume Shaped?
Full-bust circumference is only one part of corset fit. Two wearers can have the same bust measurement while needing different bust-point heights, front lengths, cup depths, underbust positions, and spacing between the breasts. This is why a fitted corset bodice cannot be developed successfully by adjusting circumference alone. The pattern must create three-dimensional projection at the correct place and then return cleanly into the waist, neckline, and side seam.
Princess seams and multi-panel constructions are especially useful because they divide the bodice into controllable areas. More volume can be added around the bust without adding the same amount at the waist. The upper edge can be tightened while preserving projection below. Side-bust fullness can be adjusted independently from the center-front contour. This level of control is one reason panelled corset construction remains effective for body-conscious fashion dresses.
During fitting, check bust-point height, bust-point spacing, underbust level, center-front length, side seam, and the neckline-to-bust relationship. Small corrections can have a noticeable effect. Adding approximately 10 mm of front length over the fullest part of the bust may correct a waistline that rises at the front without increasing the waist circumference. Removing 5–8 mm of localized excess above the bust may clean up an upper neckline once the basic projection is already correct.
Fabric tension gives useful clues. Horizontal lines across the fullest bust area commonly indicate insufficient width or projection. Diagonal lines traveling from the bust toward the side seam may indicate that volume is distributed in the wrong place. Excess above the bust can mean poor upper contour rather than an oversized bodice overall. The aim is to place volume where the body needs it instead of simply making the whole front tighter.
How Should Boning Be Positioned?
Boning usually works best when it follows the structural logic already created by the pattern. Vertical panel seams naturally divide a corset bodice into sections, so positioning support close to those lines often produces cleaner results than adding arbitrary channels between them. Before the first sample is cut, the proposed support map should be marked clearly, including the top and bottom position of each bone, channel width, and relationship to cups, neckline, waist, and closure.
The fitting should test more than whether each bone looks straight. Ask the wearer to sit, lean slightly forward, raise her arms, and rotate her upper body. A bone that appears perfectly aligned while standing may press into the ribcage or twist as soon as the torso moves. When twisting appears, weak boning is not always the cause. The channel may be too wide, a panel may be cut off grain, or excessive tension from an unbalanced waist may pull the support away from its intended line.
The same logic applies to bowing. Replacing a flexible bone with a much stiffer one can hide the visible symptom while creating a harder pressure point. The more useful approach is to identify whether the panel shape, channel direction, fabric tension, or bone stiffness is causing the problem.
Once the support positions are approved, record finished bone length and placement as production information. Leaving these decisions to individual sewing operators introduces unnecessary variation. A difference of 10–15 mm in bone length can noticeably alter neckline behavior or pressure at the waist on a short, tightly fitted bodice.
How Is the Mini Skirt Joined to the Bodice?
The waist seam is where the tension of the corset meets the movement requirements of the skirt. A structured bodice wants to stay anchored around the torso, while a fitted mini skirt needs enough freedom around the hip, seat, and thigh to allow walking and sitting. If those two areas are developed independently, the wearer may feel the entire dress pulling upward, twisting, or dragging the waistline out of position.
For a close-fitting woven mini skirt, a development starting point of approximately 2–4 cm total hip ease may work for many non-compressive silhouettes, depending on fabric, lining, intended fit, and movement requirements. A stretch bodycon skirt may use zero or negative ease instead. These numbers should be treated as starting references, not universal specifications, because a fabric with excellent recovery behaves very differently from a soft woven fabric with almost no give.
Check the waist seam from the front, side, and back while the wearer stands and moves. It should remain close to its intended level rather than climbing sharply across the abdomen or seat. The side seams should continue naturally from bodice to skirt unless the design deliberately changes their position. On basque-waist styles, unequal gathering or seam distribution can pull the center point off the body center and create visible asymmetry.
Mini length also needs movement testing. Record the standing length, then observe how far the hem rises during walking and sitting. A dress that looks acceptable in a static photograph may feel considerably shorter during normal use. The strongest development treats the bodice and skirt as one continuous fit system rather than two separately successful garments joined at a seam.
How Do You Fit a Corset Mini Dress?
A corset mini dress should be fitted by assessing bust shape, underbust position, neckline stability, waist level, torso length, side-seam balance, hip movement, closure tension, and garment behavior together. Measurements provide useful control points, but they do not explain every problem. Drag lines, seam movement, gaping, pressure points, and changes after sitting or walking often reveal issues that a size chart cannot show.

How Do You Balance Bust and Waist Fit?
Bust and waist fit influence each other, but they should not be corrected as though they are the same problem. Tightening the waist can temporarily make a loose bust appear more secure because the entire bodice becomes more tensioned. That does not mean the bust projection or vertical balance is correct. Fitting should begin by checking where the garment sits on the body before making aggressive circumference changes.
The bust point should align with the fullest part of the wearer, the waistline should sit at the intended level, the center front should remain straight, and the side seams should stay reasonably vertical. Once those landmarks are correct, the team can judge whether circumference, projection, or contour needs adjustment. Straight front, side, and back photographs are more useful for this work than flattering three-quarter images because technical imbalance becomes easier to identify.
| Fit Symptom | What to Check | Common Cause |
| Front waist rises | Front versus back waist level | Insufficient front length over bust |
| Bust looks flattened | Projection and cup depth | Insufficient bust volume |
| Side seam moves forward | Front/back distribution | Front panel too small or back too large |
| Fabric pools below bust | Underbust curve and front length | Excess length or poor shaping |
| Back zipper ripples | Waist/hip tension and seam stretch | Tension imbalance or zipper handling |
| Bodice slides downward | Neckline after movement | Weak support or excessive upper ease |
| Skirt rotates | Hip and thigh side seams | Uneven tension or pattern balance |
The strongest fit corrections target the root cause rather than the most visible symptom. If the front waist rises because the bodice lacks length over the bust, increasing the waist measurement will not solve the vertical imbalance. Changing bust width, waist width, side seam, and front length simultaneously also makes the next sample difficult to evaluate because no one knows which correction created the improvement.
What Causes Neckline Gaping?
Neckline gaping is usually a symptom of a larger fit or support problem rather than a single defect at the top edge. Too much upper-bodice length, incorrect bust projection, poor cup placement, insufficient edge stabilization, excessive ease, or the entire corset sliding down can all create a visible gap. Shortening the neckline without identifying the cause may remove excess from one area while creating pulling or distortion somewhere else.
The position of the gap provides useful information. Center-front gaping can indicate insufficient contour above the bust or an incorrect relationship between bust projection and neckline shape. A gap nearer the armhole may mean the upper chest is narrower than the pattern assumes. If the neckline looks correct immediately after dressing but begins opening after several minutes, the problem may come from fabric recovery or support loss rather than from the neckline pattern itself.
For strapless dresses, movement testing should be part of every meaningful fit review. Keep the wearer in the sample for several minutes and ask her to walk, sit, raise both arms, and rotate the torso. Watch whether the neckline remains in position or gradually falls. A garment that is stable only while the wearer stands perfectly still is not truly fitted.
Top-edge stabilization can help through narrow stay tape, controlled interfacing, elastic support, or appropriate lining tension, depending on the design. These methods work best when they support a correct pattern. Measure localized excess instead of writing vague comments such as “neckline loose.” A 6 mm gap at center front and the same amount near the side seam may require completely different corrections.
How Should the Fit Be Graded?
Corset dresses reveal grading errors more quickly than loose garments because small shifts in neckline width, bust position, waist level, and panel proportions are easy to see. Grading therefore needs to preserve the visual silhouette rather than simply enlarge the base pattern through uniform mathematical increments. Bust point, underbust seam, neckline, waist, side seam, high hip, full hip, and skirt length can all require different movement across the size range.
Cup architecture deserves particular attention. If the surrounding bodice becomes wider while cup volume changes very little, larger sizes may gain circumference without receiving enough projection or coverage. At the smaller end of the size range, a cup that changes too slowly can dominate the front bodice visually. The grading plan should therefore consider not just the outside dimensions of each panel but also how the body shape represented by those panels changes.
For commercially meaningful size ranges, reviewing only the base size creates unnecessary risk. A practical development approach is to fit at least three checkpoints: a smaller size, the base or middle size, and a larger size. These checks do not replace a complete brand fit program, but they often reveal major grade-shape problems before production begins.
Mini length should be reviewed visually at the same time. A fixed length increment may be mathematically neat but can make the style feel disproportionately short or long as the size changes. Basque points, neckline depth, strap spacing, and cup coverage also need visual review. Good grading means that customers in different sizes still recognize the same intended dress silhouette rather than receiving enlarged versions whose proportions gradually drift.
How Is the First Sample Developed?
The first sample should prove whether the design works as an actual garment, not merely whether it can be sewn. It should reveal silhouette, bust support, neckline stability, waist balance, fabric behavior, skirt proportion, closure performance, comfort, and likely manufacturing risks. A useful first sample does not need to be perfect; its real value is making the next development decision more precise and reducing uncontrolled trial and error.

What Should the First Sample Prove?
The first prototype has to answer both visual and technical questions. It should show whether the dress still communicates the original design once real fabric, seam allowances, lining, cups, boning, and closure have been introduced. At the same time, it should reveal whether the structure works on a body instead of only on a mannequin or flat table.
For a corset mini dress, review at least eight areas during the first fitting: overall silhouette, bust shape, neckline stability, waist position, side-seam balance, skirt proportion, closure performance, and movement comfort. Photograph the sample from straight front, side, and back views, then add close-ups of the bust, neckline, waist seam, zipper, boning areas, and any visible drag lines. These images become particularly useful when design, technical, and production teams are not in the same location.
The sample should also answer whether the original development concept still makes commercial sense. A beautiful fabric may require so much internal support that the dress becomes heavier, more expensive, or more difficult to sew than expected. A complex seam may add several operations but create only a minor visual difference. A low neckline may look striking in a sketch yet offer inadequate coverage on the intended customer.
Discovering these issues during the first sample is useful information rather than failure. The expensive situation is completing several rounds without understanding the reason for each change. The development process should become clearer after every sample, not simply produce another garment.
How Do You Review Corset Structure?
A detailed corset review should begin inside the garment because the internal construction often explains problems visible on the outside. Check whether the left and right cups are positioned symmetrically, boning channels are consistent, bone ends are secure, seam allowances are controlled, interfacing remains bonded, and the lining is neither pulling against nor floating away from the shell.
Once the garment is worn, inspect the underbust position, neckline contact, cup height, boning alignment, waist seam, zipper area, and side seams. Look for boning that bows or twists, visible cup edges, uneven bust shape, neckline collapse, zipper rippling, lining rolling outward, hard pressure at bone ends, or puckering caused by excess tension.
Symmetry should be measured rather than judged entirely by eye. On a strongly symmetrical corset front, differences of around 5–8 mm between left and right cup height, neckline level, or support position can already be noticeable. The smaller and cleaner the design, the more obvious these variations tend to become.
When a defect appears, identify its cause before changing a component. A bone may twist because its channel is too wide or because the surrounding panel is pulling off grain. A zipper may ripple because the back panel carries too much tension rather than because the zipper itself is poor quality. This habit of separating the visible symptom from the actual cause prevents a garment from accumulating temporary fixes that work on one prototype but fail after grading or bulk production.
How Should Fit Comments Be Prioritized?
A fitting can easily produce fifteen or twenty comments, and treating them all as independent corrections usually slows the process. A more disciplined approach groups comments into fit, structure, visual preference, and production risk. Fit covers bust, waist, hip, length, and balance. Structure includes cups, boning, lining, neckline support, and closure. Visual preference includes seam shape, proportion, and styling. Production risk covers details that may be difficult or unstable when repeated.
Root problems should be corrected before secondary details. If the bodice sits 15 mm too low, adjusting the neckline curve before restoring the correct vertical position may not achieve anything useful. If the waist rises because the front lacks enough length over the bust, simply increasing waist circumference can create a looser garment without correcting the original imbalance.
Comments also need to be measurable whenever possible. “Cup looks wrong” gives the patternmaker little information. “Lower the bust apex approximately 8 mm and remove excess from the upper edge” provides a clearer target that can be checked in the next fitting. The exact change still depends on the garment, but the language should describe a direction and an observable result.
Version control is equally important. V1, V2, and V3 should have clear records showing what changed and which points were approved. Otherwise, a successful correction in V2 can disappear while an unrelated area is being adjusted for V3. Duolan’s documented sampling workflow similarly separates fit adjustments, fabric or detail changes, visual preferences, and production-related issues before the next revision is released.
How Do You Prepare the Dress for Bulk Production?
Bulk preparation converts an approved sample into a repeatable manufacturing standard. Before cutting begins, the final pattern, grading, measurement specification, shell fabric, lining, cups, boning, closure, construction methods, workmanship, tolerances, and reference sample should be locked. Structure-sensitive corset styles may also need first-piece confirmation or a controlled pilot run before the full quantity is released to production.
What Must Be Locked Before Production?
Sample approval should not automatically trigger bulk cutting. The first question is whether all decisions made during sampling have been converted into information the production team can repeat. Experienced sample machinists often make small manual adjustments while building a prototype. If those changes exist only in someone’s memory, they disappear as soon as the style moves to another operator, sewing line, or factory.
Before production begins, confirm the final pattern version, grading rules, finished measurements, shell fabric, lining, interfacing, cup specification, boning type and length, closure, seam construction, pressing requirements, trims, labels, and critical appearance points. The approved sample should remain available as a physical visual reference because a specification sheet can describe measurements but cannot fully communicate neckline shape, bust contour, waist definition, and surface appearance.
Material changes require particular care. Replacing a 280 gsm structured satin with a softer 220 gsm alternative may appear to be a simple sourcing decision, but the reduced weight and structure can change seam appearance, cup visibility, neckline stability, and waist control. Two molded cups with the same nominal size may also differ in projection and edge thickness, while two plastic bones of identical width can behave differently in stiffness and recovery.
Duolan’s documented bulk-readiness process follows this principle by checking fabric, lining, trims, color, measurements, workmanship, and other production requirements before releasing a style into bulk rather than treating sample approval as an automatic production start.
Is a Pilot Run Necessary?
A pilot run becomes particularly valuable when the style has high fit sensitivity, unfamiliar materials, complex cups, difficult boning channels, a new production line, or details that required significant manual correction in the sample room. The purpose is not simply to make several additional samples. It is to discover whether the approved result can be repeated by multiple operators under realistic production conditions.
Even a small controlled run can reveal issues that one highly experienced sample machinist may hide. If several garments develop the same neckline distortion or bust-seam puckering, the problem is probably connected to construction, pattern, or process. If only one garment shows the problem, handling or operator technique becomes a more likely explanation. Review several pieces together instead of selecting the best-looking unit and assuming the process is stable.
Useful pilot measurements include bust, waist, cup position, boning length, waist seam level, zipper position, side length, and finished dress length. Operation time can be equally informative. If a cup seam repeatedly needs unpicking or takes far longer than expected to sew cleanly, the production risk already exists even if the completed pilot looks acceptable.
Color should also be considered. Black fabric can hide minor puckering or seam impressions that become obvious in ivory, pale pink, or light satin. If one style is being produced across several colors, appearance should be checked on the most revealing materials before the entire order is released. Duolan’s production process specifically identifies corset and bustier dresses among the styles where first-piece or pilot verification can be useful before full production.
How Do You Keep Bulk Consistent?
Consistency is created by controlling the garment at several stages rather than depending entirely on final inspection. For corset mini dresses, sensitive operations commonly include panel matching, cup positioning, boning channels, neckline stabilization, waist seams, zipper insertion, lining attachment, and final pressing. A problem at any of these points can affect both appearance and fit.
A practical production flow moves through incoming-material inspection, cutting verification, first-piece approval, inline inspection, measurement checks, finished appearance review, and final packing confirmation. Exact tolerances should follow the brand’s specification and the construction of the style, but starting control ranges can help teams understand which features deserve especially close attention.
| Critical Point | Practical Starting Control | Main Risk |
| Left/right neckline level | About 3–5 mm | Visible asymmetry |
| Cup height difference | About 3–5 mm | Uneven bust shape |
| Boning length variation | About ±5 mm where practical | Different support or pressure |
| Major fitted measurements | Often around ±5–10 mm by POM | Fit drift |
| Waist seam matching | Consistent notch alignment | Twisting or puckering |
| Zipper top position | Within a few millimeters | Uneven back or neckline |
| Finished mini length | Brand-approved tolerance | Inconsistent coverage |
These figures are practical development references rather than universal standards. Fabric type, measurement method, garment construction, and the brand’s own tolerance policy should determine the final limits. A stretch garment, for example, may not be controlled in exactly the same way as a rigid woven corset.
Repeat orders need the same discipline. A style produced six months later may use a new fabric lot, a different sewing line, or an alternative trim source even though the style number remains unchanged. Retaining the approved pattern, material references, measurements, construction notes, QC images, and known risk points gives the next order a reliable starting point instead of relying on memory.
A corset mini dress ultimately succeeds when the technical work becomes invisible to the wearer. She notices that the neckline sits cleanly, the bust looks balanced, the waist feels defined, the zipper lies flat, and the skirt stays in place while she moves. The brand sees a different but equally important result: the same silhouette can move from prototype to approved sample, grading, production, new colors, repeat orders, and future collections without losing the character that made the original design worth developing.
For fashion teams working with corset, bustier, bodycon, party, or occasion dresses, the most useful question is therefore not whether a manufacturer has made corset dresses before. The better question is whether the pattern, sample, material, production, and quality teams can explain the specific risks in the design and show how those risks will be controlled from the first pattern through bulk production. That ability to connect design intent with repeatable manufacturing is what turns a visually strong idea into a dependable commercial garment.
Frequently Asked Questions
How Many Bones Should a Corset Mini Dress Have?
There is no universal number because boning depends on bodice length, panel count, neckline, fabric stiffness, closure, and the amount of support expected from the garment. Many fashion corset bodices may begin development with roughly six to twelve vertical support channels, but this is only a practical reference. A shorter, lightly structured corset may require fewer, while a longer or more sculpted style may need additional support. Placement matters more than simply increasing quantity, because poorly positioned boning can create ridges, twisting, or uncomfortable pressure.
What Fabric Is Best for a Corset Mini Dress?
Medium-weight structured fabrics such as duchess-style satin, jacquard, brocade, twill, and stable crepe are often easier to control because they support shaped seams and do not stretch excessively under body tension. Stretch satin and other elastic materials can also work well when a softer body-conscious effect is required, but stretch percentage and recovery need to be tested. The best fabric is the one whose drape, weight, opacity, stretch, surface appearance, and support requirements match the intended silhouette rather than simply looking attractive as a flat swatch.
Does a Corset Mini Dress Need Bra Cups?
Not every corset mini dress needs sewn-in cups. Panelled bodices can sometimes create sufficient bust shaping through pattern construction alone, especially when the neckline offers more coverage or straps provide support. Molded or foam cups are useful when the design needs a defined bust shape, added coverage, or a smoother interior. When cups are used, their position should follow bust point, underbust level, neckline, and front-body shape. A correctly sized cup placed in the wrong position can still distort the entire bodice.
How Tight Should a Corset Mini Dress Be?
A fashion corset mini dress should feel secure enough to maintain its silhouette without making normal breathing, sitting, or movement uncomfortable. The correct amount of ease depends heavily on whether the garment uses stable woven fabric or stretch material. Structured woven designs may sit close to body measurements, while stretch versions may use controlled negative ease. Fit should never be judged only by how tightly the zipper closes. The wearer should also walk, sit, raise her arms, and remain in the garment long enough to reveal neckline movement, pressure points, or gradual stretching.
How Do You Prevent a Corset Dress Neckline From Gaping?
The first step is to identify where the gap appears and what causes it. Center-front gaping may come from incorrect bust projection or insufficient contour above the bust, while side gaping can result from excess upper-chest width. A neckline that becomes loose after several minutes may indicate weak support or poor fabric recovery. Stay tape, interfacing, elastic support, or controlled lining tension can improve stability, but these methods work best after the pattern is correctly shaped. Simply shortening the entire neckline often creates a new problem elsewhere.
How Long Does It Take to Develop a Corset Mini Dress Sample?
There is no single reliable development time because complexity varies considerably. A relatively simple corset-inspired mini dress with established materials and a clear tech pack may move quickly, while a new structured bodice involving custom cups, unfamiliar fabric, complex boning, multiple fit corrections, or special trims can require substantially more work. A more useful way to manage development is to separate the process into first prototype, fit review, revision sample, approval sample, and production-readiness checks. Clear comments and early material decisions usually reduce unnecessary revision rounds more effectively than simply demanding the shortest possible sample time.
What Should Be Checked Before a Corset Mini Dress Goes Into Bulk Production?
Before bulk cutting, the team should confirm the final pattern, grading, measurements, fabric, lining, reinforcement, cups, boning, closure, construction method, workmanship standards, and approved visual reference. Structure-sensitive styles also benefit from first-piece or pilot verification so that cup position, neckline symmetry, boning, zipper appearance, waist balance, and finished length can be checked under production conditions. The purpose is to ensure that the approved sample is not merely a one-off garment but a version that operators can reproduce consistently across colors, sizes, and repeat orders.