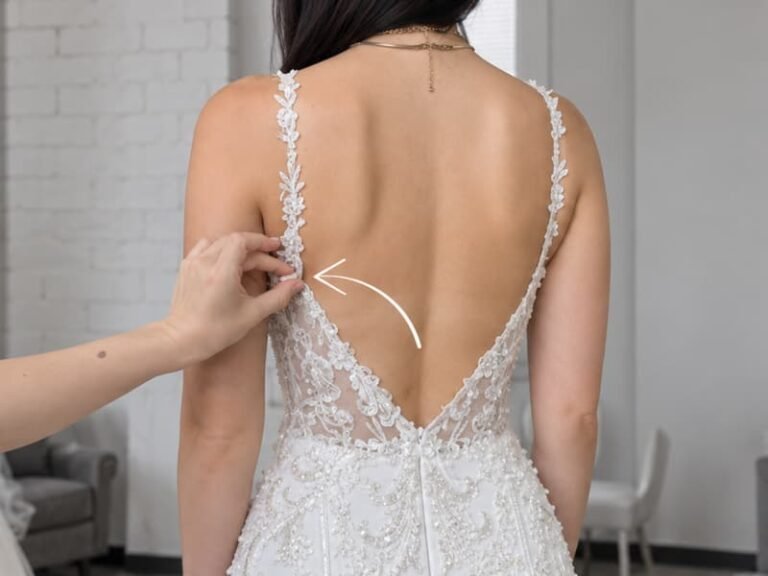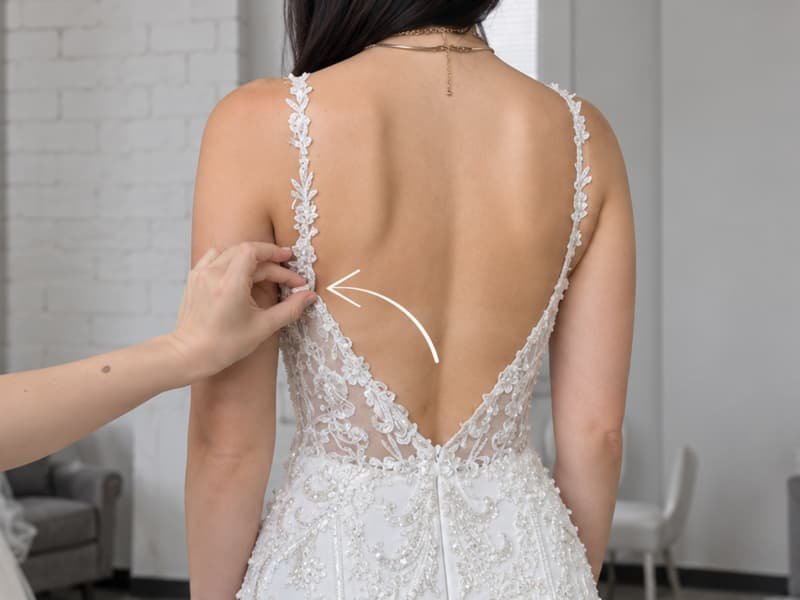
A backless dress can look almost perfect when it is laid flat on a cutting table and behave very differently once a person puts it on. One of the smallest-looking details—the position of the straps—can change the fit of the entire upper bodice. Moving a strap inward, outward, forward, or backward changes where the garment is supported and the direction in which tension travels through the neckline, bust, armhole, side body, and open back. That is why a backless dress with technically correct measurements can still slip, gape, twist, expose too much side bust, or feel uncomfortable after a few minutes of wear.
Strap placement changes backless dress fit because every strap creates a load path between the front bodice, shoulder or neck, and the remaining back structure. Moving the attachment point changes the direction and distribution of tension. Balanced placement helps stabilize the neckline, bust, armhole, and open-back edge, while poor placement can cause slipping, gaping, pulling, rotation, and uneven support.
The most frustrating part is that a strap problem rarely looks like only a strap problem. A fitter may see a loose back edge and remove fabric from the back, then discover that the neckline is suddenly too tight. Another sample may have slipping straps, so the straps are shortened, only for the armholes to rise and the back corners to lift. In many cases, the original issue was not simply strap length but the relationship between strap position, angle, body shape, fabric, and the structure that remains after the back of the dress has been opened.
How Does Strap Placement Change Backless Dress Fit?
Strap placement changes how a backless dress is suspended and where tension is transferred through the bodice. Moving the front or back attachment point can affect neckline height, bust position, armhole contact, side-seam balance, and the way the open-back edge follows the body. Because a backless dress has less upper-back structure, relatively small strap adjustments can create noticeable changes in overall fit.
Strap Placement Changes the Load Path
A conventional dress with a full back has several areas that help keep it stable: shoulders, upper back, side seams, waist shaping, bust shaping, lining, and sometimes internal reinforcement. Once a large section of the back is removed, the dress loses some of those stabilizing surfaces. The remaining straps, side body, waist area, and any internal support must take over more of the work. This makes strap placement far more important than it appears when looking only at a technical sketch or flat pattern.
When a strap sits closer to the armhole, its pull tends to be directed more toward the outer shoulder. That placement can help preserve a wide, open neckline, but it may also make the strap more likely to travel outward during wear. Moving the same strap inward can increase shoulder security because the direction of pull becomes more central. However, moving it too far can narrow the neckline, change bust coverage, or release too much tension from the outer armhole.
During sample fitting, controlled movements of around 5 mm at a time can be useful for identifying whether the anchor position is contributing to the problem. This is not a universal production tolerance or a fixed industry rule. It is a practical fitting method that allows the team to see cause and effect without making several large changes at once. If a 5 mm inward movement immediately improves shoulder security and back contact, the original attachment position deserves closer examination.
Strap Angle Matters as Much as Length
Two straps can have exactly the same finished length and still create very different fit because their angles are different. A nearly vertical strap mainly lifts the front bodice upward. A strap that travels diagonally toward center back adds an inward component of tension. A wide diagonal strap may pull more strongly toward the outside of the body. These differences influence how the neckline, armhole, bust, and back opening respond when the wearer moves.
This is why a specification such as “finished strap length: 390 mm” is rarely enough for a fit-sensitive backless dress. The technical information should also establish where the front anchor sits, where the back anchor sits, how wide the strap is, and whether it is adjustable. The final wearing angle is created by all of those factors together, not by the strap length alone.
A strap that is too short can raise the neckline and pull the open-back corner upward. A strap with the correct length but the wrong angle may keep the neckline at the right height while causing the armhole to open. When a development team separates these possibilities instead of treating every problem as a length issue, fitting becomes faster and the final correction becomes easier to reproduce during grading and bulk production.
Front and Back Fit React Together
The front and back of a backless dress should not be fitted as separate zones because they are mechanically connected. Moving the back attachment point changes the direction of pull reaching the front bodice, and moving the front anchor can change how the open-back edge sits against the body. This interaction is particularly noticeable in dresses with narrow shoulder straps, low back openings, fitted waists, or closely shaped bust areas.
If the back corner gaps by 10 or 15 mm, it can be tempting to remove the same amount from the back pattern immediately. That may improve the static appearance, but it can also create a tighter edge while leaving the original tension problem untouched. A better diagnostic approach is to compare separate changes. First, pin the back edge without changing the strap. Then restore the back and temporarily reposition the strap. If strap movement improves several areas at once, the anchor geometry is likely contributing to the problem.
A reliable fitting sequence is to stabilize the waist first, then inspect the bust position, neckline height, armhole contact, strap direction, open-back edge, and side-seam alignment. When one alteration improves one area but makes two other areas worse, the dress probably has a balance problem rather than a single incorrect measurement.
Small Changes Can Create Large Visual Differences
The effect of strap placement is especially visible in smooth, fitted, and reflective fabrics. Satin, for example, can make slight tension differences appear more dramatic because light highlights every ripple and drag line. Mesh may distort around a narrow attachment point, while stretch jersey can allow an armhole or back edge to grow after wearing. The visual result may therefore look much larger than the actual dimensional change made to the strap anchor.
For product-development teams, the practical lesson is to avoid changing several parts of the pattern at the same time. Moving a strap inward, shortening it, pinning the back edge, and reshaping the armhole in a single fitting can make the sample appear improved, but nobody will know which correction actually worked. That uncertainty often returns later when the style is graded, reordered, reproduced in another fabric, or transferred from the sample room to a production line.
Which Strap Positions Give a More Stable Fit?
There is no single strap position that guarantees the best fit for every backless dress. Stability depends on shoulder shape, bust volume, back depth, fabric behavior, neckline design, and internal support. Narrower or crossed straps often resist slipping more effectively, while wider placements can preserve an open neckline but need stronger support from the bodice, waist, lining, or internal construction.
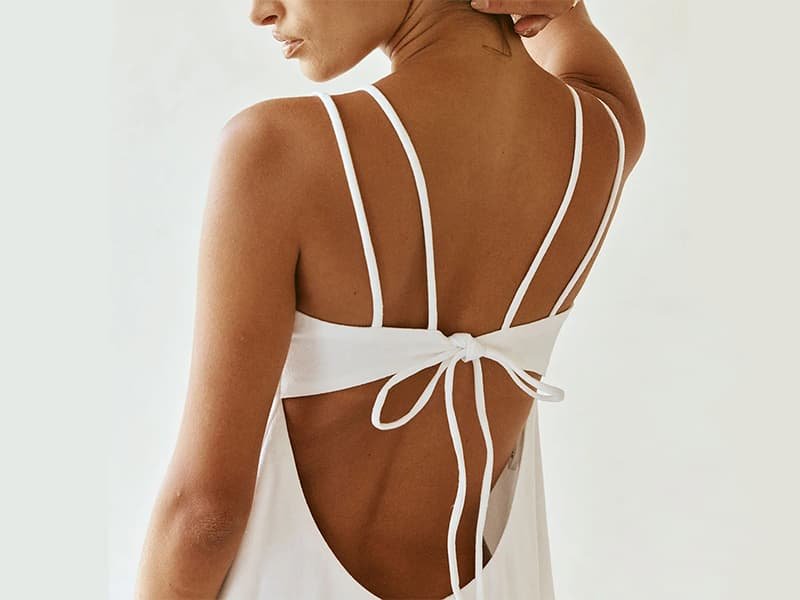
| Strap Configuration | Typical Stability | Common Fit Risk | Main Development Check |
| Wide-set straight straps | Moderate | Shoulder slipping | Outer shoulder position |
| Narrow-set straight straps | Moderate to high | Neckline pulling inward | Neckline width and bust coverage |
| Cross-back straps | High | Excess diagonal tension | Back angle and neckline height |
| Low diagonal straps | Moderate to high | Back corner lifting | Back anchor height |
| Halter straps | High at shoulder | Neck pressure | Side-bust and underbust support |
| Adjustable straps | Variable | Uneven user adjustment | Base pattern balance |
The table describes common development tendencies rather than fixed outcomes. A stable woven dress with strong waist shaping may tolerate a wider strap position better than a soft jersey dress, while a cross-back design can become less stable if diagonal tension twists the whole bodice rather than simply holding the straps on the body.
Wide-Set Straps
Wide-set straps are common in slip dresses, satin party dresses, occasion styles, and minimal fashion silhouettes because they create more open space across the upper chest. From a visual perspective, this can make the neckline feel lighter and more elegant. From a fitting perspective, however, wide-set placement leaves less margin between the strap and the outside edge of the shoulder, which makes body shape more influential.
A wearer with relatively narrow shoulders or a stronger shoulder slope may experience strap movement even when the finished strap length is technically correct. Shortening the strap can reduce obvious slack, but it may also pull the armhole upward, distort the back corner, or increase pressure at the shoulder. In these cases, moving the attachment point inward slightly while maintaining the original strap length can provide more useful diagnostic information than simply making the strap shorter.
Wide-set straps generally work better when another part of the dress is already doing a reliable job of stabilizing the body. This may include a fitted waist seam, underbust shaping, a firm lining, internal elastic, cups, or other structured components. When a very low-back dress depends almost entirely on two narrow, wide-set straps for stability, small differences in shoulder width can produce noticeable differences in wear performance.
Narrow-Set Straps
Moving straps closer to the neck often improves shoulder security because the strap sits farther from the natural edge of the shoulder. This can be useful when a sample repeatedly loses the straps during ordinary movement, even though the wearer does not feel that the straps are particularly loose. The trade-off is that every inward movement changes the pull across the neckline and outer bust.
If the front anchor becomes too central, the neckline may begin to narrow or pull toward center front. The outer bust can also lose some support because less tension reaches the side of the bodice. In some styles, moving the strap inward solves shoulder slipping but creates a new gap at the armhole. This is why “move the strap inward” should never be treated as an automatic repair.
A useful fitting check looks at three results together: the strap should remain more secure on the shoulder, the neckline should keep its intended width, and side-bust coverage should remain appropriate. If all three improve, the new position is probably working with the pattern. If only the strap stays on while the neckline or bust deteriorates, the adjustment has solved one symptom at the expense of the overall fit.
Cross-Back Straps
Cross-back straps are often more resistant to shoulder slipping because their diagonal direction creates inward tension toward the center of the back. This makes them useful for party dresses, going-out styles, resort dresses, and other garments in which the wearer is expected to move more actively. The added stability, however, does not mean that a cross-back layout automatically produces good bodice balance.
If the crossing point sits too low or the straps are too short, diagonal tension can pull the open back upward, raise the front neckline, or create visible drag lines. On stretch fabrics, excessive cross-back tension may also encourage the entire garment to rotate slightly after repeated movement. The straps remain secure, but the dress itself does not stay where it began.
A useful sample-room movement test can include 10–15 normal walking steps, one or two full arm raises, several sit-to-stand movements, and a gentle torso rotation. Afterward, the neckline, strap location, back edge, waist, and side seams should be compared with their starting positions. A successful cross-back construction should improve shoulder security without forcing another part of the bodice to migrate.
Halter Straps
A halter changes the support system because the upper load is transferred toward the neck instead of depending on the outer shoulder. Shoulder slipping is largely removed from the equation, but new considerations appear around neck pressure, side-bust coverage, underbust stability, and how high the front bodice is suspended.
If a halter strap is too short, the front can be lifted aggressively. This may initially make the bust look more supported, but it can also pull the side seam forward, expose more side bust, or create uncomfortable pressure around the neck. If the strap is too long, the neckline may drop and the bust area may become less stable.
The key question is whether the halter strap is positioning a stable bodice or being forced to support a bodice that lacks enough structure. A structured halter dress with cups, boning, underbust shaping, or a fitted waist should not need extreme neck tension to remain in place. If most of the garment feels as though it is hanging from the neck, the support system below the strap should be reviewed rather than simply tightening the halter again.
What Fit Problems Come From Poor Strap Placement?
Poor strap placement can create several defects that appear unrelated, including slipping straps, back gaping, armhole opening, neckline pulling, uneven bust support, side-seam movement, and garment rotation. Before removing fabric or changing a neckline, the fitting team should check whether strap position, angle, or tension is contributing to the problem. Correct diagnosis prevents unnecessary pattern changes that only hide the original imbalance.
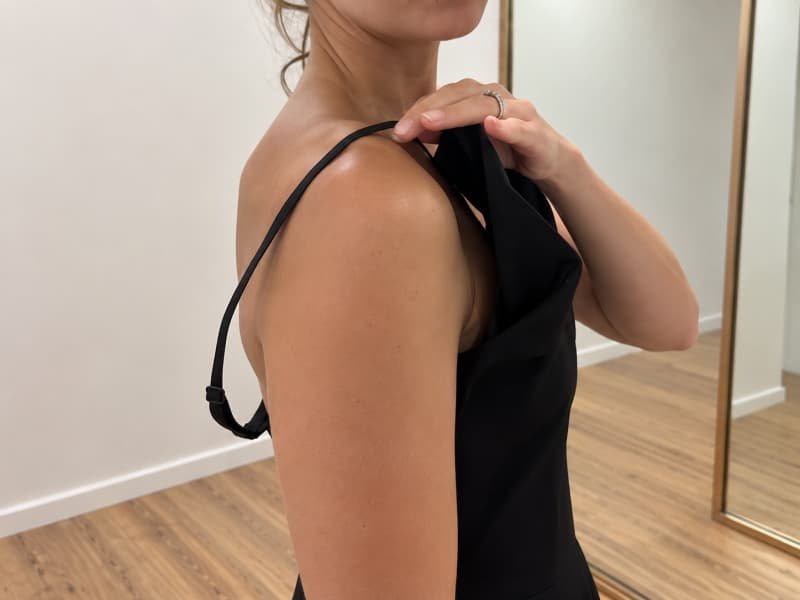
| Visible Problem | Possible Strap-Related Cause | First Useful Check |
| Strap falls outward | Anchor too close to shoulder edge | Test a slightly more inward anchor |
| Back corner gaps | Strap pulls outward | Change back-anchor direction |
| Back corner lifts | Strap too short or anchor too high | Restore length before reshaping |
| Armhole gaps | Front anchor too central | Test slight outward movement |
| Neckline rises | Excess vertical strap tension | Add temporary strap length |
| Side seam moves forward | Front bodice is over-lifted | Check strap and bust balance |
| Dress rotates | Left/right tension differs | Compare strap geometry on both sides |
Strap Slipping
Strap slipping is frequently blamed on excessive length because shortening the strap appears to be the fastest solution. Sometimes that diagnosis is correct, but the behavior of the strap can reveal whether length is actually the problem. A genuinely long strap usually develops visible slack. A strap that remains relatively taut but moves toward the arm often points to placement, shoulder shape, or the direction of the back anchor.
A practical fitting method is to mark the starting location of the strap, ask the wearer to walk and move the arms normally, and then observe whether the strap has become looser or simply shifted outward. If it migrates while staying under tension, shortening it further may create new problems without improving the basic geometry.
Shoulder width, shoulder slope, posture, and the relationship between the neck and armhole all vary across real customers. A strap position that performs well on one fit model may be much less forgiving on another body. Adjustable sliders can accommodate some differences in length, but they cannot correct an attachment point that consistently directs the strap toward the outside of the shoulder.
Back Gaping
Back gaping occurs when the open-back edge fails to follow the body contour. The underlying cause can be excessive pattern length, insufficient waist control, fabric growth, poor contouring, or strap placement. More than one cause may be present in the same sample, which is why simply removing the visible gap from the pattern can be risky.
The location of the gap provides useful information. If the entire open-back edge stands away from the body, the problem is more likely to involve back shape, waist stability, side-body balance, or material behavior. If the gap is concentrated near the upper strap corner, the strap direction deserves immediate attention.
For example, a local gap of approximately 10–15 mm at the upper corner does not automatically mean that 10–15 mm should be removed from the back edge. One useful comparison is to pin the edge without moving the strap, then release the pin and reposition the strap while keeping the original back pattern. If the strap adjustment improves the contact naturally, the attachment geometry is clearly part of the problem.
Armhole and Side-Bust Gaping
The front strap anchor is often close enough to the armhole that changes in strap position can immediately alter the way the outer bodice sits. Moving a strap inward can improve shoulder security while releasing tension from the armhole. Moving it outward can tighten the outer bodice but increase the chance that the strap itself will move toward the arm.
For that reason, an armhole gap should not automatically be corrected by removing fabric from the armhole curve. Before redrawing the pattern, the fitter can temporarily hold the strap in several nearby positions and observe whether the gap changes. If a small change in anchor location significantly improves the armhole, the strap geometry should be resolved before permanent changes are made elsewhere.
Bust volume also needs to be checked because insufficient bust projection can push fabric outward and create an armhole gap that looks very similar to a strap-placement problem. A shallow cup, an incorrectly positioned bust seam, or inadequate front shaping can all create comparable symptoms. Good fitting separates these causes rather than making several corrections at once.
Neckline and Bust Distortion
The neckline is one of the easiest places to see excessive or poorly directed strap tension. Shortening a strap generally raises the neckline. Moving a front anchor outward may widen the upper edge, while moving it inward can narrow the neckline or pull it closer to center front. Whether that change is helpful depends on the intended design and the shape of the bust underneath.
A soft jersey slip dress can depend heavily on the straps for positioning, while a structured corset-inspired dress may distribute much more load through cups, boning, lining, underbust shaping, and a fitted waist. As a result, identical-looking straps can play very different roles in different garments.
During fitting, neckline position, bust-point alignment, side-bust coverage, and underarm contact should be evaluated together. If shortening the straps improves apparent bust lift but noticeably reduces side coverage or causes the neckline to dig into the wearer, the bodice has not necessarily become better fitted. It may simply have been pulled upward inside an incorrect structure.
How Do Back Depth, Bust Shape, and Fabric Affect Straps?
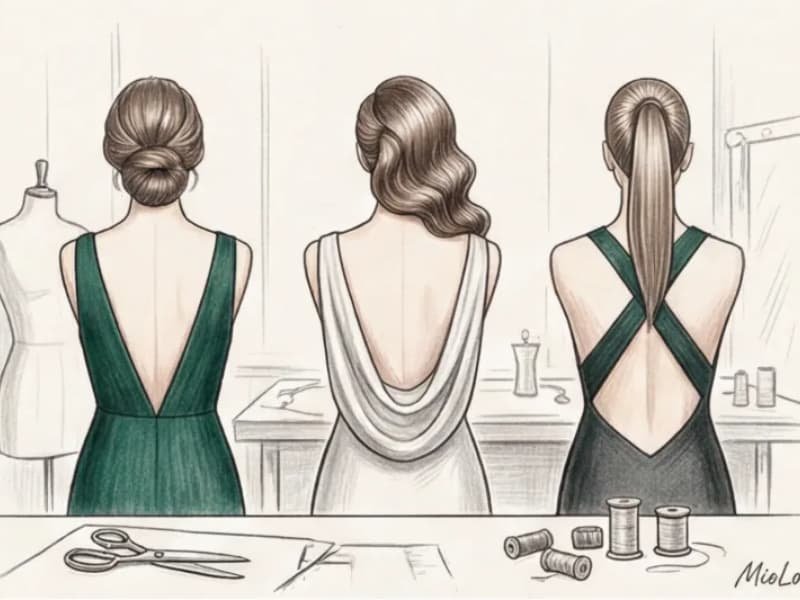
Back depth, bust shape, and fabric behavior determine how much work the straps must do. As the back becomes lower, the garment loses structural area and becomes more dependent on the straps, waist, side seams, bust shaping, and internal support. Bust projection changes the effective strap path, while stretch, mesh, satin, and bias-cut fabrics can alter tension after sewing and during wear.
Back Depth Changes the Support System
Lowering the back changes more than the appearance of a dress. It physically removes material that previously helped control horizontal and diagonal movement. A relatively shallow open back may still retain enough structure across the upper body to share the load with the straps. Lowering the back further shifts more responsibility toward the straps, waist, side body, and whatever internal structure remains.
This is why the same strap arrangement can perform well on a medium-low back and become unstable when the design is revised into a dramatically deeper back. As more structure disappears, the waist often becomes one of the most important horizontal anchors. Without a secure waist, the straps may be forced to control both vertical suspension and horizontal stabilization, which can create excessive tension at the shoulders or neck.
When a design team considers lowering the back by another 30–50 mm, the useful question is not simply whether the opening will look better. The technical question is what will replace the support that has been removed. The solution may involve stronger waist shaping, lining, elastic stabilization, power mesh, boning, revised side panels, or a new strap path.
Bust Shape Changes Strap Geometry
Bust circumference is important, but it does not fully explain how a backless dress will sit. Two people can share the same full-bust measurement while having very different projection, spacing, height, and underbust measurements. Those differences change the three-dimensional path between the front strap anchor and the shoulder or neck.
A fuller or more projected bust usually requires more front shaping and changes the effective distance that the strap must travel. If the pattern does not provide enough bust volume, the garment begins borrowing length from nearby areas. The neckline may drop, the strap may feel unusually tight, or the armhole may open. Adjusting the strap can temporarily change the appearance without correcting the missing bust volume underneath.
For fitted backless dresses, useful references include bust-point height, bust-point spacing, underbust circumference, side-bust coverage, cup depth where relevant, and the vertical relationship between the bust and neckline. These factors become even more important during grading because a larger size does not simply need a proportionally longer strap. The anchor position and front-bodice shaping may also need to move.
Fabric Can Change Fit After Sewing
Fabric behavior can change the apparent strap fit between the first fitting and the next day. Stretch jersey may grow around an armhole or back opening. Mesh can distort where a narrow strap is attached. Bias-cut satin may relax under the weight of the garment, and smooth woven satin can show even small tension differences because the surface reflects every ripple and drag line.
Before final strap placement is approved, the team should understand how the material behaves in the direction relevant to the design. Useful observations include stretch percentage, recovery, fabric weight, edge stability, grain direction, and whether the garment contains bias-cut sections.
For fabrics that are prone to relaxation, allowing the completed sample to hang for approximately 12–24 hours before a final fit review can expose obvious growth. This is a practical development check rather than a substitute for textile laboratory testing. If the open-back edge becomes longer after hanging, the solution may involve stabilization rather than shortening the straps to compensate for a material problem.
Internal Support Changes Strap Load
Cups, boning, lining, elastic, underbust seams, and fitted waist construction can dramatically change how much work the straps need to perform. In a soft slip dress, the straps may control neckline height, upper-bodice position, and a significant share of bust support. In a structured backless dress, more of the load can be distributed through the torso, leaving the straps mainly responsible for positioning and fine stabilization.
This distinction has a direct effect on comfort. If a structured dress still requires extremely tight straps to remain secure, the internal support should be reviewed. Tightening the straps again may hide the problem temporarily while creating pressure at the shoulder or neck.
A useful fitting test is to relax the straps slightly and observe whether the waist and bust structure can still hold the garment reasonably close to its intended position. If the entire bodice immediately collapses downward, the straps are probably carrying more load than the design should require. Better distribution of support often produces a more comfortable dress and a more stable fit across different customers.
How Should Strap Placement Be Corrected During Fitting?
Strap placement should be corrected by separating strap length, anchor position, angle, bust balance, and back shape into individual tests. Start from a clear baseline and change only one variable at a time. Temporary movements of roughly 5 mm can help show the direction of improvement without creating a large irreversible change. Final corrections should then be transferred accurately to the pattern and technical specifications.
Start With a Structured Fit Check
The first fitting should establish what is actually happening before permanent changes are made. For a backless dress, useful observations include strap security, neckline height, bust position, side-bust coverage, armhole contact, open-back contact, waist stability, and side-seam alignment. Photographs from the front, side, and back help create a clear baseline, while short video can reveal movement problems that still photographs do not show.
A development record should separate measurable specifications from fit observations. “Finished strap length: 385 mm” is a specification that production can reproduce. “Right strap travels outward after arm movement” is an observation that helps the technical team understand the failure. Both are important, because measurements without behavior can miss the real problem, while observations without measurements are difficult to reproduce.
When several sample rounds are required, comments such as “make strap tighter” or “fix back” are too vague to create reliable progress. Clearer comments describe what is happening, where it happens, and what changed after the previous adjustment. This makes each fitting round more useful and reduces the risk of repeating the same mistake in a slightly different form.
Separate Length From Position
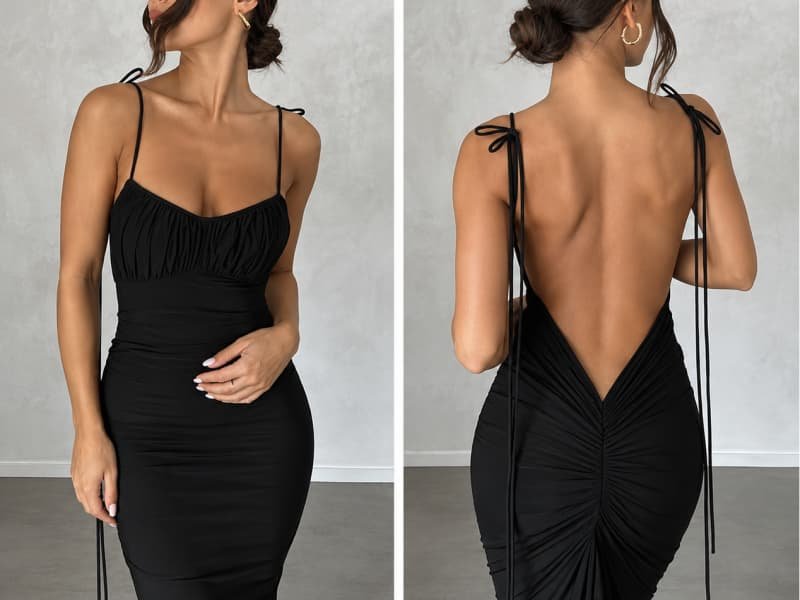
One of the most useful fitting comparisons is to test strap length and strap placement independently. First, shorten the strap temporarily while keeping both anchors in the original location. Check what happens to the neckline, armhole, bust, back edge, and shoulder pressure. Then return the strap to its original length before testing a small change in anchor position.
If shortening the strap improves the major areas without creating new distortion, length is likely part of the problem. If shoulder security improves but the neckline rises or the back corner lifts, the strap may have been made tighter without correcting the direction of pull. If moving the anchor by approximately 5 mm improves several zones at once, the original position is probably contributing more strongly than the strap length.
Changing one variable at a time is important because a sample can look better after several simultaneous alterations while providing almost no useful technical information. That uncertainty becomes expensive later when the pattern is graded, repeated, reproduced in another fabric, or transferred to bulk production.
Move the Anchor According to the Problem
There is no universal rule that every slipping strap should move inward or every gaping back should move upward. The useful adjustment depends on the direction of the tension that is producing the problem. A slipping strap may improve with a more inward anchor, while an armhole that gapes after that change may need the front point to return slightly outward or require a separate bust correction.
A back corner that lifts may indicate excessive vertical tension rather than too much back length. In that case, shortening the back edge can make the garment tighter without solving the force that is pulling it upward. A slightly lower attachment point, additional strap length, or improved waist support may provide a better result.
The original anchor should remain marked throughout fitting so that each temporary alternative can be compared against a known baseline. Once the final position is approved, it needs to be updated in every relevant production document, including the digital pattern, paper pattern, construction sheet, graded nest, technical sketch, and measurement information where applicable. A correction that exists only on one physical sample is not yet a controlled production standard.
Test the Dress in Motion
Backless dresses should not be approved entirely while the wearer stands still. The design is expected to move with the body, and movement can reveal strap migration, neckline drift, back-edge rolling, garment rotation, and side-seam movement that are almost invisible during a short static fitting.
A simple movement check can include 10–15 normal walking steps, one or two full arm raises, three sit-to-stand movements, a forward reach, and a gentle torso rotation. Afterward, compare the strap location, neckline height, side seams, waist, and open-back edge with their original positions.
The goal is not to create clothing that never moves. Every garment shifts slightly with the wearer. The useful question is whether it returns close to its intended position without the wearer repeatedly pulling the strap or neckline back into place. A strap that remains fixed while the entire bodice rotates is not a successful result, because shoulder security has been achieved at the expense of garment balance.
For development teams working remotely with brand offices, a short fitting video can be especially valuable. A 15–30 second clip can show gradual migration or rolling that a carefully posed front, side, and back photograph may completely hide.
How Do You Keep Strap Fit Consistent in Production?
Consistent strap fit requires the approved sample to be translated into measurable production controls. Finished strap length alone is not enough. Front and back anchor positions, left-right symmetry, reinforcement, back-opening dimensions, neckline balance, and grading relationships also need to be controlled. Fit-sensitive backless dresses often benefit from first-piece or pilot verification before full production because small anchor deviations can create visible on-body differences.
Grade the Relationship, Not Just the Strap
Grading a backless dress is more complex than increasing the strap by a fixed amount as the size becomes larger. As sizes change, bust projection, neckline width, armhole dimensions, bodice width, and shoulder relationships also change. If the strap anchor follows only one of those measurements, the resulting geometry can gradually move away from the intended silhouette.
A useful grading review compares the distance from center front to the front anchor, the relationship between the anchor and armhole, the location of the back anchor relative to center back, the finished strap length, and the width or depth of the back opening. These relationships explain whether the strap is staying in the same functional position rather than merely growing mathematically with the rest of the pattern.
For a size range such as XS–XL, fitting only one middle size may leave the smallest and largest sizes less verified, particularly on a very low-back or structured style. The number of physical fit sizes required depends on the brand block, construction difficulty, previous experience, and commercial risk, but high-risk styles deserve more deliberate size-range checks than forgiving loose dresses.
Control Fit-Critical Measurements
| Production Checkpoint | Practical Control Method | Fit Risk if Incorrect |
| Front strap anchor | Measure from fixed neckline or seam reference | Uneven neckline or armhole |
| Back strap anchor | Measure from center back or fixed back reference | Gaping or strap migration |
| Finished strap length | Measure after sewing and pressing | Neckline height change |
| Left/right symmetry | Compare both sides directly | Visible imbalance |
| Back opening width | Check against approved specification | Loose or overly tight back |
| Neckline width/depth | Measure from fixed reference points | Coverage and bust changes |
| Strap reinforcement | Visual and pull inspection | Distortion or attachment failure |
| Side-seam balance | Compare front/back alignment | Bodice rotation |
The exact production tolerances should be established according to the brand’s specification, fabric, construction method, and quality requirements. Not every measurement has the same effect on fit. A small variation in a hidden seam may have little visible impact, while a similar difference at a narrow strap anchor can noticeably change the direction in which the bodice is pulled.
This is why an effective quality specification identifies which dimensions actually drive the wearing result instead of treating every number in a measurement chart as equally critical. For backless dresses, strap anchors, neckline relationships, back-opening dimensions, and left-right balance often deserve closer attention than less visible internal dimensions.
Use First-Piece or Pilot Verification
The approved sample and the first bulk-production garment are produced under different conditions. Sample-room operators normally work more slowly and can make small adjustments as they sew. Production operators work repeatedly, often with different equipment, handling methods, pressing conditions, and material lots. Those differences can affect a fit-sensitive style even when everyone is working from the same pattern.
A first-piece or small pilot run allows the technical team to verify that the approved geometry has survived the transition into production. For a backless dress, important checks include strap symmetry, anchor location, finished length, neckline position, back-opening shape, bust balance, armhole behavior, and side-seam alignment.
If the development sample lies smoothly against the back but the first production piece gaps, the team can investigate before the issue is multiplied across a large quantity. The cause may be sewing position, pressing, fabric behavior, material-lot differences, or misunderstanding of the approved construction. Finding the source at the first-piece stage is far more manageable than discovering it after a full production run has been completed.
Final QC Must Look Beyond Stitching
A backless dress can pass a basic sewing inspection and still fail when worn. The stitching may be clean, the zipper may work correctly, and the main measurements may sit within specification, but the straps can still be uneven or the back edge can stand away from the body. Final inspection therefore needs to include the dimensions and relationships that actually control fit.
Left and right strap positions should be compared, finished lengths should be measured after final pressing, adjustable hardware should move smoothly, and narrow straps should be checked for twisting. Attachment points should be reinforced according to the construction standard, while neckline and back-opening measurements should be compared against the approved production reference.
For selected production samples, checking the garment on an appropriate mannequin, fit form, or approved model can reveal asymmetry that is difficult to see when the dress lies flat. A difference of only several millimeters between the left and right anchor points may appear insignificant on a table but become much more obvious once the two straps begin pulling the upper bodice in different directions.
The final question is therefore broader than whether the strap was sewn neatly. The real standard is whether the bulk garment still behaves like the approved fit sample. That distinction is what separates acceptable workmanship from repeatable product performance.
Backless dress fit is rarely controlled by one measurement alone. Strap length matters, but so do attachment position, angle, back depth, shoulder shape, bust projection, waist stability, material behavior, internal support, grading, and production accuracy. The more of the back structure a design removes, the more carefully the remaining support points need to work together.
A good fitting process does not automatically shorten the straps when they slip or remove fabric whenever the back gaps. It asks where the tension is coming from, changes one variable at a time, and checks whether the improvement remains after the wearer moves. Small diagnostic adjustments—sometimes only a few millimeters—can reveal whether the real problem sits at the strap anchor, the bust, the waist, the back pattern, or the fabric itself.
For fashion brands developing low-back party dresses, occasion styles, halters, corset-inspired dresses, fitted satin silhouettes, or other shape-sensitive products, this level of technical attention becomes especially valuable before the style moves from sample approval into bulk production. A beautiful backless dress should not require the wearer to keep adjusting it. When strap geometry and bodice balance are developed correctly, the engineering becomes almost invisible—and that is usually the sign that the fit is doing its job.
Frequently Asked Questions
Does shortening the straps fix a gaping backless dress?
Shortening the straps can help when the straps are genuinely too long and the upper bodice is sitting lower than intended, but it does not automatically fix back gaping. If the gap is caused by an outward strap angle, excessive back length, weak waist support, or fabric growth, shorter straps may simply pull the back corners upward. The better approach is to compare strap length, attachment position, and back shape separately before making a permanent alteration.
How far inward should backless dress straps be moved?
There is no universal measurement because the correct position depends on shoulder width, neckline shape, bust volume, back depth, and the original pattern. During sample fitting, moving an attachment point in controlled increments of around 5 mm can be useful for identifying the direction of improvement. Once the correct position is understood, the final amount should be determined from the fit result rather than treating 5 mm as a standard production adjustment.
Are cross-back straps better for a backless dress?
Cross-back straps often provide better resistance to shoulder slipping because their diagonal direction creates more inward tension. They are not automatically better for every design, however. If the straps are too short or the back attachment is too low, they can raise the neckline, pull up the open-back edge, or rotate the bodice. Cross-back designs work best when the diagonal tension supports the existing pattern rather than compensating for poor waist or bust stability.
What causes the back of a backless dress to gape?
Back gaping can come from several sources, including excess pattern length, inadequate contouring, insufficient waist stability, fabric stretch or relaxation, and incorrect strap direction. The position of the gap is useful for diagnosis. Gaping concentrated near a strap corner often suggests that strap geometry should be checked, while a gap extending along most of the back opening is more likely to involve the overall pattern shape, fabric behavior, or lower-body anchoring.
Why do the armholes gape after moving dress straps inward?
Moving a strap inward changes where tension is applied to the front bodice. Although this can improve shoulder stability, it may reduce the amount of tension holding the outer armhole close to the body. The result can be armhole or side-bust gaping. Before removing fabric from the armhole, the fitter should confirm that bust volume is correct and compare several nearby strap positions to determine whether the gap is primarily caused by the anchor location or by the bodice pattern itself.
Should backless dresses be fitted while the wearer moves?
Yes. Static fitting is necessary, but it cannot show whether a strap migrates, the neckline gradually rises, the back edge rolls outward, or the entire bodice rotates during wear. A simple movement check with walking, arm raises, sitting, standing, reaching, and gentle torso rotation can reveal these issues. The dress does not need to remain completely motionless; it should return reasonably close to its intended position without constant adjustment by the wearer.
How can strap placement stay consistent in bulk production?
Consistency depends on converting the approved sample into measurable production information. The factory should control the front and back attachment points, finished strap length, left-right symmetry, neckline and back-opening dimensions, reinforcement, and grading relationships. Fit-sensitive styles also benefit from first-piece or pilot verification before full production. Final inspection should confirm not only sewing quality but whether the production garment still reproduces the balance and wearing behavior of the approved fit sample.