Skip to content


A mesh corset dress often looks effortless in a campaign image. You see a sheer bodice, shaped cups, a clean waist, visible boning, and perhaps a fitted skirt that follows the body without a wrinkle. Behind that finished appearance, however, several materials are being asked to do almost opposite jobs. Mesh needs softness and transparency. The corset needs stability. The cups need to control bust volume. The waist needs shaping without excessive pressure. The lining must protect coverage without making the garment look heavy. The closure must remain secure even when the body moves.
A successful mesh corset dress is developed by defining the silhouette and support level first, then matching mesh, lining, cups, boning, pattern shaping, and closure construction to that goal. The first sample should test fit, transparency, stretch behavior, and support, while bulk production should begin only after materials, measurements, workmanship, and high-risk construction points have been clearly approved.
This is why reference images alone are rarely enough. Two dresses may look almost identical on screen while one depends on high-stretch power mesh and the other depends on a stable internal corset foundation. One may use its cups mainly for coverage, while another expects those cups to carry meaningful bust support. If those distinctions are missed during development, the first sample can look promising on a mannequin and still fail the moment someone walks, sits, raises her arms, or wears it for an evening.
For fashion brands, product teams, and designers, the real challenge is therefore not simply making a corset dress. It is turning a visually delicate idea into a repeatable garment in which mesh, fit, support, transparency, and production engineering work together. Duolan’s documented product focus includes fashion dresses, occasion dresses, fitted dresses, mesh dresses, and corset or bustier structures, with product development extending from material and fit decisions into sampling and production execution.
What Should You Define Before Developing a Mesh Corset Dress?
Before pattern making begins, define the silhouette, degree of support, transparency zones, target fit, closure, and wearing situation. These choices affect almost every technical decision that follows. When they remain vague, the development team ends up using the first sample to discover what the product is supposed to be rather than using it to confirm whether the planned construction actually works.
What Is the Intended Silhouette?
The first decision should be the complete silhouette, not the corset details in isolation. A strapless bodycon mini dress, a cupped midi dress, a sheer-panel maxi dress, and a structured occasion dress may all contain mesh and boning, but their internal engineering can be completely different. A short bodycon dress may rely heavily on stretch and negative ease, while a longer occasion dress may need more controlled torso structure so the skirt can fall cleanly from the waist or hip.
Start by deciding what the body is supposed to look like when the dress is worn. Should the bust appear strongly projected, naturally rounded, or lightly supported? Should the waist look sharply defined or simply smooth and contoured? Does the skirt continue the compression of the bodice, or should it become softer below the waist? These visual questions directly affect pattern reduction, panel curvature, mesh selection, boning placement, and lining strategy.
Vertical proportion is just as important as circumference. Bust point, underbust position, waist level, high hip, full hip, and final hem length should be established early. On a corset dress, even a modest error in torso length can change the entire visual balance. A waist seam that sits too high may make the bust look crowded, while one that sits too low can flatten the waist and visually lengthen the upper body.
Design teams often describe the intended look with words such as “snatched,” “sculpted,” “softly fitted,” “romantic,” or “barely there.” Those terms are useful creatively, but a pattern maker needs measurable instructions. The development process becomes much more efficient when each visual idea is translated into garment behavior: how closely the bodice should follow the body, where compression should occur, how much stretch is expected, and which areas should remain visually soft.
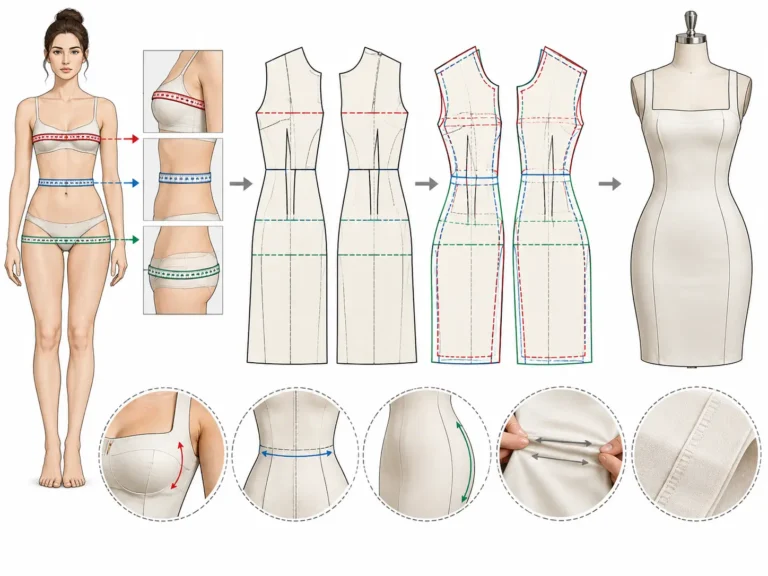
A useful starting specification is shown below. The figures are not universal garment standards; they are development checkpoints that help keep the design, pattern, and sample teams aligned.
| Development Point | What to Record | Practical Purpose |
| Bust | Full bust, underbust, cup position | Controls cup and neckline balance |
| Waist | Body waist and target garment waist | Defines contour and compression |
| Hip | High hip and full hip | Prevents pulling below the corset |
| Torso length | Shoulder/HPS to waist or relevant reference | Controls vertical proportion |
| Neckline | Width and depth | Influences coverage and support |
| Back height | Finished back level | Affects stability and closure |
| Stretch | Crosswise and lengthwise behavior | Determines ease and pattern reduction |
| Coverage | Sheer, partially lined, and lined zones | Prevents late transparency changes |
How Much Support Does the Dress Need?
Not every dress that looks like a corset needs to function like traditional corsetry. This distinction should be made before selecting cups or boning. Some styles use vertical channels and visible bones mainly to create a structured fashion appearance. Others must genuinely support the bust, stabilize a strapless neckline, shape the waist, and remain secure through several hours of wear.
A useful working classification is visual structure, moderate structure, and functional structure. A visual corset may require only enough support to keep panel seams smooth. A moderately structured bodice may shape the torso and provide light bust support. A functional structure must distribute load across cups, underbust seams, body panels, boning, the center back, and the closure rather than depending on a single piece of mesh or a tight zipper.
The most useful question is not “How many bones should this corset have?” but “Where is the tension going?” If the neckline is carrying too much load, it can pull away from the chest. If the center back is carrying too much tension, the zipper may ripple or feel difficult to close. If the cups are expected to support more bust volume than their shape allows, stronger boning will not solve the fundamental problem.
Mesh makes this especially important because it changes under load. A bodice can appear stable when placed on a mannequin, yet stretch noticeably after twenty or thirty minutes on a moving body. The upper edge may relax, the cups may shift, and the waist may migrate. A support plan should therefore define which parts of the garment are allowed to stretch and which parts need to remain relatively stable.
For fashion-focused corset dresses, the goal is usually not extreme compression. It is controlled contour. A customer should be able to see a defined waist and supported bust without feeling that the entire garment depends on excessive tightness. That balance normally comes from pattern shaping first, structural support second, and fabric tension third.
Which Areas Should Be Sheer?
Transparency should be designed before the first pattern is completed. A mesh corset dress often contains several different visual densities in the same garment, and each zone may require different material treatment. The waist might remain fully sheer, the lower cups might contain hidden support, the side bust could need partial lining, and the zipper area may require a second layer even though the surrounding back remains transparent.
A useful approach is to create a simple coverage map. Areas can be marked as fully lined, partially covered, structurally reinforced, or intentionally sheer. This gives the designer, pattern maker, sample technician, and later the production team a shared reference. Without that map, it is common for a sample room to make sensible local adjustments that unintentionally change the visual concept.
Transparency also changes under tension. A mesh that looks reasonably dense on a cutting table can become much more open when stretched across the bust or hip. A 20% or 30% extension may reveal skin, internal seams, boning channels, or cup edges that were barely visible when the material was relaxed. This is why fabric approval should include worn or stretched evaluation rather than relying only on a flat swatch.
Lighting introduces another variable. Daylight, strong indoor light, backlighting, and direct flash can create four different impressions of the same garment. A dress designed for parties, events, social media, or studio photography should therefore be reviewed in several lighting conditions during sampling. The objective is not to eliminate the sheer effect; it is to prevent the customer from discovering an unintended one after the product has already launched.
Movement should also be considered. Sitting may change how the lining sits against the mesh. Raising the arms can move a strapless neckline. Walking can cause a short lining to ride upward underneath a transparent skirt. Good transparency control therefore combines material choice, pattern placement, and real-body testing.
Which Mesh and Support Materials Should You Use?
Choose mesh according to function rather than appearance alone. Stretch, recovery, opacity, softness, strength, weight, and interaction with lining should all be checked. A successful dress may use soft fashion mesh for visual areas, stronger mesh in structural sections, and local reinforcement around cups, closures, or high-tension seams instead of forcing one material to perform every job.
Which Mesh Works Best?
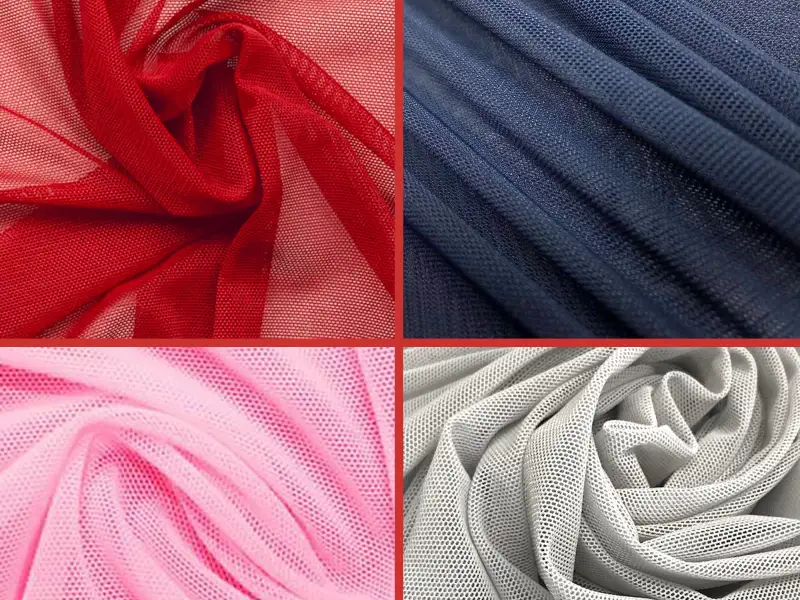
“Mesh” is not one predictable material. The name covers fabrics that can differ dramatically in elasticity, recovery, weight, yarn structure, softness, and transparency. Soft fashion mesh may drape beautifully but offer little resistance. Power mesh usually provides stronger recovery. Stable corsetry mesh can maintain transparency while limiting stretch. Tulle may create a crisp appearance but can be uncomfortable or unsuitable in areas where the garment needs to follow body movement.
The material should therefore be selected panel by panel according to its task. If the center waist is intended to look sheer but remain controlled, a more stable mesh may work better than a very soft one. If the side body needs comfort and movement, a supportive stretch mesh may be more appropriate. Decorative upper panels can sometimes use a softer fabric because they are carrying less structural load.
A simple 10 cm stretch test is useful during development. Mark 10 cm on the material without tension, stretch it to the intended working limit, and measure the new length. If the marked section extends from 10 cm to 14 cm, the extension is 40%:
(14 − 10) ÷ 10 × 100 = 40%
The test should be repeated in both directions because some meshes behave very differently crosswise and lengthwise. It can also be repeated three times to observe recovery. If the original 10 cm gauge returns to 10.5 or 11 cm rather than close to 10 cm, the material is showing growth, which may become visible during prolonged wear.
The following checks are practical development tools rather than fixed industry standards. They allow a brand to compare candidate materials consistently.
| Material Test | Simple Method | What to Record | What It Reveals |
| Crosswise stretch | Mark 10 cm and extend | Maximum comfortable length | Body-fit potential |
| Lengthwise stretch | Repeat vertically | Percentage extension | Risk of bodice growth |
| Recovery | Stretch 3 times and release | Returned gauge length | Shape retention |
| Opacity | View relaxed and stretched | Visible skin/lining | Coverage stability |
| Layer test | Combine mesh and lining | Drag, stiffness, shade shift | Finished hand feel |
| Seam test | Sew 15–20 cm | Waviness, growth, puckering | Sewing compatibility |
A material that performs well in only one category may still be the wrong choice. Excellent stretch with poor recovery can cause the neckline or waist to grow. Strong recovery with an unpleasantly harsh hand may reduce comfort. High opacity might solve coverage but destroy the desired illusion effect. Development is therefore about balancing several properties rather than chasing one “best” fabric.
Do You Need a Strength Layer?
A sheer appearance does not mean every structural component should also be sheer. In many commercially successful corset dresses, the outer mesh provides the visual effect while hidden layers carry the actual load. This separation allows the garment to look lighter than it really is structurally.
The key is to reinforce only where reinforcement is needed. High-load areas commonly include the center-back closure, underbust, side seam, waist, cup attachment, strap junctions, and the upper or lower ends of boning channels. These zones can use stronger mesh, narrow stabilization strips, lining, tape, or another appropriate reinforcement without forcing the entire bodice to become rigid.
Consider a rippling zipper. One response would be to double the whole back bodice, but that might make the garment warmer, darker, and stiffer. A better solution may be to stabilize only the zipper seam and adjacent back area. Likewise, if the cup collapses, doubling every mesh layer may not solve the problem if the real cause is incorrect cup volume or weak underbust geometry.
Reinforcement should follow tension paths. When the wearer closes the dress, where does the pulling force travel? When she raises her arms, which edge is being asked to resist movement? When the bust is supported, which seam receives that load? Answering those questions often leads to cleaner, lighter construction than simply adding more material.
During sampling, each hidden support should be recorded on the pattern or construction sheet. This matters because experienced sample makers often make small intuitive improvements while sewing. If those changes remain only in the finished sample and are not documented, the bulk production line may recreate the pattern but fail to reproduce the same stability.
Which Boning, Cups, and Lining Work Best?
Boning, cups, and lining should be treated as an integrated support system. Selecting each component independently can create conflicts. A rigid molded cup may feel disconnected from very soft mesh. A highly stable lining can fight against a stretchy outer layer. Soft cups may collapse beside firm vertical boning. The right combination depends on how the dress is expected to shape and support the body.
Flexible plastic boning is often suitable when the main purpose is keeping vertical seams clean and supporting fashion shaping. Firmer plastic, spiral steel, or other specialized options may be used where greater structural control is needed. The objective is not to use the strongest material available but to use enough support for the specific design.
Boning-channel width also matters. As a working sample-room guideline, the internal channel generally needs only a small amount of clearance beyond the actual bone width, often around 1–2 mm in total depending on fabric thickness and construction. Too much room lets the bone rotate or twist. Too little can make insertion difficult and create visible ridges.
Cup development should go beyond a simple bust size. Cup width, cup height, underbust curve, apex position, and neckline shape must relate to the actual bodice pattern. A molded cup may technically correspond to the intended size and still sit incorrectly because its underbust curve does not match the garment.
Lining should then be assessed for coverage, skin feel, stretch compatibility, seam visibility, and support. A lining that stretches significantly less than the outer mesh may carry most of the load and create drag. One that stretches much more may fail to stabilize the garment. Duolan’s documented development approach specifically highlights mesh, corset, fitted silhouettes, fabric behavior, support, fit, lining, cups, boning, and related trim decisions as critical factors in converting a design into a commercially workable dress.
How Do You Build the Corset Structure?
Build the corset from the body’s load-bearing areas outward. Bust shape, underbust position, waist contour, panel balance, boning, and back tension should be planned as one system. Boning should reinforce a correct pattern rather than compensate for an incorrect one, while cups, seams, and closures should distribute tension instead of concentrating it in a few fragile areas.

How Should the Bodice Be Paneled?
Corset panel lines perform two jobs at the same time. They create the visual language of the garment, and they control how a three-dimensional body is shaped from flat pieces. This means panel placement should never be decided only because a seam looks attractive on a sketch.
A common construction may include center-front, side-front, side, and back panels, although the exact number can vary widely. The important question is what each seam is doing. A side-front seam may shape bust projection while narrowing toward the waist. A side seam balances front and back volume. Back panels may need enough stability to support a zipper or lace-up closure.
Boning placement should be considered before finalizing panel lines. If the bone follows a seam, the seam geometry has to accommodate it. A strongly curved seam can create a very attractive silhouette, but the boning must still lie close to the body rather than bridging away from the curve. If decorative seams and structural channels are crowded into the same area, the construction can become unnecessarily bulky.
Symmetry is especially visible in transparent corsetry. A difference of only a few millimeters between left and right panel shapes can become obvious once boning creates strong vertical references. Pattern symmetry, cutting accuracy, seam width, and channel placement should therefore be checked before the corset is fully assembled.
During the first sample, selected fit-sensitive seams can retain slightly more working allowance than the final production pattern. This gives the pattern maker room to adjust bust balance, waist shaping, or side-body distribution. Once the fit is approved, the production pattern should standardize the final allowances so the result can be repeated consistently.
The best panel map usually looks simple when the garment is finished because every seam appears intentional. Achieving that simplicity often requires more thinking before sewing, not more decoration afterward.
How Do Cups Fit the Corset?
The cup should feel visually and structurally integrated into the bodice. When a molded cup looks as though it has simply been inserted into a mesh dress, the problem is often not the cup itself but the relationship between cup volume and the surrounding corset.
Four measurements deserve particular attention: cup width, cup height, apex position, and underbust seam length. The bust apex should align with the cup’s intended projection. If the apex is too high, the lower cup can become compressed while the upper edge gaps. If it is too low, the bust may sit above the intended support area.
The underbust seam should match both the body and the cup curve. Small differences in seam length can create puckering, twisting, or a cup that sits unevenly. These issues are especially visible in mesh because the fabric does not hide irregular construction as easily as an opaque, textured material.
Cup fitting must also be reviewed from the side. A front photograph can look excellent even while the side view shows the bust being pushed downward, excessively outward, or away from the body. A proper fit review should include front, both 45-degree views, a full side view, and the back.
Sheer cups require an additional decision: where will the support come from? The design may use underwire, a partially hidden lower cup, an internal supportive mesh, a narrow lining zone, or the lower corset itself. Removing visible structure for aesthetic reasons does not remove the body’s need for support.
This is one reason the cup should be treated as part of the corset architecture rather than a trim component. Changing cup volume can change neckline tension, side-bust fit, waist balance, and even the position of nearby boning.
Where Should Boning and Closures Be Placed?
Boning works best when it supports existing pattern lines and tension paths. Common locations include the center front, shaping seams, side body, and areas close to the back closure. More bones are not automatically better. If a pattern is fundamentally unbalanced, adding extra rigid elements can simply make the wrong shape harder.
Each bone should have a clear purpose. Some stabilize vertical seams. Others resist folding at the waist. Others support a neckline or help distribute tension near the back. If the development team cannot explain what a bone is doing, it may be unnecessary.
Bone length and end position also need attention. A bone that stops directly at a pressure point can become uncomfortable or eventually push against the fabric. Ends should be appropriately finished or protected, and the placement should allow the garment to bend where the body naturally bends.
Closures form part of the same structural system. Invisible zippers create a clean appearance, but they should not be expected to absorb all the load from an aggressively fitted corset without adequate stabilization. Lace-up backs offer adjustability but concentrate force around eyelets or loops, which normally require reinforcement. Hook-and-eye systems can distribute tension effectively but may need an underlap for comfort and coverage.
A simple sample test is to open and close the garment around ten times before approval. This is not a formal universal test standard, but it often reveals early zipper rippling, eyelet movement, edge distortion, or hook strain. It is much cheaper to discover these problems on one development sample than after hundreds of garments have been sewn.
How Do You Control Fit and Sheer Coverage?
Control fit by balancing contour, compression, support, and material stretch rather than simply making the pattern smaller. The bust, waist, lining, mesh, boning, and closure must work together. Transparency should also be reviewed under stretch, movement, and different lighting conditions because the appearance of a sheer corset can change substantially once it is worn.

How Should Bust and Waist Fit Be Balanced?
The best corset fit is not necessarily the tightest fit. In commercial fashion, the objective is usually a controlled silhouette that looks sculpted while remaining wearable. Excessive waist reduction can create several secondary problems: side seams rotate forward, cups are pulled downward, the skirt rides up, the back closure becomes overloaded, and the wearer feels concentrated pressure around the waist.
It helps to separate three ideas that are often mixed together. Contour describes how closely the garment follows the body. Compression describes how much it reduces or holds body volume. Support describes how the structure stabilizes the bust or torso. A dress can be strongly contoured without extreme compression, and it can provide meaningful bust support without behaving like a traditional tight-lacing corset.
During fitting, review at least the bust apex, cup edge, underbust, natural waist, side seam, and center back. These points should remain reasonably stable not only when the wearer stands still but also when she moves. A sample that looks perfect in a static front photograph may behave very differently after the wearer walks across a room or sits down.
The waist should also be evaluated in relation to the hip and skirt. If the bodice is very fitted while the skirt has insufficient ease or stretch, movement can pull the entire dress upward. The resulting complaint may sound like a waist-fit problem even though the true cause is lower-body tension.
A good fit review asks whether the garment maintains its intended proportions over time. If the neckline drops, the waist climbs, or the side seam twists after twenty minutes, the sample is providing useful information about fabric recovery, pattern balance, and structural load.
How Do You Prevent Mesh Distortion?
Mesh distortion usually appears when different parts of the garment are under different levels or directions of tension. Common causes include inconsistent spreading, incorrect stretch orientation, cutting under tension, seam growth, excessive stitch tension, uneven reinforcement, or a closure carrying more load than the adjacent mesh can support.
Fabric should be allowed to relax appropriately before cutting, particularly when it has been tightly wound. During spreading, the material should lie naturally. Pulling it smooth across the cutting table can make the pieces look precise while introducing hidden stretch that releases later.
Stretch direction should be clearly marked. If one panel is cut with the primary stretch running crosswise while a matching panel is slightly off-grain, both pieces can initially measure the same yet behave differently during wear. This type of mismatch often appears later as twisting, uneven waist tension, or a vertical boning line that refuses to remain straight.
Seam lengths should be compared before stitching. Soft mesh can grow during handling. If one side of a seam becomes 5–8 mm longer than its matching side, forcing the pieces together may temporarily hide the difference but often creates puckering or torque once the garment is worn.
A short sewing trial can save substantial development time. Sewing a 15–20 cm test seam allows the sample room to check needle choice, thread, stitch length, machine tension, and feeding before assembling the entire garment. If the test seam waves or grows, the problem should be corrected before boning is introduced.
Boning frequently makes existing mesh distortion more visible rather than causing it. Once a semi-rigid vertical element is inserted, surrounding imbalance becomes easier to see. This is why seam and panel stability should be solved first instead of expecting the bone to straighten an unstable construction.
How Do You Control Transparency?
Transparency should be treated as a controlled product characteristic. It changes with fabric density, color, skin tone, stretch, layer count, lighting, seam allowance, and internal construction. A material that appears suitable on a swatch card may look dramatically more transparent across the bust or hip.
A practical development method is to create a visual coverage map. Fully lined areas can be differentiated from partially covered and intentionally sheer zones. The same map can also identify where reinforcement or cup materials will be visible through the outer mesh.
The finished sample should then be reviewed under several lighting conditions. Normal indoor lighting, daylight, strong backlighting, and direct camera flash reveal different things. In pale or nude mesh, the color of the lining and internal components can be particularly important. A lining that is only slightly different in tone may become much more obvious once the mesh stretches.
Construction details also influence transparency. Seam allowances can create dark bands. Boning channels can produce deliberate vertical lines or unwanted shadows. Cup foam can show through at the upper edge. Zipper tape can appear noticeably darker than the surrounding back.
These details do not all need to disappear. Visible construction is part of the aesthetic of many modern corset dresses. The difference between a premium-looking sheer dress and an unfinished-looking one is often whether those visible elements appear planned and consistent.
Coverage should finally be checked in movement. A lining that appears correctly positioned while standing may ride upward after walking. A bust edge may become more exposed when the arms are raised. The intention is not to make a sheer dress conservative; it is to ensure that the amount of exposure remains controlled by the design rather than by chance.
How Should You Develop and Fit the First Sample?
The first sample should test the highest-risk decisions: silhouette, mesh behavior, bust support, waist balance, transparency, closure stability, and basic construction. It does not need every decorative detail to be final. A useful first sample gives the brand enough evidence to decide what is correct, what requires adjustment, and whether the proposed structure can realistically move toward production.

What Should the First Sample Test?
The first sample should answer defined questions rather than simply prove that the factory can make a garment resembling the reference. This distinction is important because a highly polished sample can still be technically unhelpful if no one knows which variables were actually being tested.
For a mesh corset dress, the first fitting should prioritize silhouette, bust support, waist balance, fabric tension, transparency, closure, and skirt behavior. Trims or embellishments that do not affect structure can often be refined later. Trying to perfect every visual detail during the first round can distract the team from more fundamental problems that may force a pattern or material change.
A consistent review method helps compare one round with the next. The following tests are practical sample-development checks rather than mandatory industry standards.
| Sample Check | Practical Method | What to Observe |
| Bust support | Stand, turn, and raise arms | Cup movement and neckline stability |
| Waist balance | Front and side review | Pressure, seam position, body contour |
| Closure | Open and close around 10 times | Rippling, pulling, hardware stress |
| Walking | Take 10–15 normal steps | Skirt ride-up and seam migration |
| Sitting | Sit for about 60 seconds | Waist pressure and bodice lift |
| Transparency | Review in 4 lighting conditions | Coverage and internal visibility |
| Recovery | Wear for 20–30 minutes | Mesh growth and silhouette change |
The result should be a clear list of what has been approved and what still needs work. Comments such as “fit is not right” are rarely useful enough. “Cup apex needs to move 8 mm inward” or “center-back mesh is growing after wear” gives the next sample a concrete objective.
The company’s documented sample-development process similarly emphasizes defining fit priority, fabric direction, sample purpose, support, coverage, and construction risks before treating the first sample as decision-ready. This approach is particularly valuable for mesh corsetry because changing one component often affects several others.
A strong first sample is therefore not necessarily the prettiest sample. It is the sample that reduces uncertainty.
How Should You Review the Fit?
Fit review should combine measurement, visual assessment, and movement. Begin by comparing the garment with the agreed specification. Bust, underbust, waist, high hip, full hip, bodice length, back height, and overall dress length are among the measurements that commonly influence a corset silhouette.
Measurements alone cannot explain whether body volume is distributed correctly. A garment can match every flat measurement and still look wrong because the cup projection, waist position, or front-to-back balance is incorrect. This is why fit photographs are valuable.
Use consistent front, 45-degree, side, and back views. Whenever possible, photograph revisions from approximately the same distance, height, and body posture. Otherwise camera perspective can make one sample look narrower or longer even when the pattern change was minimal.
Movement testing should be equally routine. Ask the wearer to lift the arms, walk, sit, and return to standing. Watch whether the neckline remains against the body, whether the corset rises, whether the side seam rotates, whether the skirt rides up, and whether the garment returns to its intended position afterward.
Comments should then be sorted by cause. A shallow cup is primarily a pattern or fit issue. A mesh that looks too shiny is a material issue. A wavy channel may be a sewing or stabilization issue. A neckline the design team simply no longer likes is a creative preference.
This separation is important because the wrong diagnosis leads to unnecessary revisions. If a sewing problem is treated as a pattern problem, the pattern may be changed even though the original geometry was correct. The next sample can then introduce new fit issues while the original distortion remains.
Which Problems Require Pattern Changes?
One of the most valuable skills in fitted-dress development is identifying whether the pattern is actually responsible for the problem. Many defects have several possible causes.
A gaping neckline can result from excess pattern length, but it can also appear because the mesh edge grew during sewing. A side seam moving forward may indicate incorrect front-to-back body balance, but it can also come from different stretch behavior between front and back panels. A rippling zipper could be a back-pattern issue, or it could simply require better stabilization.
A useful diagnostic order is pattern, material, construction, component, and finishing. First decide whether the underlying shape is correct. Then ask whether the material can maintain that shape. Next examine sewing methods. After that, assess cups, boning, zipper, elastic, or other components. Finishing should be considered last.
Pattern revisions are appropriate when body balance, shaping, measurement distribution, panel geometry, or seam length is fundamentally incorrect. Material changes are more appropriate when stretch, recovery, thickness, or opacity is causing the failure. Construction changes solve problems created by sewing, stabilization, or assembly.
Avoid changing every variable in one revision. If the cup pattern, outer mesh, lining, waist reduction, boning, and zipper are all changed simultaneously, the next sample may look better, but no one will know which change produced the improvement.
For complex fit problems, solving three or four major issues in a controlled revision is often more useful than making a dozen unrelated alterations. The goal is not to maximize the number of comments completed. The goal is to move the product predictably toward approval.
How Do You Make a Mesh Corset Dress Production-Ready?
A mesh corset dress becomes production-ready when its approved materials, pattern, fit, construction, and visual standards are converted into repeatable manufacturing instructions. Before bulk cutting, the team should lock the mesh, lining, cups, boning, closure, measurements, workmanship, transparency, and critical quality points, then verify the most sensitive areas before releasing the full production quantity.
What Should Be Locked Before Bulk?
A sample that looks good is not automatically ready for production. During development, an experienced sample maker may make dozens of small adjustments: slightly changing a seam, trimming a cup edge, adding a hidden strip of reinforcement, altering channel tension, or easing one area by hand. If those decisions are not documented, the production line may copy the visible sample without understanding how the result was achieved.
Before bulk cutting, the final pattern version should be clearly identified. The approved outer mesh, lining, cup specification, boning type, channel method, zipper or other closure, seam construction, measurement chart, grading basis, and transparency standard should also be confirmed.
Material approval should consider layer combinations rather than individual swatches. A nude outer mesh placed over a slightly different lining may produce an obvious color shift. The same outer fabric can also look darker where two layers overlap. Approving the complete material stack helps reduce surprises.
Critical measurements should be distinguished from general measurements. Cup placement, center-front length, waist, underbust, back height, and key panel widths often affect the visual result more strongly than less sensitive measurements. They deserve clear tolerances appropriate to the brand’s specification and garment construction.
Duolan’s documented production process follows the same principle by requiring fabric, lining, trims, measurements, workmanship, and the status of the approved sample to be reviewed before bulk manufacturing begins.
The purpose of this stage is simple: remove unnecessary interpretation. A line operator or another factory team should not have to guess what the sample maker intended.
How Do You Prevent Bulk Variation?
Bulk consistency begins by identifying where small deviations create large visual consequences. In a loose dress, several millimeters of variation may be difficult to notice. In a transparent corset bodice, the same variation can move a cup, shift a boning line, change neckline symmetry, or make the lining visible in the wrong place.
Incoming material should therefore be compared with the approved development material. The same 10 cm stretch and recovery test used earlier can be repeated on bulk mesh. The objective is not to enforce an arbitrary universal percentage. It is to identify whether the bulk fabric behaves materially differently from the sample lot.
Quality control should also occur before final inspection. Cup placement is easiest to correct before the bodice is fully closed. Boning channels should be checked before every bone is inserted. Back stabilization should be reviewed before the zipper is completely finished. If these checks are postponed until the final garment, repair may require extensive disassembly.
Production teams should also use physical references where possible. Templates for cup placement, clear boning maps, approved seam samples, and marked reference garments reduce dependence on verbal instructions. This becomes increasingly important when multiple operators or lines are involved.
The biggest production risk is not always an obvious defect. Gradual variation across the order can be equally damaging. The first twenty pieces may match the sample, while later pieces slowly change because machine settings, handling, or material tension drifts. Inline checking helps identify that change before it becomes the new normal.
For repeat orders, the approved specifications should remain accessible. A brand should not have to rediscover the correct cup, mesh, or boning combination every season. Repeatability is one of the clearest differences between a successful sample and a reliable commercial product.
Which Risks Need a Pilot Run?
A structure-sensitive dress benefits from first-piece or pilot verification before the entire order is released. The purpose is not simply to make another sample. It is to determine whether the production method can reproduce the approved result under real manufacturing conditions.
A development sample is often sewn by a highly experienced sample maker who handles the garment carefully and makes small corrections while working. Bulk production involves different operators, standardized processes, higher speed, and repeated handling. A construction that succeeds once may not be stable enough to repeat efficiently.
For a complicated mesh corset dress, checking several early production pieces can reveal more than checking only one. A review of three to five pieces, for example, may expose variation in cup placement, zipper installation, boning channels, or seam tension. The exact number should depend on product complexity, order size, and the brand’s own quality system rather than being treated as a universal rule.
Three questions are particularly useful. Can several garments reproduce the same silhouette? Can the sewing method be repeated without excessive correction or rework? Does the bulk material behave like the approved sample material?
The company’s manufacturing framework specifically identifies corset and bustier dresses, mesh-layered dresses, fitted silhouettes, and other structure-sensitive products as styles where first-piece or pilot verification can be valuable before a full production run is released.
The real production target is not one perfect sample. It is a system that can make the approved design repeatedly across sizes, colors, production batches, and future orders while preserving the fit, support, transparency, and visual proportions that made the original sample successful.
Conclusion
Developing a mesh corset dress successfully means treating it as a complete engineered garment rather than a collection of fashionable details. Mesh, cups, boning, lining, pattern shaping, closure, and skirt fit continuously affect one another. A decision that improves transparency can reduce support. A stronger lining can improve stability but change hand feel. A tighter waist can sharpen the silhouette while creating new stress at the bust, hip, or zipper.
The most efficient development process therefore begins by defining what the finished garment is supposed to do, not simply what it is supposed to resemble. Once silhouette, support, and coverage are clear, materials can be selected for measurable reasons. Pattern and structural decisions can then be tested through samples, movement, stretch, transparency, and recovery rather than relying entirely on static photographs.
For brands developing fitted, party, occasion, or fashion-forward collections, this discipline matters even more when the product is expected to move from a single sample into repeated production. A reliable manufacturing partner should be able to discuss not only whether a mesh corset dress can be made, but also where it may fail, what needs to be tested, and how the approved result can be carried into bulk production without losing the design intent. That is ultimately what turns an attractive reference into a commercially dependable garment.
Frequently Asked Questions
What Is the Best Mesh for a Corset Dress?
There is no single mesh that works best for every corset dress. Soft stretch mesh works well for delicate visual panels, while power mesh generally provides stronger recovery and support. Stable corsetry mesh can be useful where transparency is required but uncontrolled stretch is not. The best choice depends on where the material is used, how much tension it carries, how transparent the design should remain, and how it interacts with the lining and internal structure.
Does a Mesh Corset Dress Need Boning?
Many mesh corset dresses benefit from boning, but the amount and type depend on the function of the bodice. A fashion corset may need only enough boning to maintain clean vertical lines and prevent folding, while a more supportive strapless or bustier-style dress may require stronger structural control. Boning should reinforce a correctly shaped pattern; adding more boning cannot reliably repair incorrect cup volume, waist balance, or poor material selection.
Can Stretch Mesh Be Used for a Structured Corset?
Stretch mesh can be used successfully, but the garment usually needs a clear strategy for controlling stretch. Supportive power mesh, local reinforcement, lining, boning, cups, and stabilized closure areas can allow the design to retain a soft appearance without becoming unstable. The amount of stretch and recovery should be tested in both directions because a material that stretches easily but does not recover well may cause neckline growth, waist movement, or loss of shape after wear.
How Do You Stop a Mesh Corset Dress From Gaping at the Bust?
Bust gaping should first be diagnosed rather than immediately solved by tightening the neckline. Common causes include incorrect cup volume, a misplaced bust apex, excess length at the upper bodice, insufficient underbust support, or mesh growth during sewing. Review the cup, neckline, underbust seam, and side-bust balance together. If the pattern is correct but the edge is stretching, stabilization may be more effective than making the entire upper bodice smaller.
How Many Samples Are Usually Needed for a Mesh Corset Dress?
There is no universal number because complexity, starting information, fabric behavior, and fit expectations differ between projects. A well-prepared style may reach approval after a first prototype and one focused revision, while a complicated cup, strapless neckline, unusual mesh, or new fit block may require additional rounds. The more useful measure is whether each sample answers clearly defined questions and reduces uncertainty rather than simply generating another version of the garment.
How Should Transparency Be Tested Before Production?
Transparency should be reviewed using the final material combination, not only a single flat mesh swatch. Check the garment while worn and under tension, then view it in daylight, normal indoor lighting, strong backlighting, and direct camera flash. Review the bust, side body, waist, back, skirt lining, seams, boning channels, cup edges, and zipper tape. The objective is to ensure that visible construction and exposed areas match the design intention consistently.
What Should a Brand Approve Before Bulk Production?
Before bulk production, the brand and manufacturing team should have a clearly approved pattern, size specification, outer mesh, lining, cups, boning, closure, seam construction, transparency standard, workmanship details, and representative sample. High-risk areas such as cup position, neckline stability, zipper reinforcement, mesh stretch, and boning alignment should also be checked during first-piece or pilot production so problems can be corrected before they affect the full order.