Skip to content


Bias-cut dresses have a habit of exposing problems that stay almost invisible in ordinary straight-grain garments. A paper pattern can measure perfectly, both side seams can be walked and matched, and the first sample can look clean when it leaves the machine. Then the dress hangs, the cloth settles, or the sample goes onto a fit model and one seam begins drifting toward the front while the other side seems to pull backward. On satin, charmeuse, viscose, or another smooth fabric, the surface reflection makes even a small twist or ripple much easier to see.
Bias-cut side seams stay balanced when the front and back panels use compatible grain directions, the pattern distributes body tension correctly, the fabric is cut and sewn without stretching, and the finished garment is allowed to relax before final approval. True bias is about 45 degrees to warp and weft, but equal angles do not guarantee equal drape because the two yarn systems can behave differently.
The useful way to approach the problem is to stop treating the side seam as an isolated line. It is the visible result of several decisions made earlier: grain direction, front-to-back pattern balance, fabric choice, cutting accuracy, sewing feed, pressing, lining behavior, and the timing of the final fit review. When these variables are checked in the order they enter the garment, most bias problems become much easier to diagnose. A seam that twists is not simply telling you that the seam is wrong; it is telling you where to start asking better questions.
What Makes Bias-Cut Side Seams Lose Balance?
Bias-cut side seams lose balance when adjoining panels stretch, rotate, or settle at different rates. Common causes include unequal bias behavior, inaccurate grain placement, front-to-back fit imbalance, sewing stretch, pressing distortion, and a lining or zipper that restricts one side more than the other. A seam can match perfectly on the paper pattern and still drift, ripple, spiral, or create an uneven hem after the garment hangs.
What Is Bias Side-Seam Balance?
A balanced bias side seam is judged on the finished garment, not only on the pattern table. The seam should remain close to its intended anatomical position and travel cleanly from the underarm or waist toward the hem without progressively rotating to the front or back. Bias fabric has more mechanical freedom than straight-grain fabric because the warp and weft yarns can shift relative to each other when loaded diagonally. True bias is approximately 45 degrees to the lengthwise and crosswise grain, but a 45-degree placement alone does not guarantee balance. Yarn density, finishing tension, fabric weight, fiber content, and the garment’s own length influence how the panel settles. In practice, pattern balance should be reviewed at four different moments: on paper, immediately after cutting, after sewing, and after the completed garment has relaxed. Those four checks answer different questions and prevent a development team from changing the pattern to compensate for a cutting or sewing error.
How Do Warp and Weft Affect Drape?
Warp and weft are often discussed as if they were mechanically identical, yet real fabrics rarely behave that neatly. Warp yarns are held under controlled tension during weaving, while weft yarns are inserted across them, and the two systems may differ in yarn count, density, twist, finish, or residual tension. Once the pattern is rotated onto the bias, those differences begin acting diagonally through the garment. A long skirt makes the effect easier to see because gravity has more fabric weight to work with and more distance over which a small difference can accumulate. For development, compare both bias directions instead of testing only one 45-degree strip. If +45 degrees and -45 degrees show noticeably different growth or recovery under the same hanging condition, the cutting layout deserves attention before the sample is approved. The key is not to chase a universal percentage, but to learn how the exact fabric lot behaves in the exact directions used by the style.
Which Defects Signal Imbalance?
Side-seam imbalance rarely produces only one symptom, so the timing and location of the defect are useful diagnostic clues. A seam that is already displaced on the cut panel points toward grain placement or handling. A seam that becomes wavy immediately after sewing points more strongly toward feeding, tension, or pressing. A seam that looks clean at first but rotates after several hours of hanging suggests bias relaxation or an incompatible panel relationship. If the garment hangs correctly off the body but the seam moves when worn, front-to-back fit distribution becomes more important. Local bagging at the hip can come from excess effective length, body-shape mismatch, or a fabric that is growing more in one area than another. The practical habit is to record when the defect first appears instead of correcting the final symptom blindly. That simple timeline often narrows five possible causes to one or two likely sources.
| Visible symptom | First area to check | Likely explanation |
| Side seam drifts forward | Fit and grain relationship | Front/back distribution or unequal panel growth |
| Side seam drifts backward | Fit and grain relationship | Front/back distribution or diagonal behavior |
| Whole dress spirals | Panel layout | Incompatible bias directions around the body |
| One seam ripples | Sewing and pressing | Unequal feeding, stretching, or heat/steam handling |
| Hem drops on one side | Relaxation | Unequal settling after hanging |
| Shell and lining separate in length | Component compatibility | Different growth between shell, lining, or zipper area |
How Should Bias-Cut Panels Be Laid Out?
Bias-cut panels should be laid out so adjoining pieces use compatible diagonal directions and the garment does not develop a dominant rotational pull. True bias is approximately 45 degrees to warp and weft, but angle alone is not enough. Grain consistency, mirrored orientation, fabric relaxation, accurate single-layer cutting, and the relationship between front and back panels all influence how the finished dress hangs.
Do Front and Back Need Opposite Bias?
Front and back panels do not automatically have to be cut in opposite bias directions for every design, but their relationship should always be deliberate. Think of the two bias directions as / and \. If every major panel is laid in the same diagonal direction, a long or fluid dress can develop a preferred direction of rotation, especially when the two fabric diagonals do not behave identically. Alternating compatible directions around the body can help distribute that movement more evenly, but the correct arrangement depends on the style, seam placement, fabric structure, and whether the pattern includes center-front or center-back seams. The issue becomes more sensitive as garment length, fabric weight, and surface smoothness increase. A short camisole in stable crepe may tolerate a layout that creates visible twisting in a narrow satin maxi dress. Once the final sample is approved, grain orientation should be documented on every major pattern piece so repeat production does not depend on a cutter remembering how the first sample was arranged.
How Do You Check True Bias?
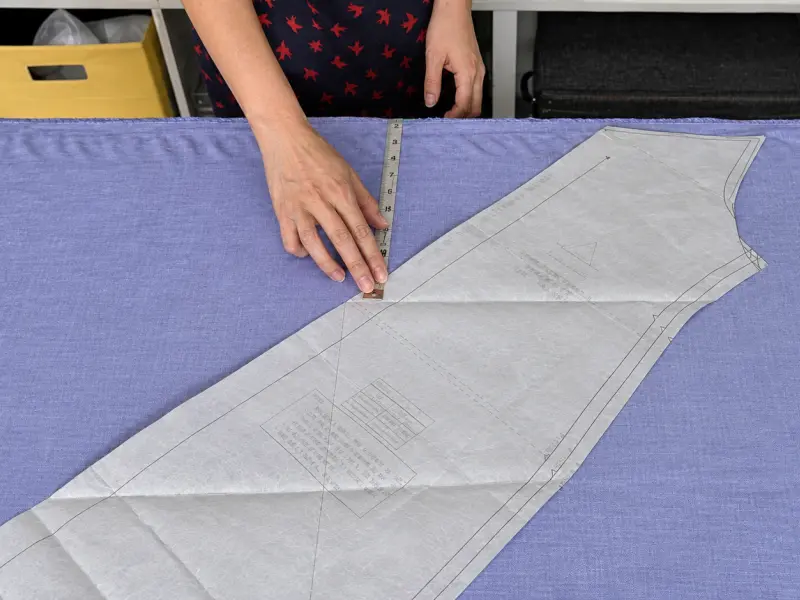
True bias is located at roughly 45 degrees to the lengthwise and crosswise grain, but accurate production cutting means more than placing one point of the pattern at 45 degrees. The full grainline should stay consistent across the entire pattern length. On a long slip-dress panel, it is useful to extend the grain reference and compare more than one measurement back to a stable selvage or confirmed straight-grain reference. If both ends of the grainline sit correctly, the pattern is less likely to have rotated during placement. Slippery satin, charmeuse, viscose, and chiffon often benefit from single-layer cutting during development because the lower ply can otherwise move independently of the upper layer. The fabric should also be relaxed and supported before cutting rather than pulled square by force. Pattern weights, careful pinning outside visible areas, sharp cutting tools, and a stable cutting surface all help, but the central objective is simple: preserve the intended grain without introducing tension before the first seam is sewn.
Is a Center Seam Better?
A center seam can improve control in some bias garments because it allows the left and right halves to be cut on opposing diagonal directions. This can be useful when testing shows that the two bias directions behave differently or when a long garment needs stronger symmetry. It is not automatically the better design, however. A clean satin front may rely on an uninterrupted surface, and adding a seam changes both the visual language and the sewing workload. The decision should balance appearance against stability. A center seam becomes more attractive when the fabric has noticeable directional imbalance, the dress is long, or the seam can become part of the design through chevrons, stripes, or matched directional prints. It is less attractive when the intended product depends on a smooth, minimal front. The useful development question is not whether bias garments require a center seam, but whether this fabric and silhouette can maintain the required symmetry without one.
How Do You Balance the Pattern?
A bias pattern is balanced by checking seam geometry, body distribution, grain behavior, and post-relaxation fit together. Equal side-seam lengths are only the starting point. The seam must also remain in its intended position over the bust, waist, and hips. When it moves, the cause may be pattern distribution, fabric growth, cutting distortion, or sewing stretch, so each source should be tested separately.

Do Equal Seam Lengths Guarantee Balance?
Equal paper-pattern seam lengths do not guarantee equal finished seam lengths because bias edges can change during handling, cutting, sewing, pressing, and hanging. Start with conventional pattern control: walk the front and back seam lines without including seam allowance, confirm notches, and identify any intentional ease. Then check the cut panels before they reach the machine. Measuring again after sewing can reveal whether one layer was fed longer than the other, while a post-relaxation check shows how the material itself has settled. The important point is not to impose one universal tolerance on every bias fabric. Instead, use the sequence to identify where the difference entered. If both paper seams are equal but one cut edge becomes longer, the pattern is not the immediate problem. If the difference appears only after sewing, review handling and machine feed. If it appears mainly after hanging, the fabric and grain relationship need more attention.
| Check stage | What to record | What the result tells you |
| Paper pattern | Seam-line length, notches, intended ease | Whether the geometry starts correctly |
| After cutting | Panel edge length and grain orientation | Whether cutting or handling changed the piece |
| After sewing | Finished seam length, rippling, layer match | Whether feed, tension, or handling distorted the seam |
| After relaxation | Side-seam position and hem level | How the material settles under its own weight |
| On fit model | Forward/back movement at bust, waist, hip | Whether body distribution is pulling the seam |
How Do You Check Front-to-Back Pull?
The side seam is one of the most useful visual indicators of front-to-back fit distribution. First observe the garment hanging freely. If the seam is already rotating before the dress is placed on a body, grain orientation, cutting, sewing, or relaxation is likely involved. If it hangs vertically off the body but moves significantly when worn, the pattern’s distribution over the bust, waist, or hip becomes a stronger suspect. On fitted bias dresses, the full hip often reveals the problem because the fabric must travel around body curvature while still maintaining a clean vertical fall. The bust can create the same effect higher up if the front panel lacks effective length or width. Front, side, and back photographs taken at the same camera height are useful during fitting rounds because subtle seam movement is easier to compare between versions. Marking the intended side line on the dress form also helps show whether the displacement is local or continuous.
Which Pattern Points Need Correction?
Pattern corrections should be tied to body landmarks rather than made as a broad side-seam reshaping without evidence. The most useful checkpoints are usually the underarm, natural waist, high hip, full hip, upper thigh, and hem. If the seam is correct at the waist but sits 8 to 10 mm too far forward at the full hip, the correction should focus on that zone and may involve redistributing width between front and back while keeping the total circumference unchanged. That is different from simply adding or removing size. Bias garments need another review after the corrected sample has relaxed, because a seam drawn perfectly during fitting can move again as the cloth settles. It is helpful to label each change as a fit correction, grain correction, or process correction. Keeping those three categories separate prevents the pattern from becoming a record of unrelated compensations and makes later repeat-order troubleshooting much faster.
Which Fabrics Need More Bias Control?
Fluid, slippery, lightweight, loosely woven, or directionally unbalanced fabrics usually need more bias control. Satin, charmeuse, viscose, chiffon, and lightweight crepe can magnify small differences in grain, cutting, and seam handling. Before an approved pattern is released for production, the actual fabric should be checked carefully for diagonal growth, drape, weight, recovery, surface sensitivity, and compatibility with the intended silhouette.

How Does Satin Behave on the Bias?
Satin is unforgiving because it combines fluid movement with a smooth surface that makes technical imperfections easy to see. A seam ripple that almost disappears in a matte crepe can reflect as a bright-dark wave on satin, while the fabric’s diagonal mobility allows the shape to continue changing after assembly. The word satin also does not describe one fixed mechanical specification. Polyester satin, silk charmeuse, acetate satin, and viscose satin can differ substantially in weight, finish, friction, yarn density, recovery, and diagonal growth. A pattern approved in one satin should therefore not be assumed to behave identically in another fabric that merely looks similar. During material evaluation, look beyond color and handfeel to surface friction, opacity, diagonal extension in both directions, response to steam, tendency to mark, and the way the fabric falls over curves. Long slip dresses expose these differences quickly because the smooth skirt gives the eye a continuous line from hip to hem.
Which Fabric Tests Predict Growth?
A simple directional hanging test can reveal potential bias problems before a full sample is made. For a practical in-house comparison, prepare equal strips or panels from warp, weft, +45-degree bias, and -45-degree bias. A 500 mm gauge length is easy to measure and convert to percentage change, but it is a development method rather than a universal industry standard. Record the relaxed starting length, suspend every specimen under the same condition, and take readings at the same intervals, such as an early check and a 24-hour comparison. The most important observation is often not how much the bias grows compared with straight grain, but whether the two diagonal directions differ from each other. Record millimeter change, percentage change, recovery after unloading, and any visible skew. These tests provide a warning rather than an automatic pattern allowance. The finished garment remains the final decision because seams, facings, zippers, lining, and body shape redistribute the loads in ways a strip cannot reproduce.
| Test item | Practical setup | Record |
| Gauge length | 500 mm sample or controlled test panel | Starting length in mm |
| Directions | Warp, weft, +45 deg, -45 deg | Direction of each specimen |
| Early check | Same hanging condition for all pieces | Initial movement and skew |
| 24-hour comparison | Same support and environment | Length change in mm and % |
| Recovery check | Allow specimen to rest after unloading | Permanent growth versus recovery |
| Garment confirmation | Repeat evaluation on sewn sample | Seam position, hem, drape, lining interaction |
Do Linings and Zippers Change Balance?
Yes. A fluid bias shell and its support components do not necessarily grow together. A lining cut on a more stable grain can restrict an outer layer that wants to settle, while an invisible zipper introduces stable tape into one seam and can make that side behave differently from a completely free side seam. The result may be blousing, local pulling, hem mismatch, or a seam that looks balanced before lining but shifts afterward. The answer is not to make every component equally stretchy; it is to manage the relationship intentionally. During development, compare shell grain with lining grain, shell growth with lining growth, zipper-side behavior with the opposite seam, and the attachment points where the layers are forced to share length. When the shell fabric is substituted for cost, color, or availability, repeat this check. A new material can look almost identical while changing the diagonal behavior enough to disturb a previously approved pattern and lining relationship.
How Do You Sew Bias Side Seams Without Distortion?
Bias side seams should be sewn with enough support to prevent stretching, layer slippage, and uneven feeding. The fabric should not be pulled into or away from the machine, and the garment weight should be supported on the table. Needle, thread, stitch formation, presser-foot pressure, seam construction, and pressing should be tested on the actual production fabric rather than copied automatically from another satin or crepe style.

How Do You Prevent Seam Stretching?
The simplest handling rule is also one of the most important: do not stretch the seam while trying to control it. Bias edges can lengthen with surprisingly little force, and the lower part of a long skirt hanging from the machine bed can create enough weight to change the seam before the operator notices. Support the garment on the table, align notches without pulling one layer to meet the other, and use temporary basting when the fabric is too slippery for reliable direct sewing. Intermediate matching points help reveal whether one layer is feeding faster than the other. Pressing should also be controlled because sliding a hot, steamed iron along a bias seam can lengthen it. A lift-and-place motion is safer than pushing the iron down the seam. During development, compare a few identical trial seams sewn with different handling methods, then measure the seam before sewing, after sewing, and after pressing. The method that gives the cleanest, most repeatable result should become part of the workmanship standard.
Which Sewing Settings Help?
There is no responsible universal machine setting for every bias satin because needle choice, thread, stitch density, presser-foot pressure, and tension must match the fabric construction and seam type. Fine satin and charmeuse generally need a clean, sharp penetration that does not push or snag the yarns, while a heavier crepe may accept a different setup. Stitch density should secure the seam without creating a perforated or puckered line. Presser-foot pressure should be high enough for control but low enough to avoid forcing one layer ahead of the other. Machine tension should be judged after the seam has been released and allowed to relax, because a line that looks flat on the machine bed can pucker afterward. For bulk production, the specification should record more than ‘single-needle side seam.’ It should identify the approved needle and thread family, stitch requirement, seam allowance, pressing method, and any special handling point that proved important in the sample.
Do Bias Seams Need Stabilization?
Some bias areas benefit from stabilization, but stabilizing every seam can make the garment less successful. Necklines, zipper openings, and selected waist sections often need dimensional control because they must maintain a defined length. A lightweight stay, narrow tape, controlled stitching, or suitable interfacing can help in those zones. A long free-hanging skirt seam is different. If the seam becomes rigid while the surrounding panel remains fluid, the fabric may form a ridge or create drag lines beside the stabilization. The correct question is what movement needs to be stopped. If the problem is temporary growth during sewing, better handling may be enough. If a zipper opening must remain fixed, permanent stabilization is more logical. If the whole dress twists because the grain layout is wrong, tape will only lock the symptom into the garment. Every added stabilizer also introduces weight, width, adhesive, placement, and pressing variables, so it should be retained only when the approved sample shows a clear benefit.
How Do You Approve Bias Balance for Production?
A bias-cut garment should be approved only after the completed sample has relaxed and has been checked for grain orientation, side-seam position, drape, fit, and hem level. Once accepted, the pattern version, grain direction, shell and lining materials, construction method, stabilization points, and relaxation procedure should be documented so the approved balance can be reproduced in first-piece checks and repeat production.
How Long Should a Bias Dress Hang?
Twenty-four hours is widely used as a practical starting point before final hemming a bias garment, but it should not be treated as a universal rule. A short lightweight dress may settle sooner, while a heavy satin maxi can continue changing longer because more fabric weight is acting through the diagonal grain. What matters most in development is consistency. If one sample is hemmed immediately and another is evaluated after hanging overnight, their hem measurements cannot be compared fairly. Suspend the garment in a way that reflects how the weight is carried, then check more than the hem. Side-seam position, zipper length, shell-to-lining relationship, local drape, and any visible rotation should be reviewed at the same time. If the sample continues changing significantly beyond the normal review period, that is valuable information rather than an inconvenience. It indicates that the material or construction may need a longer controlled relaxation step, another sample, or a different solution before bulk cutting begins.
How Do You Diagnose Twisting?
Twisting becomes much easier to solve when the investigation follows the order in which the garment is made. Start with the grain layout and confirm that each panel matches the approved direction, especially mirrored pieces. Next compare the cut panel with the paper pattern to see whether distortion entered during cutting. Then inspect the seam before and after pressing for unequal feeding, excessive tension, or stretching. Allow the garment to relax and check whether rotation increases with time. After that, fit the dress on the intended body; a garment that hangs well off the body but twists when worn points more strongly toward bust, waist, or hip distribution. Finally, inspect the lining, zipper, facing, and any stabilization. The practical sequence is grain, cutting, sewing, pressing, relaxation, fit, and support components. Change one major variable at a time whenever possible, because changing grain, pattern, seam method, and lining together may improve the sample without revealing which correction actually solved the problem.
Which QC Points Must Be Locked?
The approved sample should become a measurable production reference rather than simply an attractive garment in the sample room. Lock the pattern revision, grain direction for every major panel, cut-one or mirrored instructions, shell and lining specification, zipper and stabilization details, side-seam construction, pressing method, relaxation procedure, and the visual standard for seam position and hem balance. First-piece approval should include more than flat measurements because a bias dress can fall inside width tolerances and still hang poorly. Compare the first completed garment with the approved sample after the same relaxation condition, looking for rotation, rippling, shell-to-lining mismatch, and uneven hem drop. For a brand developing bias-cut satin, slip, or drape-sensitive dresses, this is also a useful test of a manufacturing partner: the team should be able to identify where imbalance begins, prove the correction in sampling, and carry the same controls into repeatable production rather than relying on one operator’s memory.
Conclusion
A well-balanced bias dress is the result of a chain of controlled decisions rather than one clever sewing trick. The pattern maker sets the geometry, the fabric determines how much diagonal movement is available, the cutter preserves the intended grain, the sewing team avoids adding unwanted stretch, and the fit team separates body balance from fabric distortion. Production then has to preserve the approved combination. When the sequence is managed carefully, side seams stay cleaner, hems require fewer late corrections, drape becomes more predictable, and a successful sample has a much better chance of surviving repeat production. For fashion brands developing satin slips, bias occasion dresses, or other drape-sensitive styles, involving a dress-focused development team early is often more efficient than trying to correct twisting after the material, pattern, and construction have already been locked.
Frequently Asked Questions
Why do bias-cut side seams twist?
Bias-cut side seams usually twist because the garment is receiving unequal diagonal forces from grain orientation, fabric behavior, fit distribution, or sewing distortion. The first check should be whether the panels were cut in the approved bias directions. If the cut pieces are correct, compare the seam before and after sewing, then after relaxation, and finally on the fit model. The stage where the rotation first appears usually gives the strongest clue to the underlying cause.
Should front and back panels be cut on opposite bias directions?
Not in every garment, but the front-to-back grain relationship should be intentional. Opposing or alternating bias directions can help reduce a dominant rotational pull when the two diagonals of a fabric behave differently. The best arrangement depends on seam placement, fabric structure, garment length, and design. A development sample should confirm the layout before bulk cutting, and the approved orientation should be recorded on the production pattern rather than left to operator memory.
How long should a bias-cut dress hang before hemming?
A 24-hour hang is a common practical starting point for bias garments, but it is not a universal standard for every fabric and silhouette. Lightweight short styles may settle sooner, while long or heavier dresses can continue changing for longer. Use the same hanging method and review period across development samples, then measure the hem and inspect side-seam position, shell-to-lining balance, and visible rotation before making final corrections.
Why does a bias-cut satin dress develop wavy side seams?
Wavy side seams often come from stretching during handling, unequal feeding between layers, excessive machine tension, aggressive pressing, or a mismatch between a fluid shell and a more stable component. Satin makes the problem especially visible because its smooth surface reflects light along every ripple. Before changing the pattern, compare seam length before sewing, after sewing, and after pressing. If the seam grows during construction, the process should be corrected first.
Can a lining cause a bias dress to hang unevenly?
Yes. A bias shell can continue settling while a lining, zipper tape, or interfaced area remains comparatively stable. If the layers are joined without allowing for different behavior, the lining may pull the shell upward or create local blousing and uneven hem drop. The shell and lining should be tested together during sampling, and any material substitution should trigger another balance check because two fabrics that look similar can have very different diagonal growth.
How do you check whether a bias pattern is balanced?
Start by walking the paper side seams and confirming notches and intended ease. Then verify grain orientation and measure the cut edges before sewing. Inspect the seam again after assembly and after the garment has relaxed. Finally, check the dress on the fit model for forward or backward seam movement at the bust, waist, and hips. A balanced pattern is one that remains visually stable through all of these stages, not merely one with matching paper lengths.